English
vCenter Server 8.0 Complete Installation and Deployment Guide | Building a vSphere Management Platform from Scratch

Preface
vCenter Server is the core management component of the VMware vSphere virtualization environment, providing centralized host and virtual machine management, resource scheduling, high availability, and other functions. This article will use an illustrated format to describe in detail the complete installation and deployment process of vCenter Server 8.0.
Installation environment description:
Target ESXi host IP:
192.168.0.201vCenter Server IP after deployment:
192.168.0.202Deployment scale: Micro (2 vCPU / 14GB memory / 579GB storage)
Applicable scenarios: small lab environments or lightweight production environments (up to 10 hosts / 100 virtual machines)
Pre-installation preparation
Before starting the installation, please ensure the following conditions are met:
A deployed and normally operating ESXi host(8.0 or later)
ESXi host's root account and password
planned Static IP address, subnet mask, gateway, and DNS
stable Network connection(used for downloading deployment images and NTP time synchronization)
Used to run the installer Windows or macOS client (this article uses macOS)
Download vCenter Server 8.0 installation image and verification files
Download the vCenter Server 8.0 installation image
vCenter Server 8.0 is provided as an ISO image and includes installers for Windows and Linux/macOS. After downloading, it is recommended to verify file integrity first.
| file | Download link |
|---|---|
| Installation image (ISO) | |
| SHA256 checksum |
Verify file integrity (optional but recommended)
macOS / Linux:
bash
shasum -c /path/to/VMware-VCSA-all-8.0.3-24322831.iso.sha256Windows (PowerShell):
powershell
Get-FileHash -Path "C:\path\to\VMware-VCSA-all-8.0.3-24322831.iso" -Algorithm SHA256💡 After downloading, mount the ISO image, and you can then use it in vcsa-ui-installer/ Find the installer for the corresponding operating system in the directory:
Windows:
vcsa-ui-installer/win32/installer.exemacOS:
vcsa-ui-installer/mac/installer.appLinux:
vcsa-ui-installer/lin64/installer.bin
Overall Installation Process Overview
The installation of vCenter Server 8.0 is divided into two stages:
| stage | content | Explanation |
|---|---|---|
| Phase One | Deploy vCenter Server | Deploy the vCenter Server virtual machine to the target ESXi host |
| Phase 2 | Set up vCenter Server | Complete the initial configuration of vCenter Server (SSO, NTP, CEIP, etc.) |
Phase 1: Deploy vCenter Server
Step 1: Start the installer
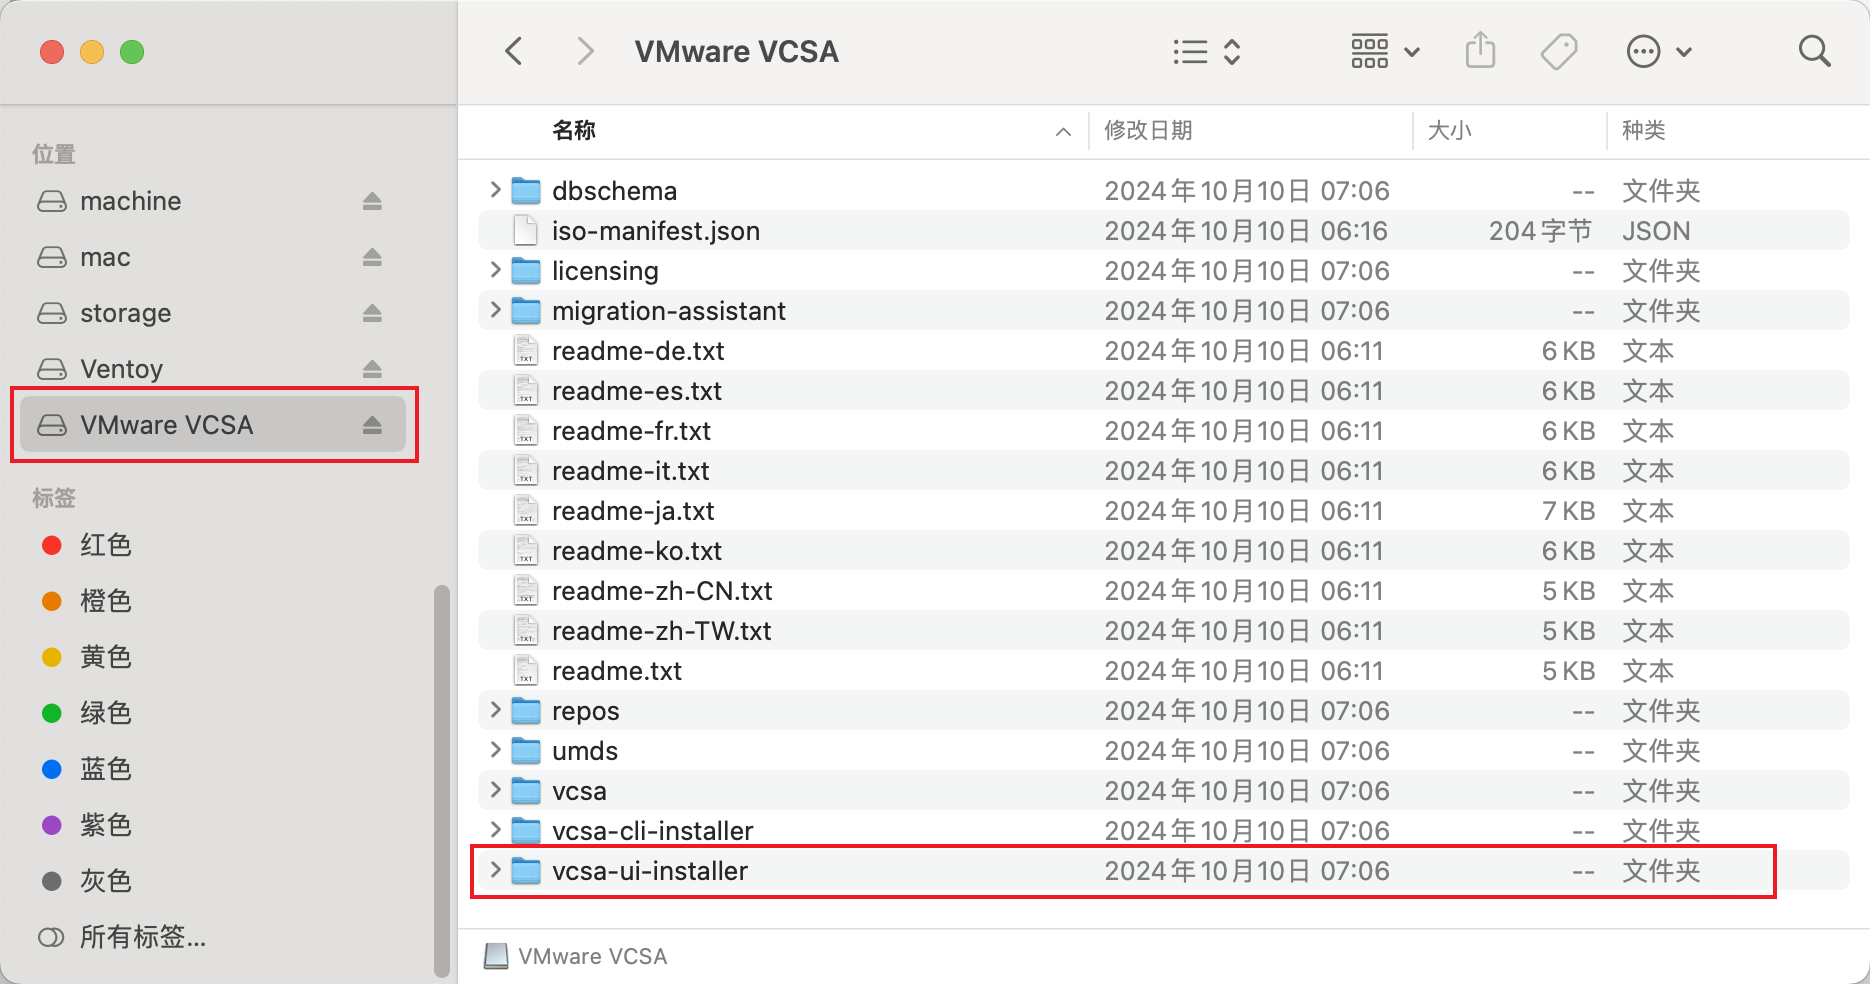
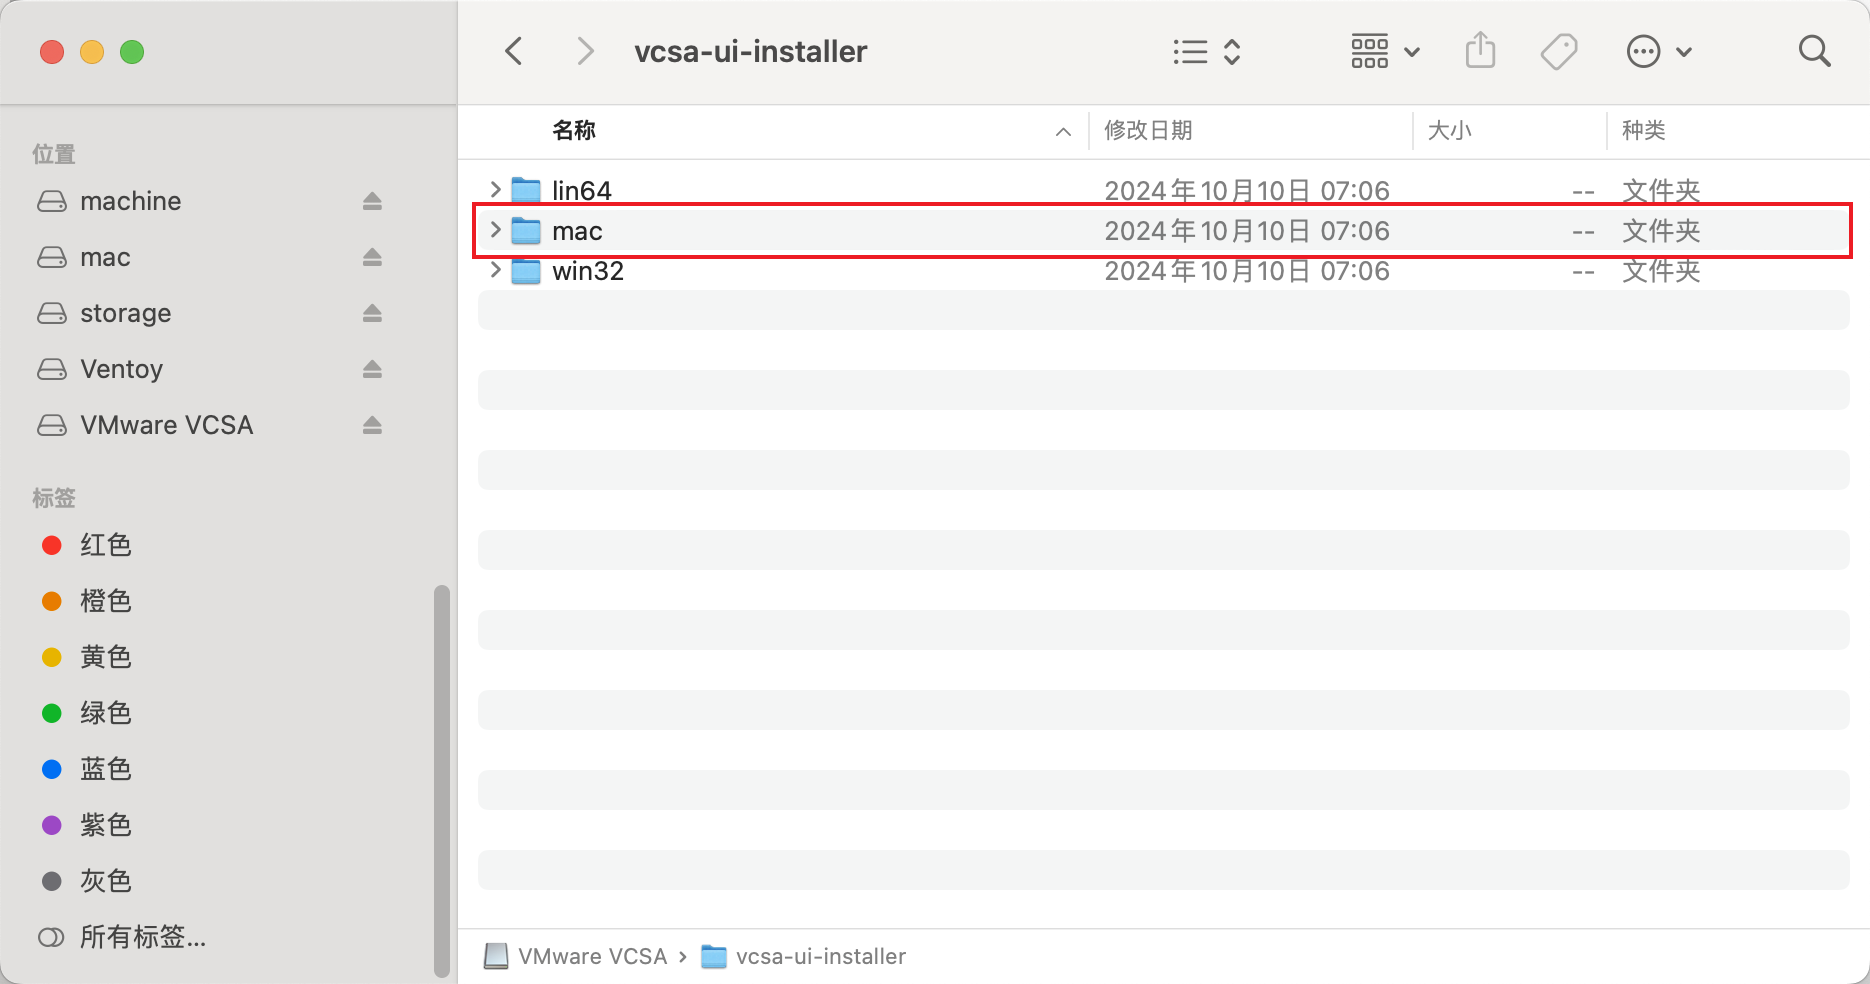
In the macOS environment, directly double-click to mount the ISO image. At this point, it will appear on the left side of Finder like a macOS installer, with the specific name VMware VCSA. Click vcsa-ui-installer -> mac in sequence.
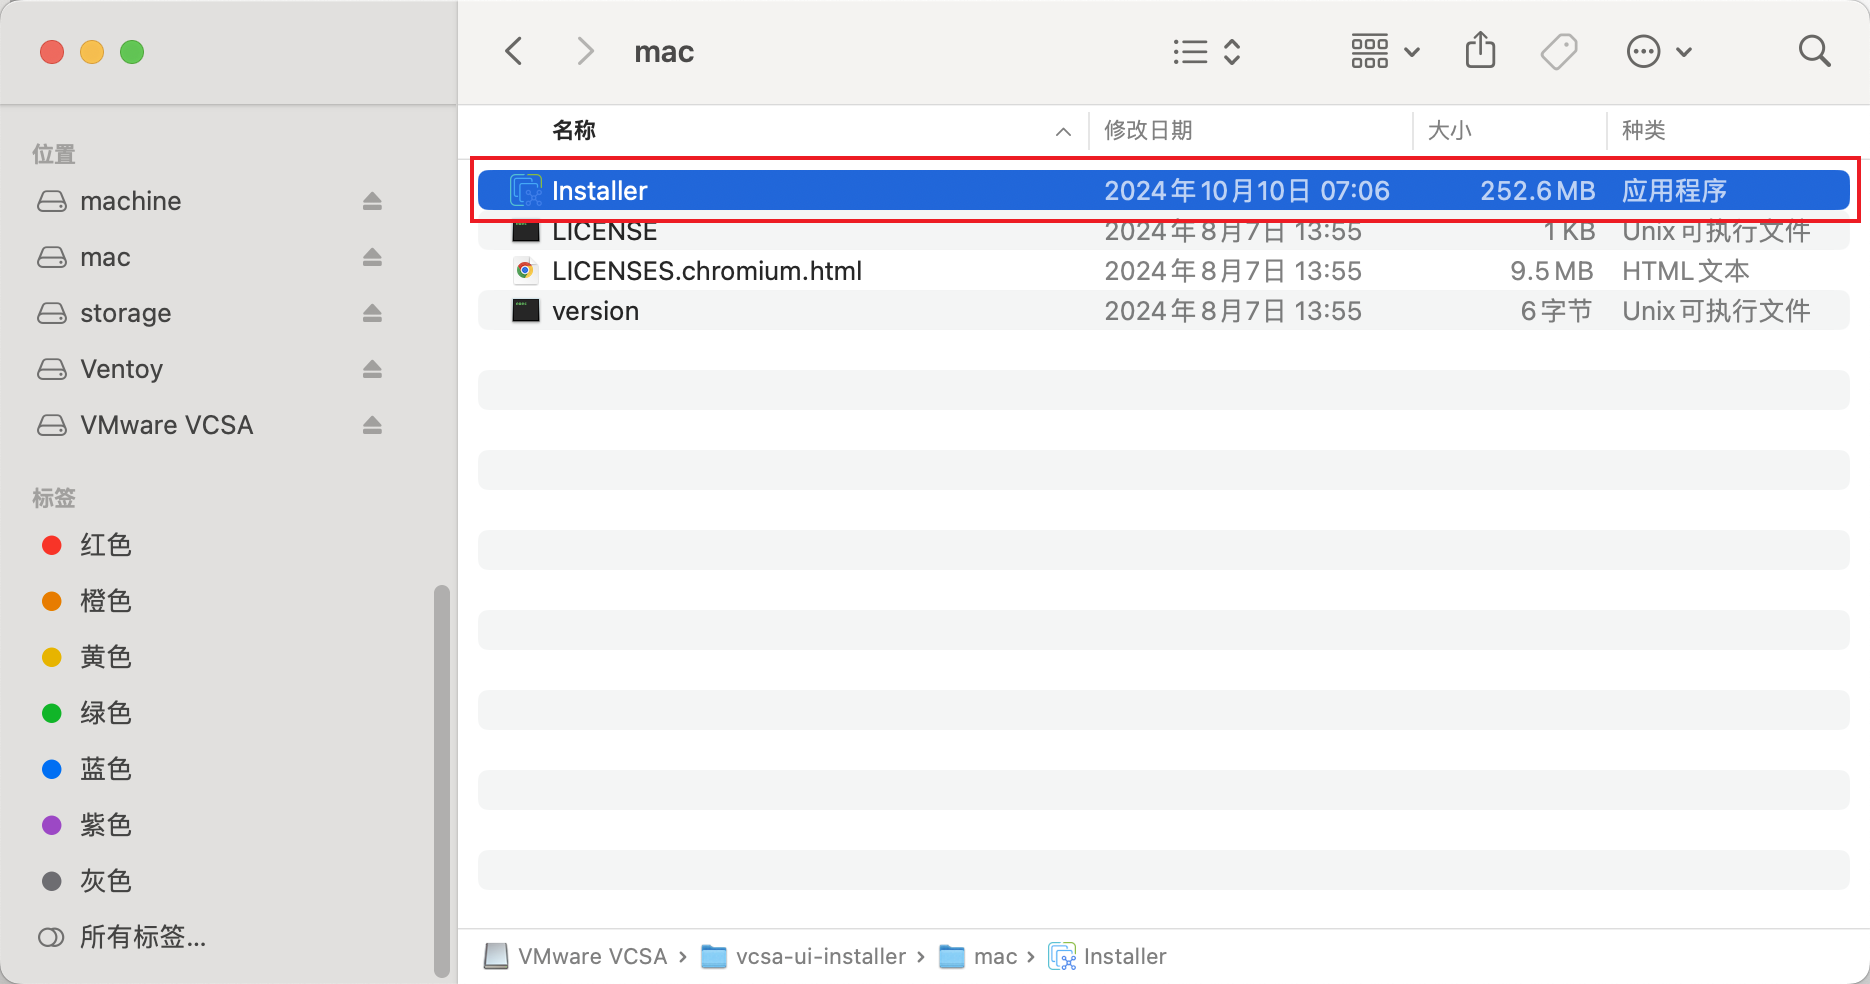
Double-click to run installer.app Installer, enter the startup screen:
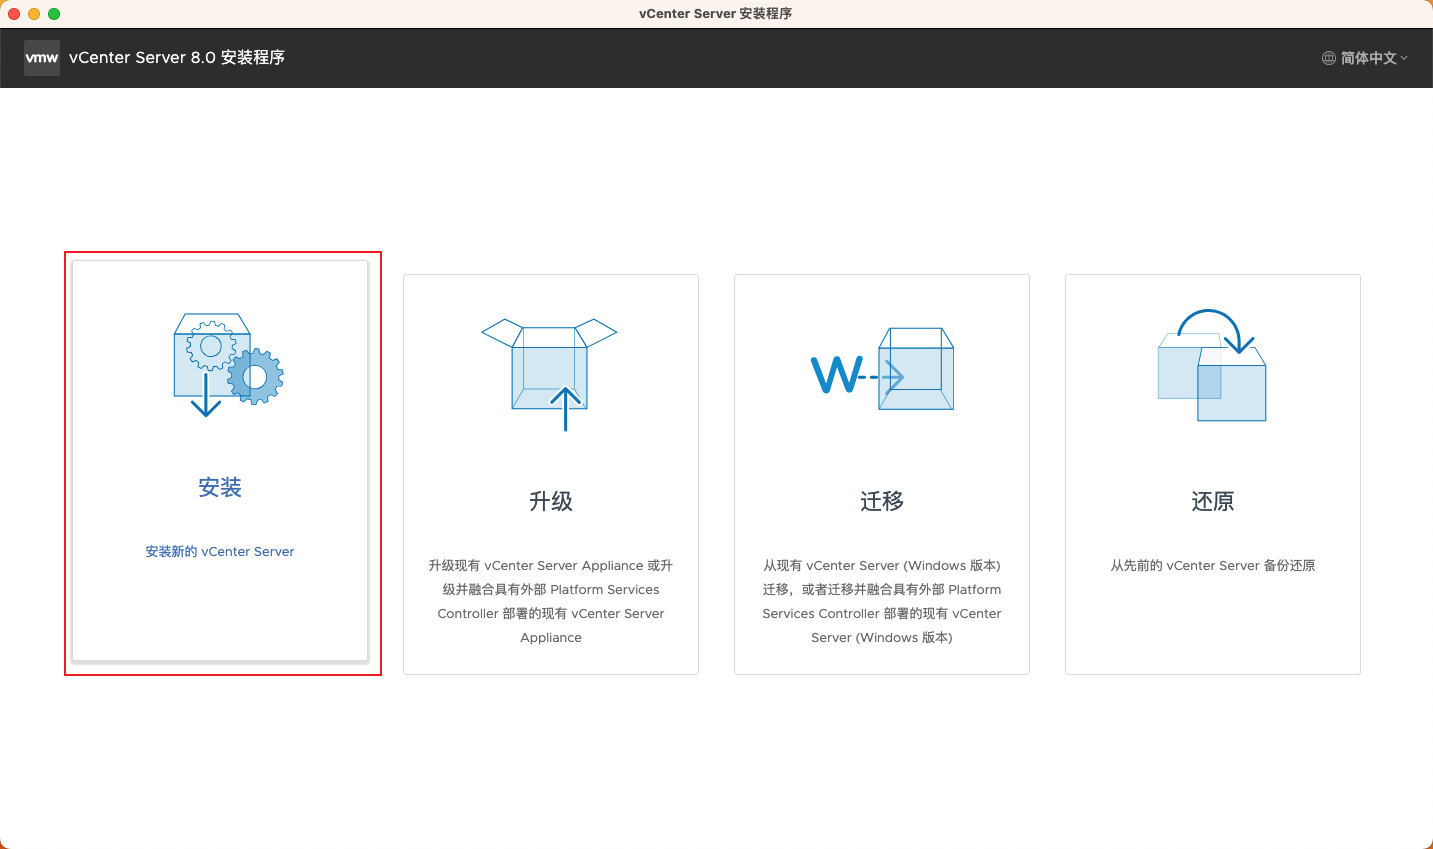
Choose Installation, then click Next step.
Step 2: Introduction and License Agreement
Installation Introduction
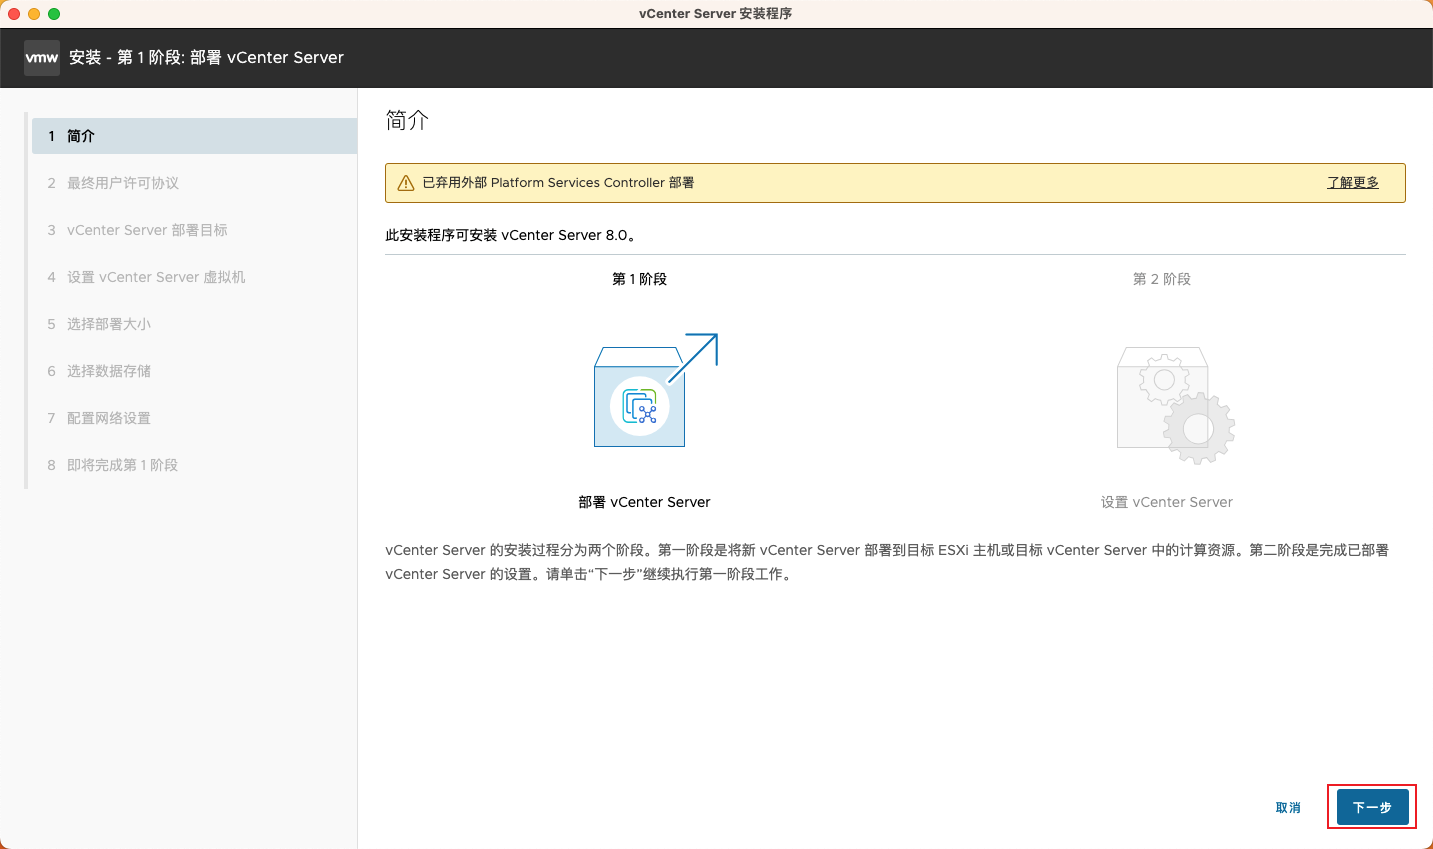
The installer will prompt that the installation process is divided into two stages, click Next step Continue.
End User License Agreement
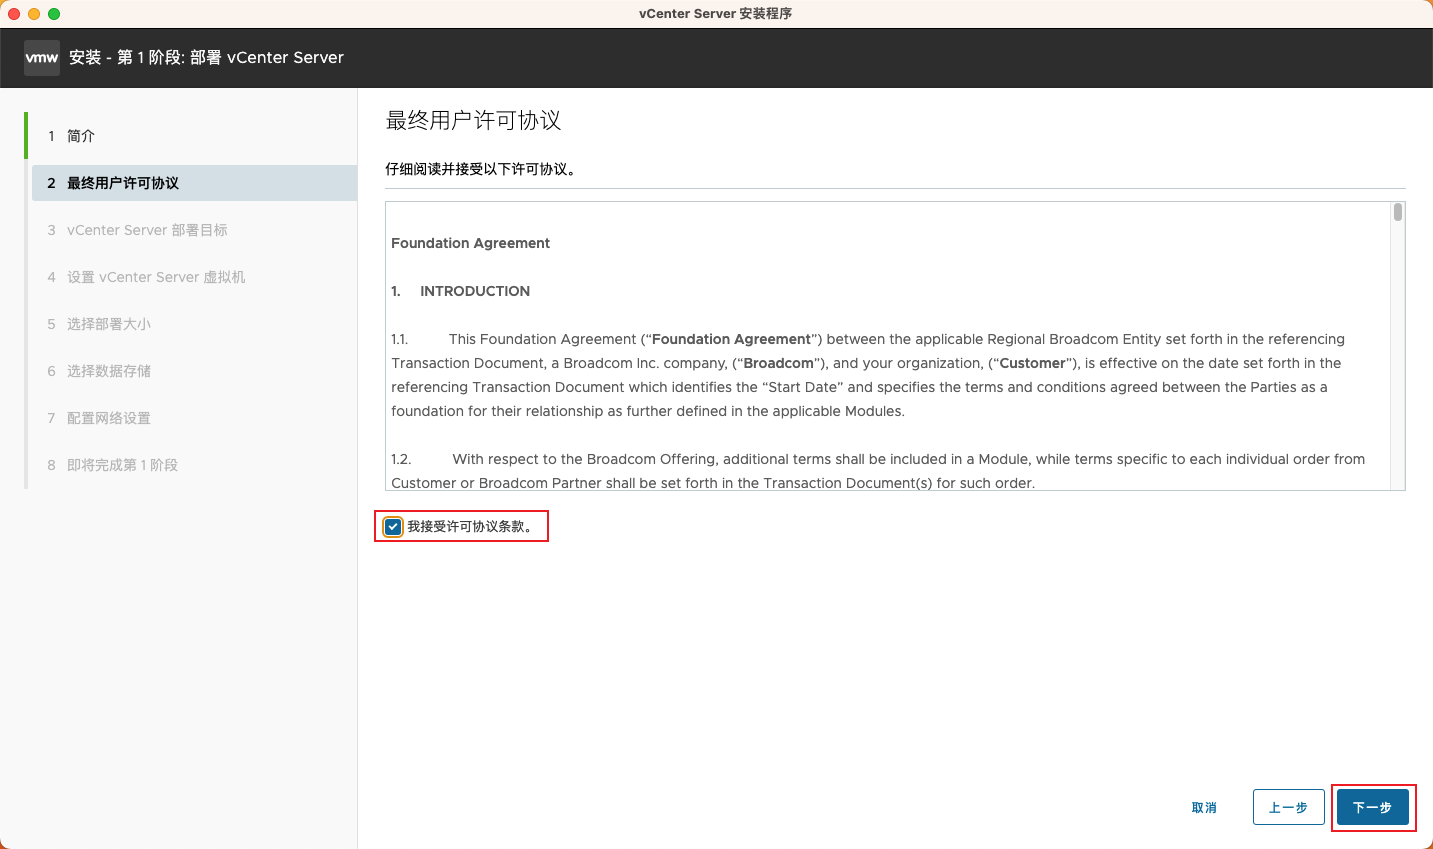
Read the license agreement carefully and check I accept the terms of the license agreement., click Next step.
Step 3: Configure deployment targets
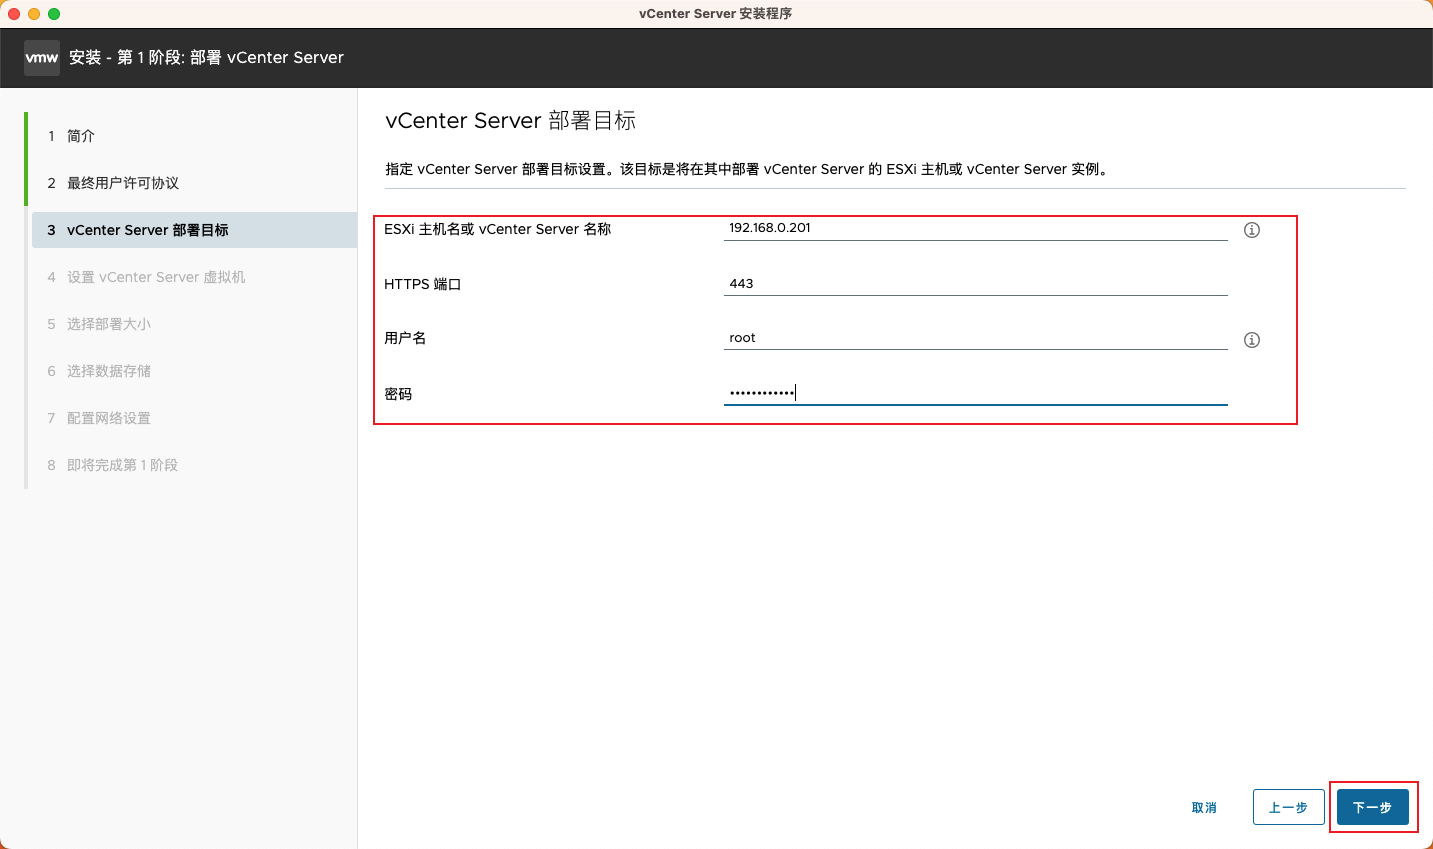
In this step, specify the connection information for the target ESXi host:
| Configuration item | Content to fill in |
|---|---|
| ESXi hostname or vCenter Server name | 192.168.0.201 |
| HTTPS port | 443(Default) |
| username | root |
| Password | Enter the root password for the ESXi host |
After completing input, click Next step.
Step 4: Confirm the certificate warning
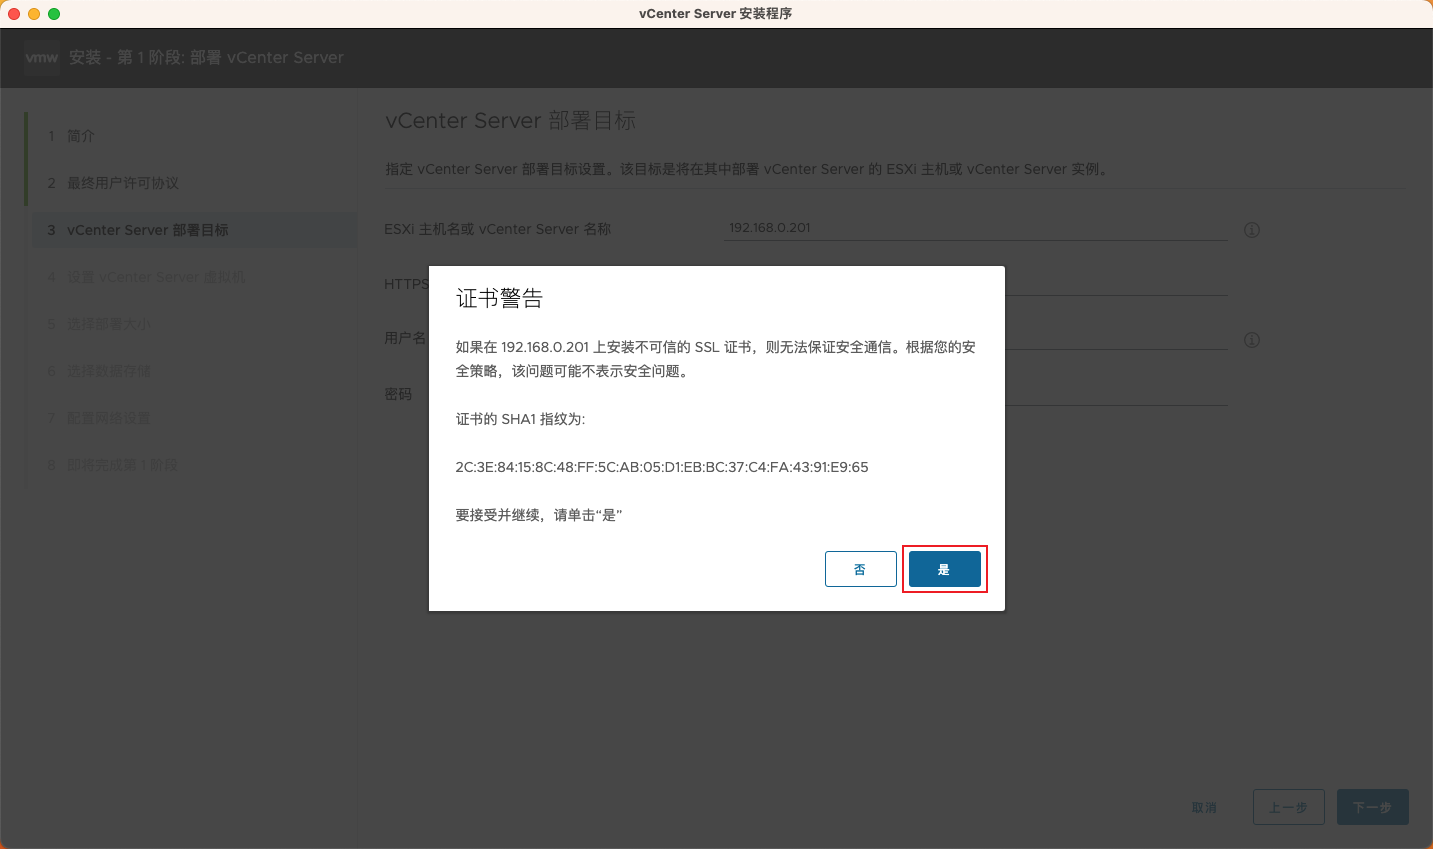
If the target ESXi host uses a self-signed certificate, the system will display a certificate warning prompt. After confirming that the certificate fingerprint is correct, click Yes Continue.
Step 5: Set the virtual machine name and root password
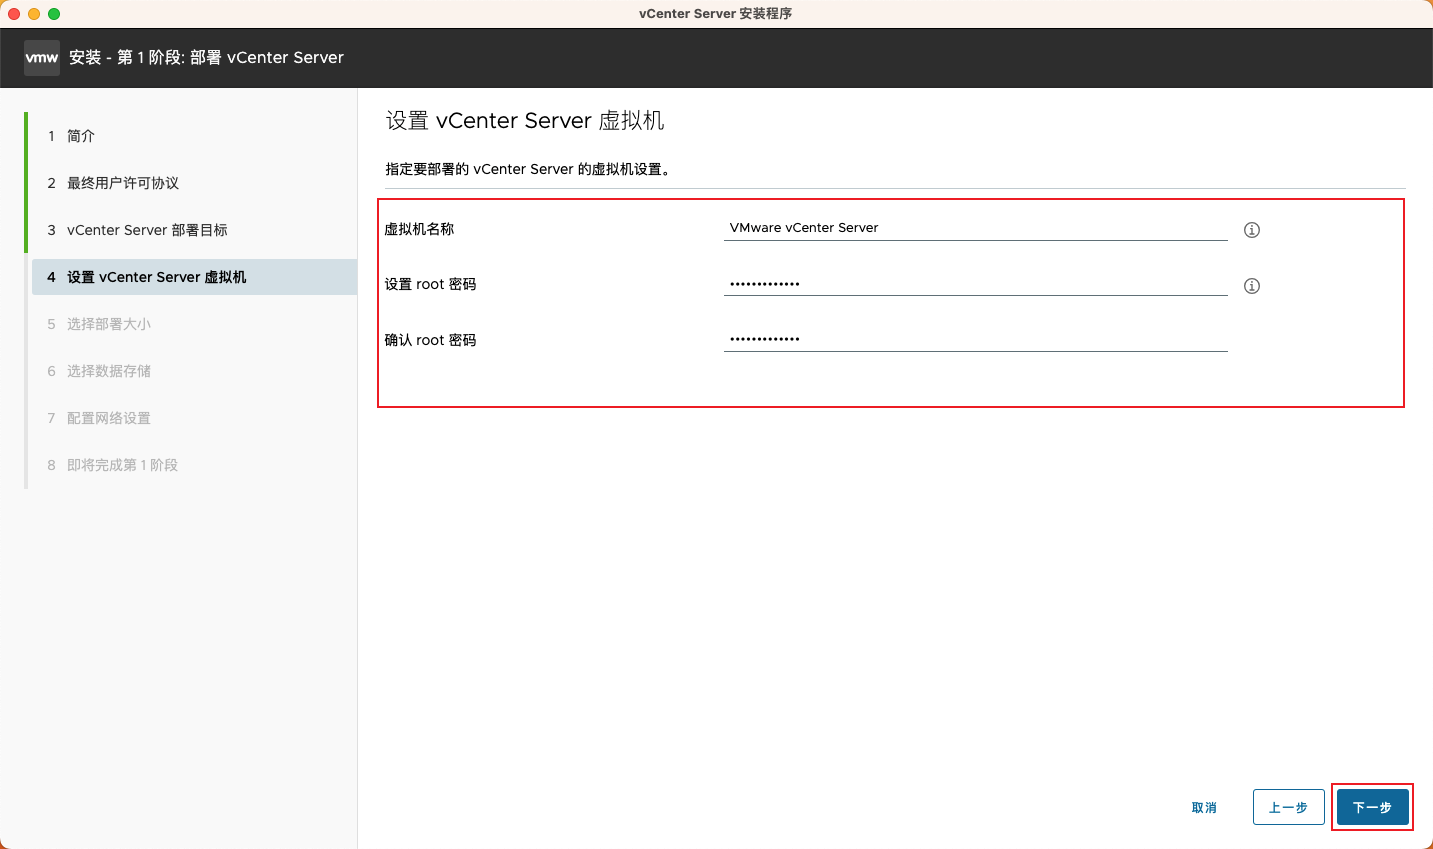
Configure the vCenter Server virtual machine to be deployed:
| Configuration item | Fill in content |
|---|---|
| Virtual machine name | VMware vCenter Server(Customizable) |
| Set root password | Set the root password for vCenter Server (not the ESXi password) |
| Confirm root password | Enter again to confirm |
⚠️Attention: The root password here is the root password for the vCenter Server virtual machine (Photon OS), which is different from the ESXi root password. Please keep it safe.
Step 6: Select deployment size
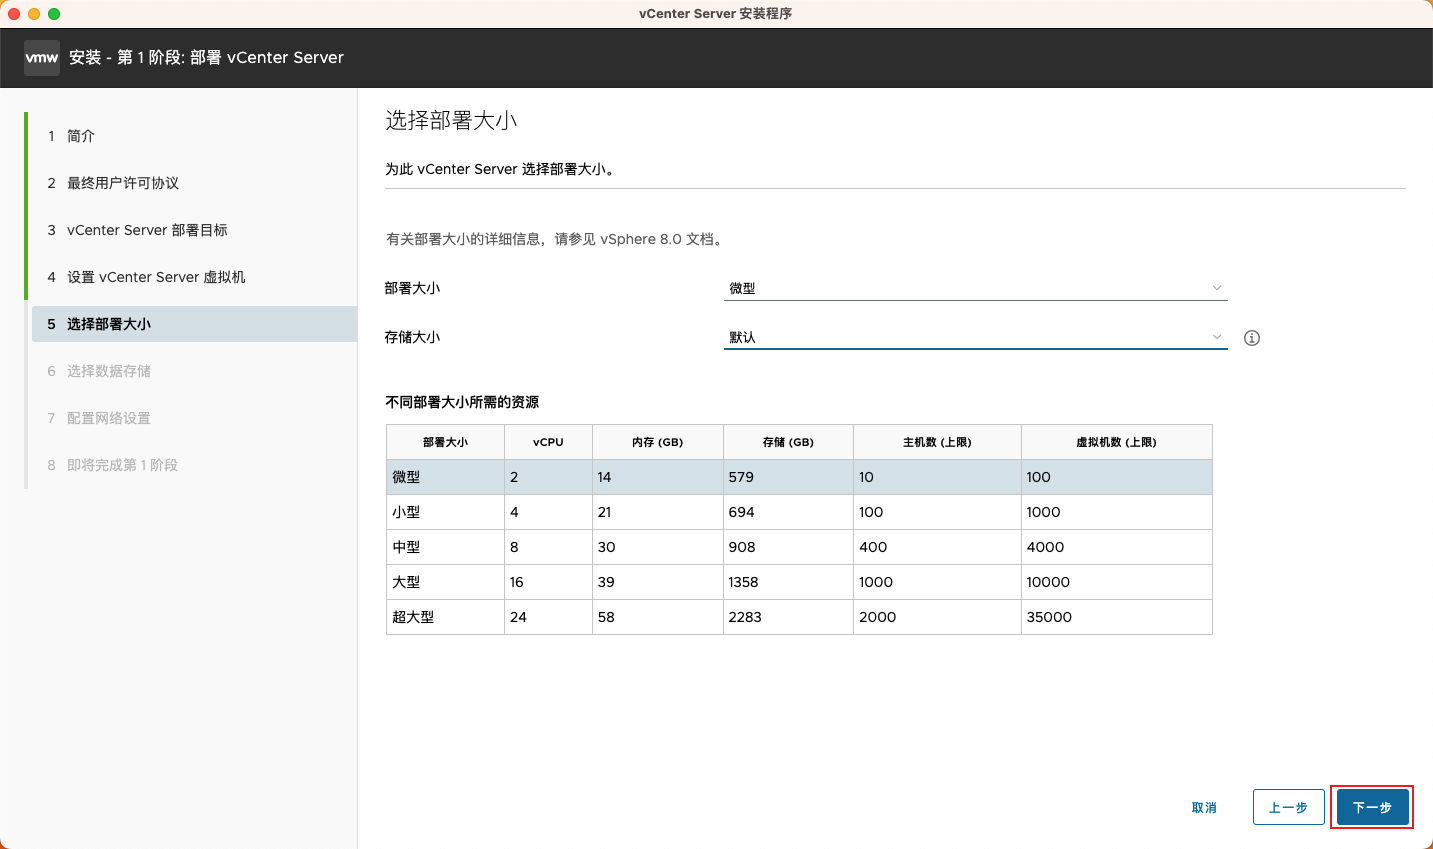
Choose the appropriate deployment scale based on actual needs:
| Deployment size | vCPU | Memory (GB) | Storage (GB) | Host limit | Virtual machine limit |
|---|---|---|---|---|---|
| micro(This selection) | 2 | 14 | 579 | 10 | 100 |
| Small | 4 | 21 | 694 | 100 | 1,000 |
| medium-sized | 8 | 30 | 908 | 400 | 4,000 |
| Large | 16 | 39 | 1,358 | 1,000 | 10,000 |
| Ultra-large | 24 | 58 | 2,283 | 2,000 | 35,000 |
This selection Miniature+default Storage size.
Step 7: Choose Data Storage
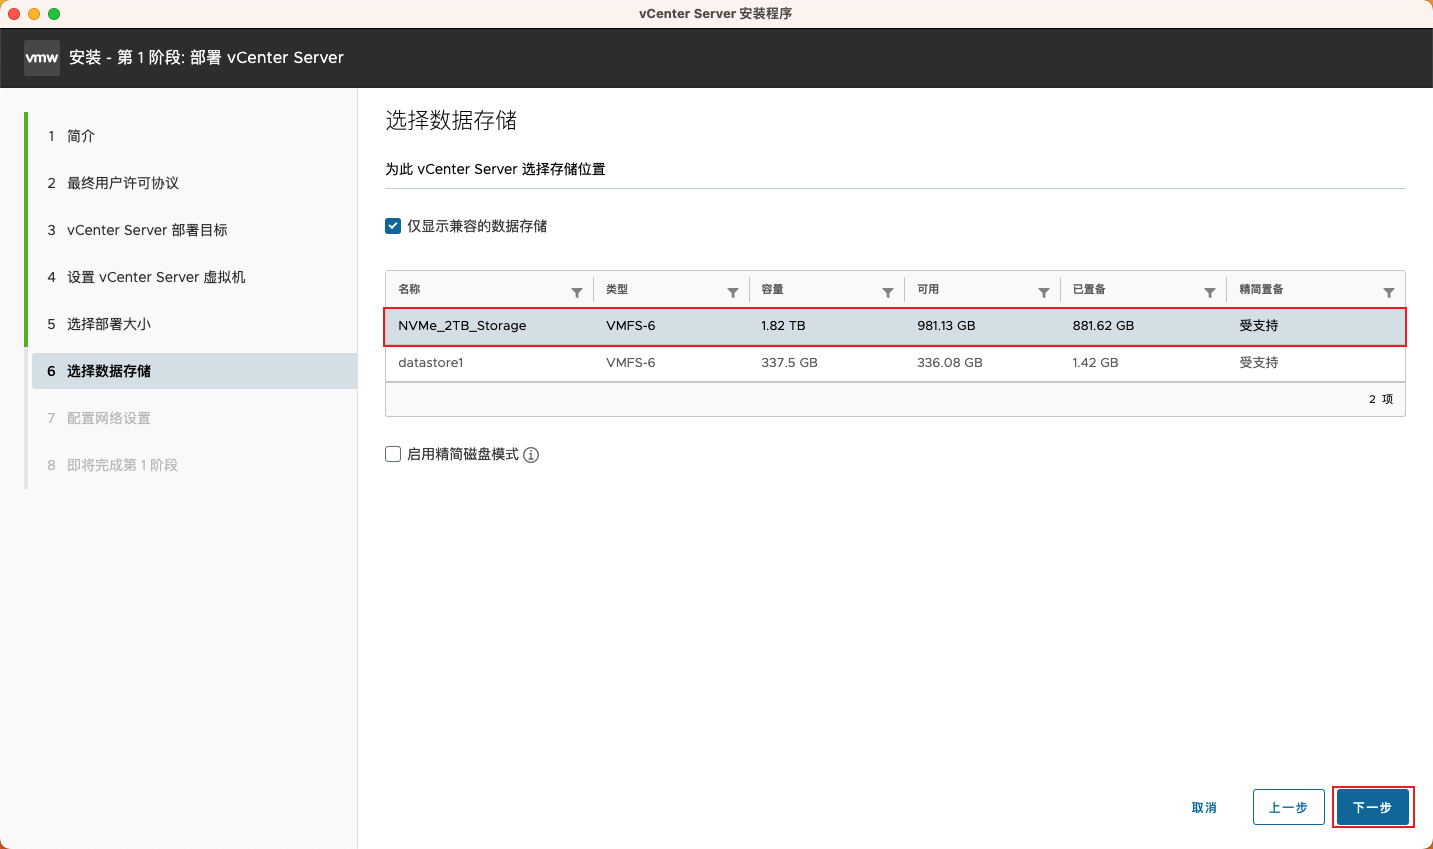
Select the storage location for the vCenter Server virtual machine:
This selection:
NVMe_2TB_Storage(VMFS-6, available space 981.13 GB)Recommended to check Enable thin disk mode to save storage space
Step 8: Configure network settings
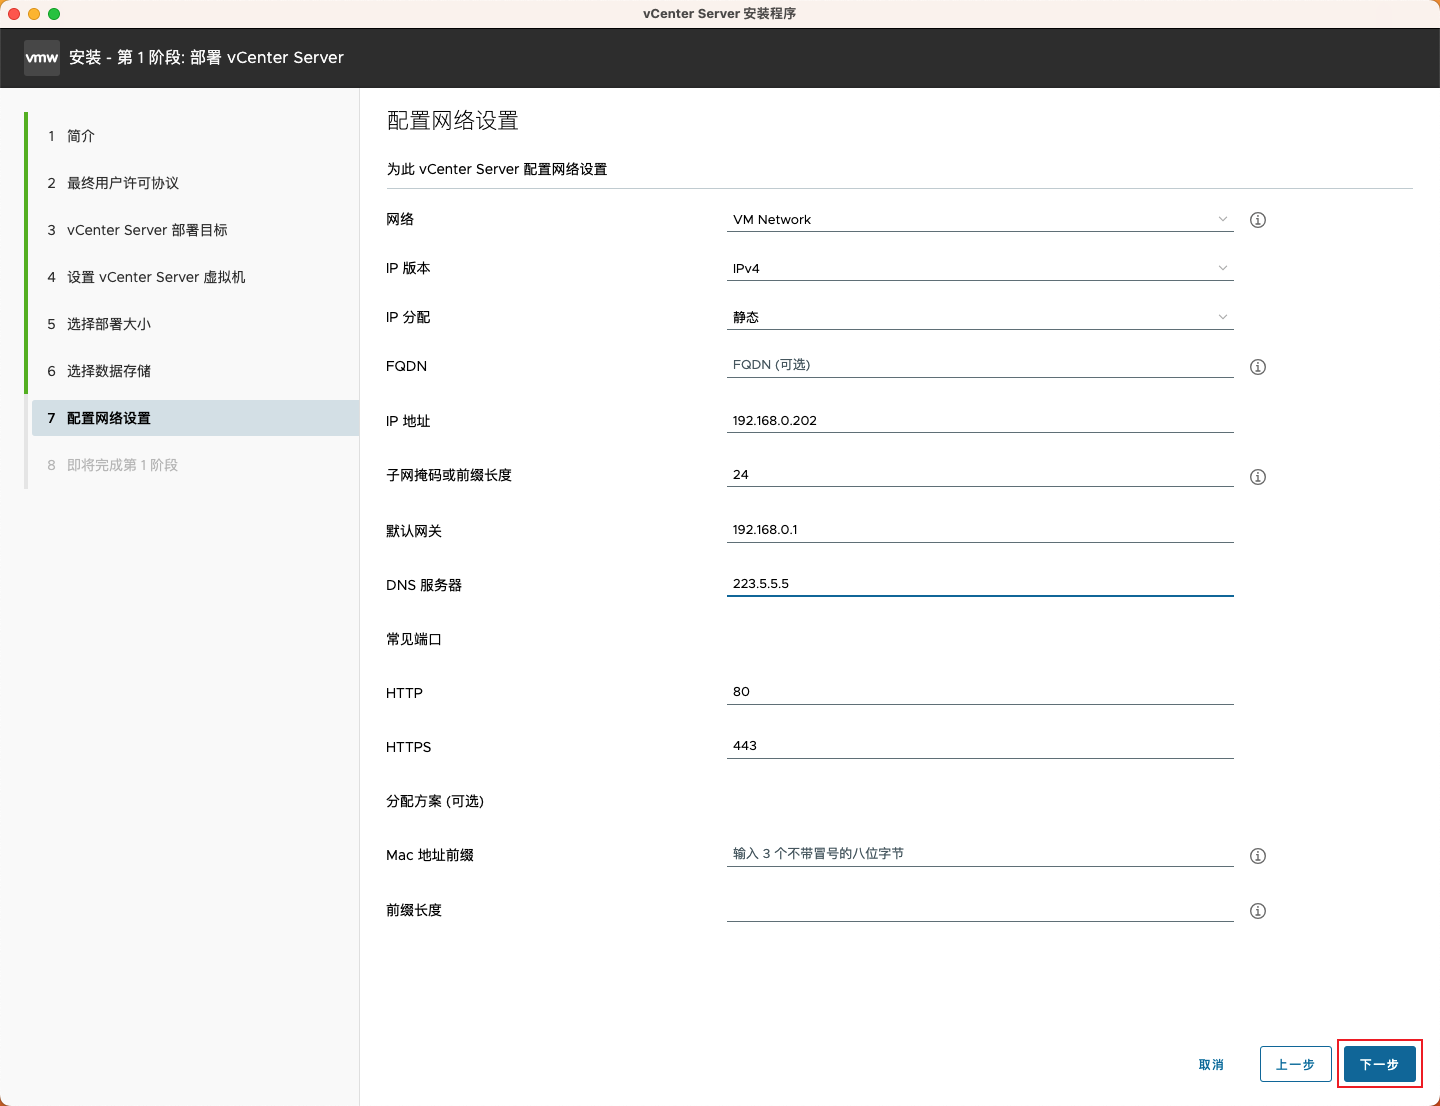
Configure the network parameters for vCenter Server:
| Configuration item | Fill in the content |
|---|---|
| Network | VM Network |
| IP version | ipv4 |
| IP allocation | static |
| IP address | 192.168.0.202 |
| Subnet mask or prefix length | 24 |
| default gateway | 192.168.0.1 |
| DNS server | 223.5.5.5(Alibaba Public DNS) |
| HTTP port | 80 |
| HTTPS port | 443 |
💡 It is recommended to enter a reliable public DNS for the DNS server (such as 223.5.5.5,114.114.114.114 or 8.8.8.8).
Step 9: Start deployment
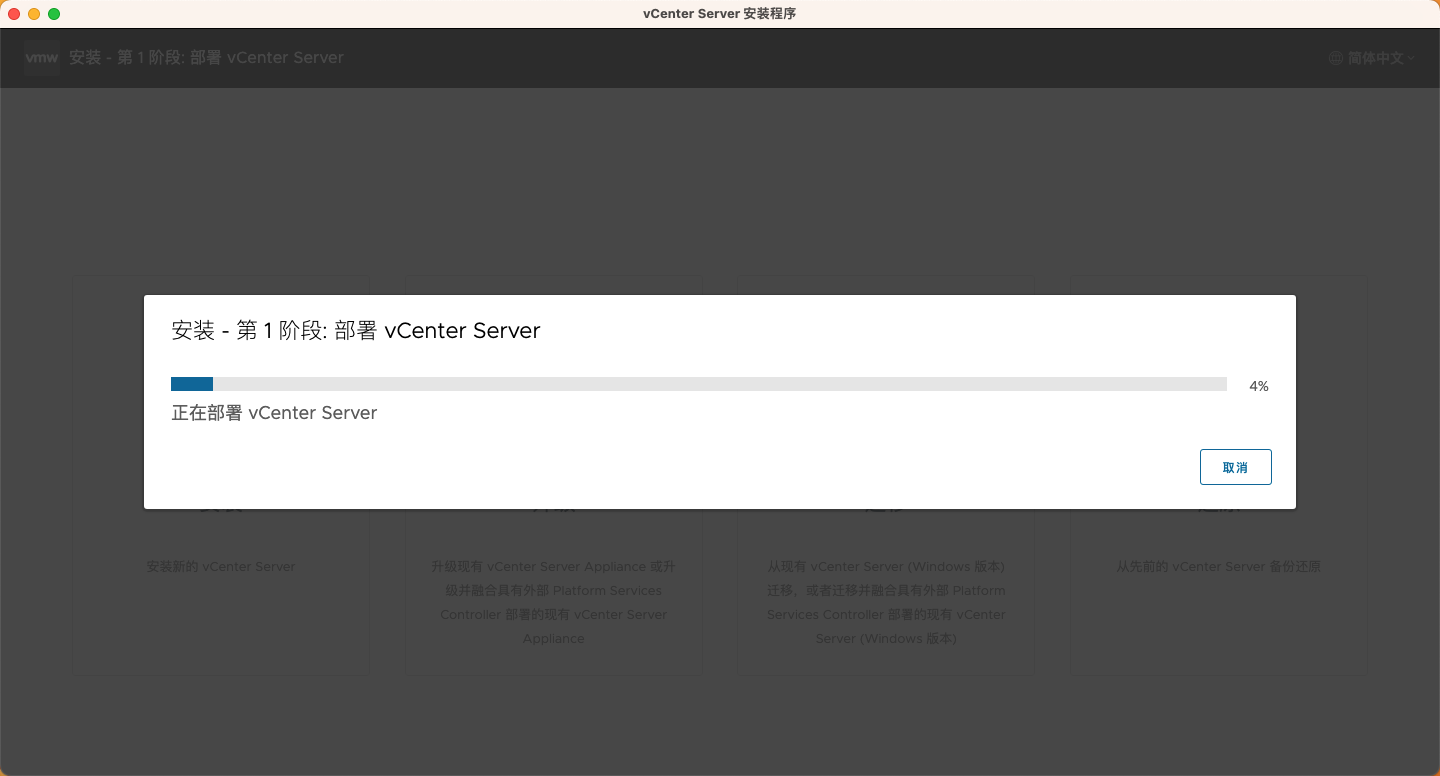
After confirming that all configurations are correct, the installer begins deploying the vCenter Server virtual machine to the ESXi host. The deployment process takes about 10~20 minutes, depending on network and storage speed.
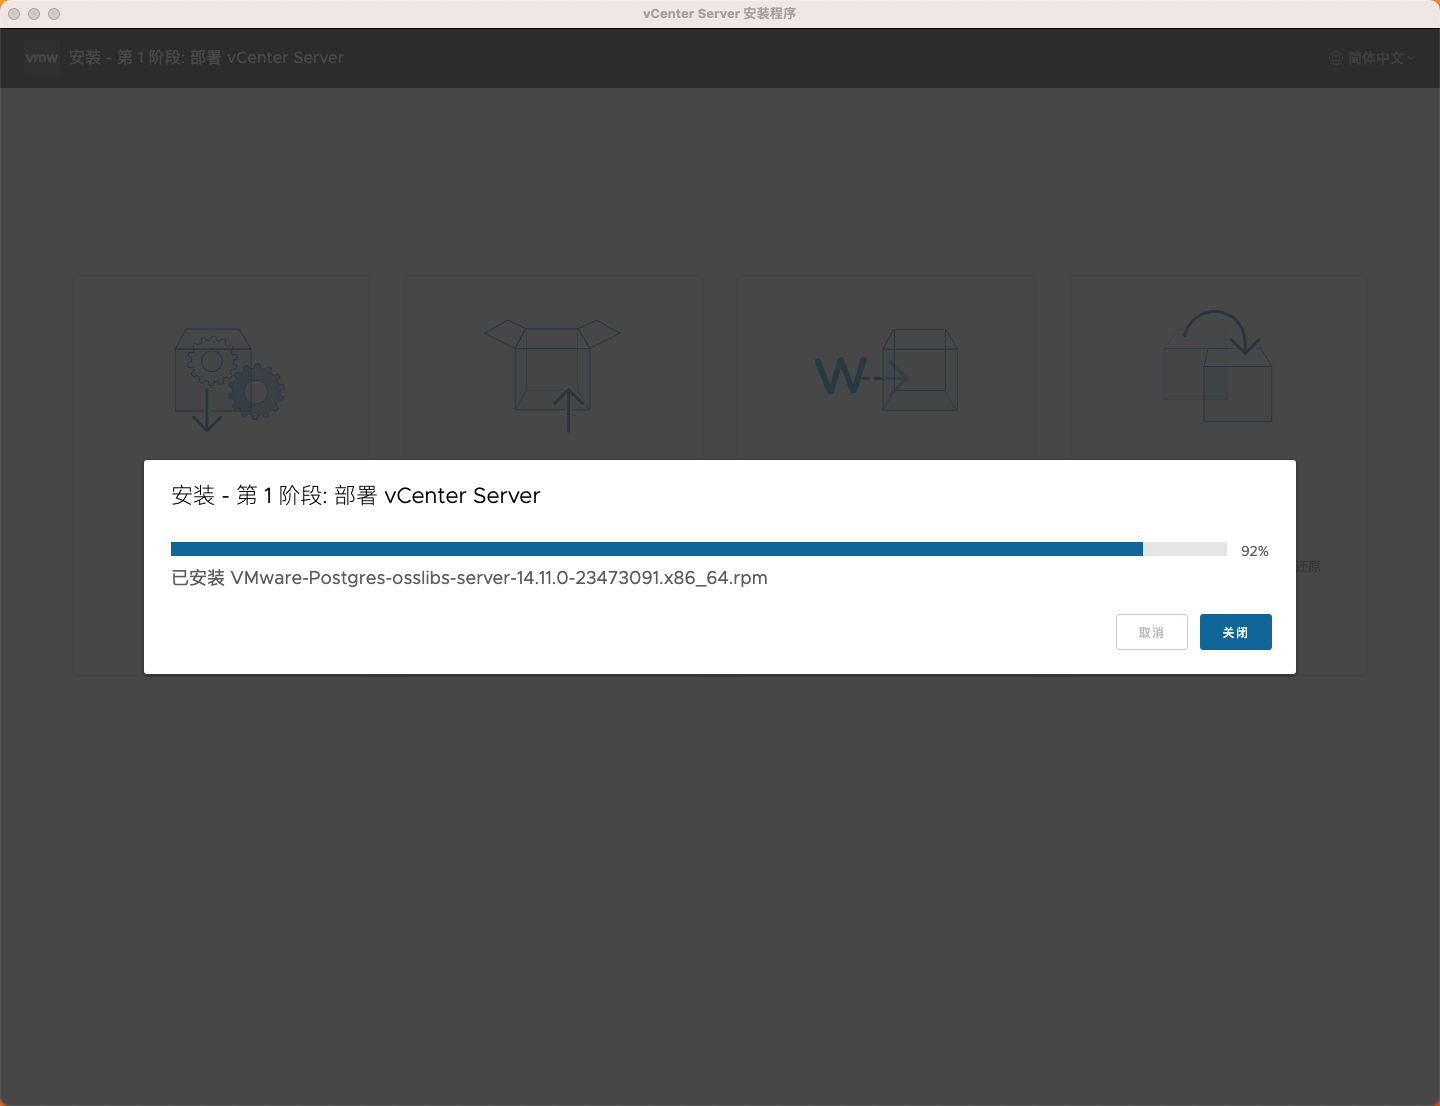
Step 10: Phase 1 complete
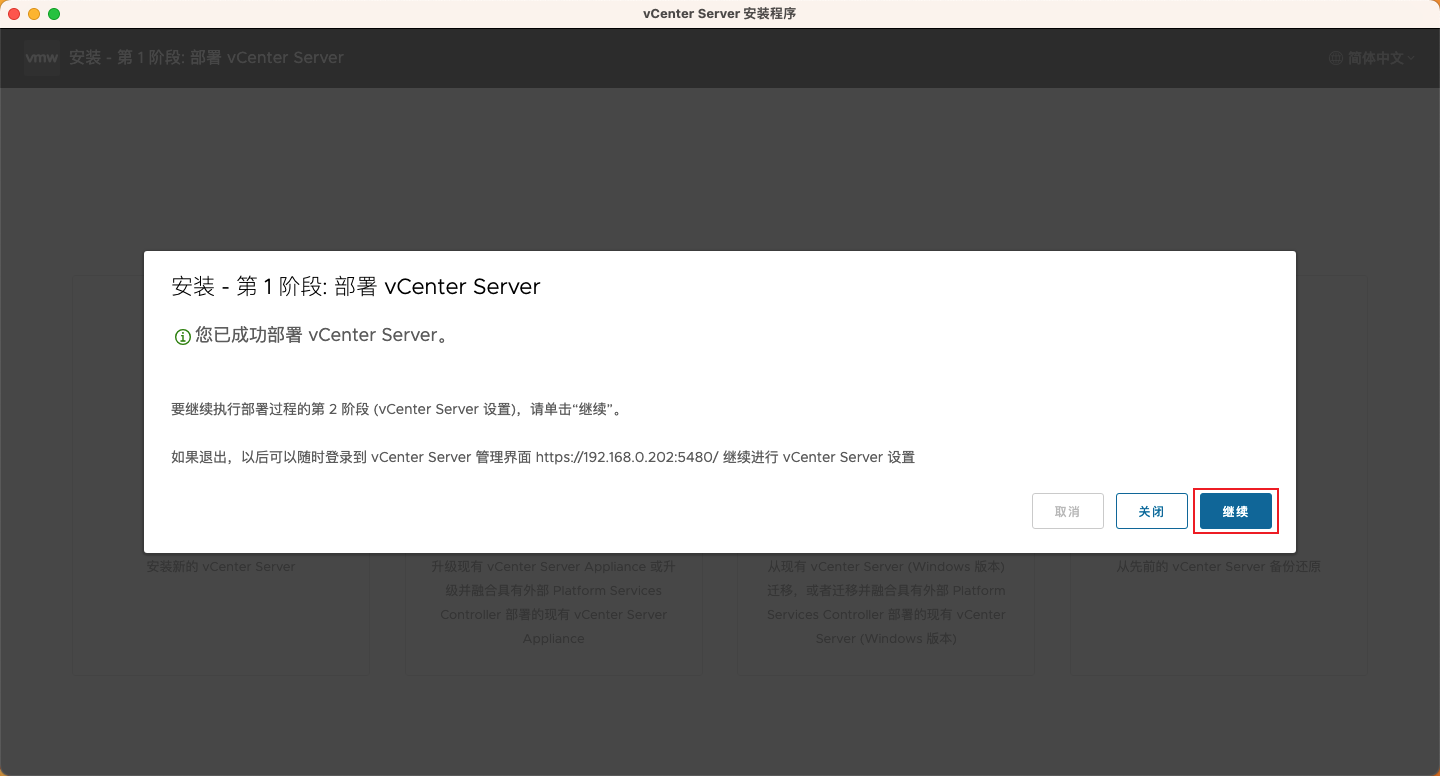
After successful deployment, the system will prompt:
✅You have successfully deployed vCenter Server. vCenter Server management interface address:https://192.168.0.202:5480/
Click Continue Enter the second phase settings.
💡 Note (avoid pitfalls)
Actually, vCenter Server can also be deployed by creating a virtual machine from an OVA in ESXi, but during the process of creating the virtual machine, it is necessary to Additional settings specified in System Configuration management end root Password—if it’s specified, so be it; the key is to pass.https://192.168.0.202:5480 After completing the second stage of vCenter installation, access https://192.168.0.202:5480 Input root The password prompt says the password has expired; if it’s expired, so be it—go to the ESXi browser console and do a cloud reset.root That'll do!
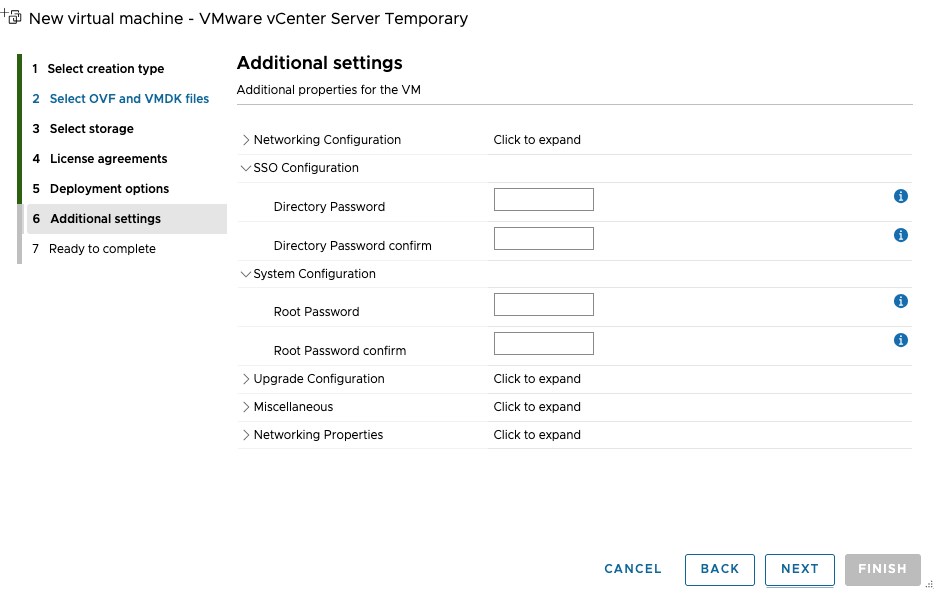
Damn it, when I got to the ESXi browser console, I could enter the management menu with an expired password. When I tried to reset the password, it said password reset failed! Even when the password was set strictly according to the password security requirements, it still couldn't be reset! So, even though vCenter installation is complete, but this https://192.168.0.202:5480 The password on the administrator side cannot be reset, which makes it impossible to access the management page again, so the whole thing is also unavailable! Therefore, after trying back and forth, the blogger ultimately installed and deployed vCenter through the terminal, so the above-mentioned problem does not exist!
Phase 2: Set up vCenter Server
Step 11: Enter Phase 2
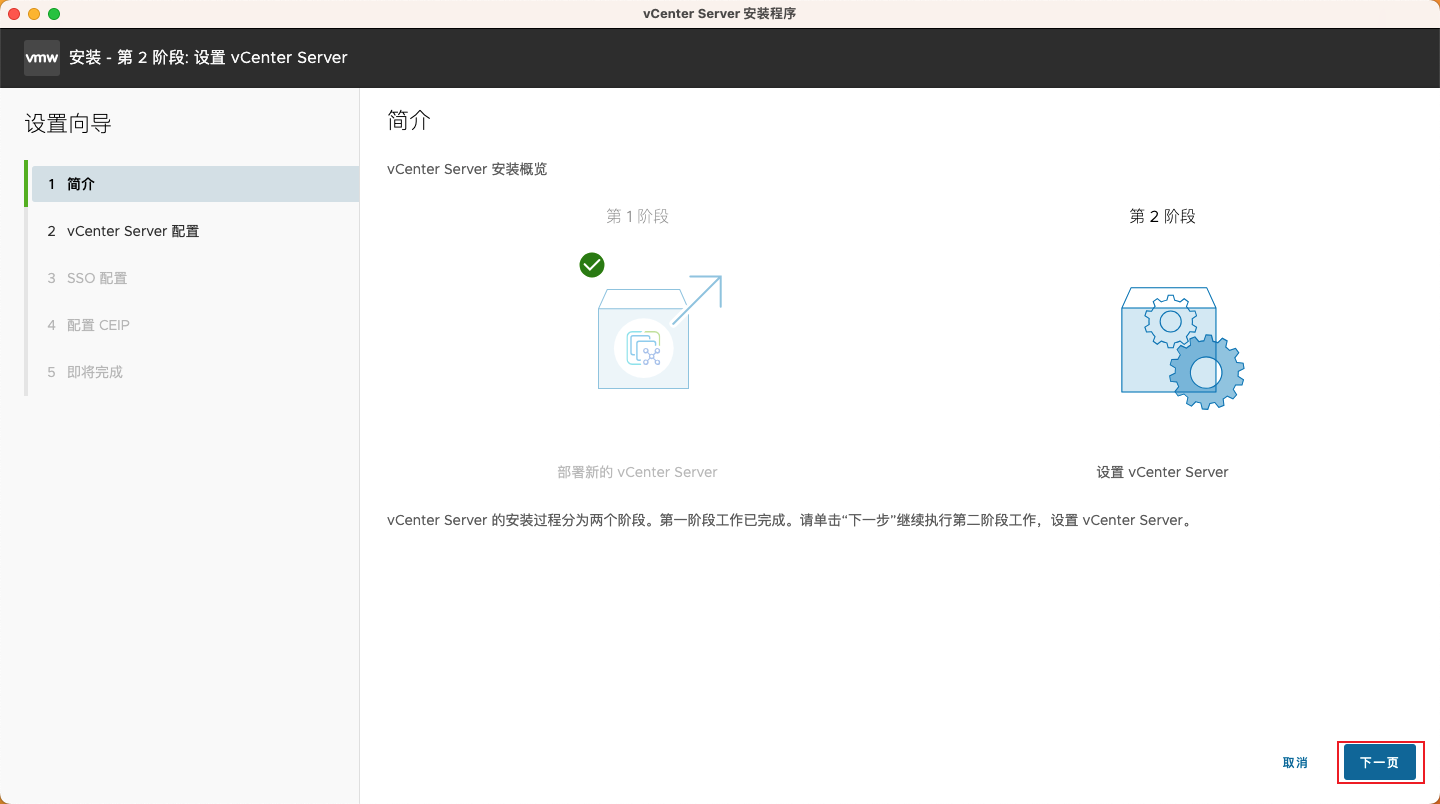
The second-stage wizard will start automatically, click Next page Start configuration.
Step 12: Configure vCenter Server time synchronization
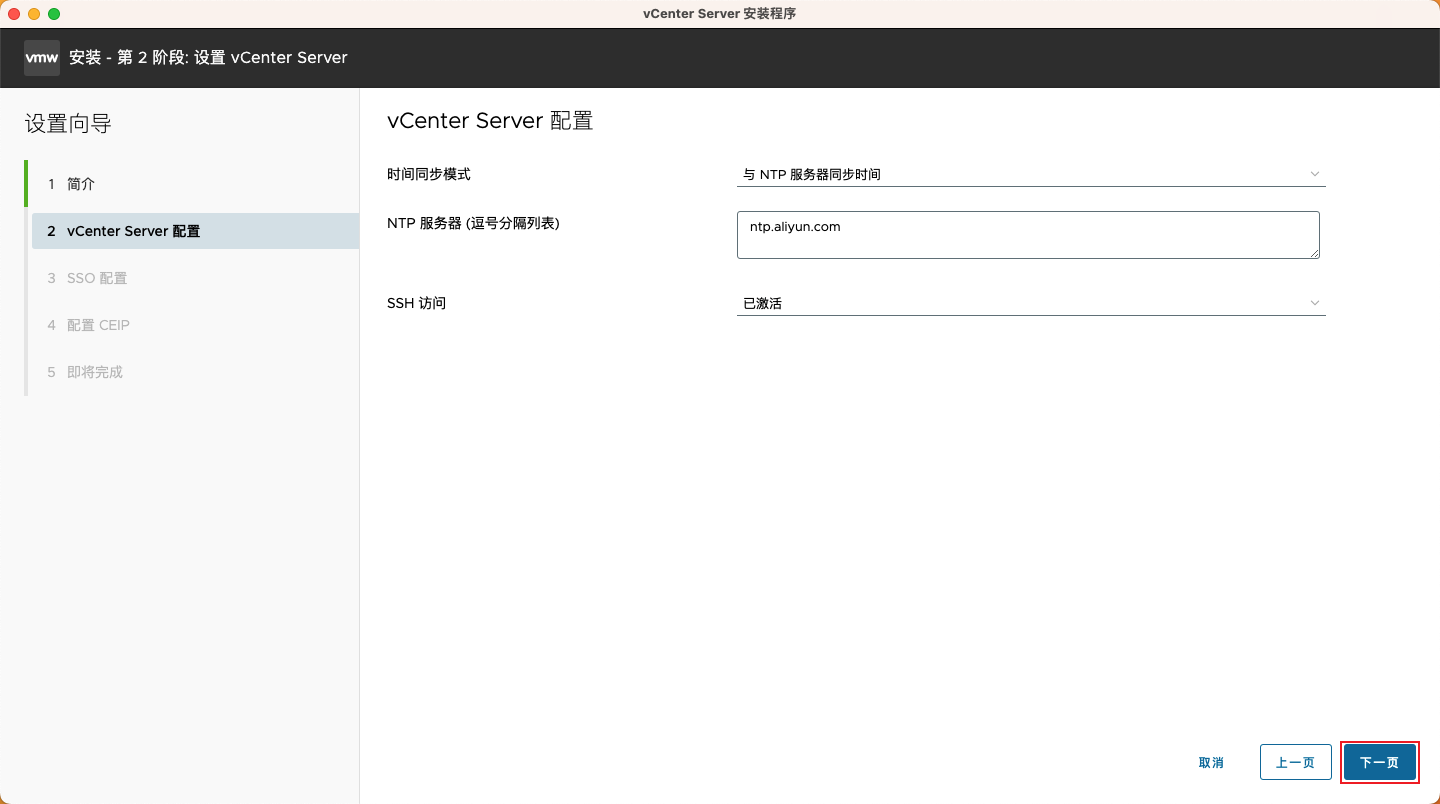
| Configuration item | Content to fill in |
|---|---|
| Time synchronization mode | Select Synchronize time with NTP server |
| NTP server | ntp.aliyun.com(Alibaba Cloud NTP, stable and reliable) |
| SSH access | Check Activated(for the convenience of subsequent operations and maintenance) |
💡 It is recommended to always use NTP time synchronization to avoid SSO authentication failures caused by time inconsistency.
Step 13: Configure Single Sign-On (SSO)
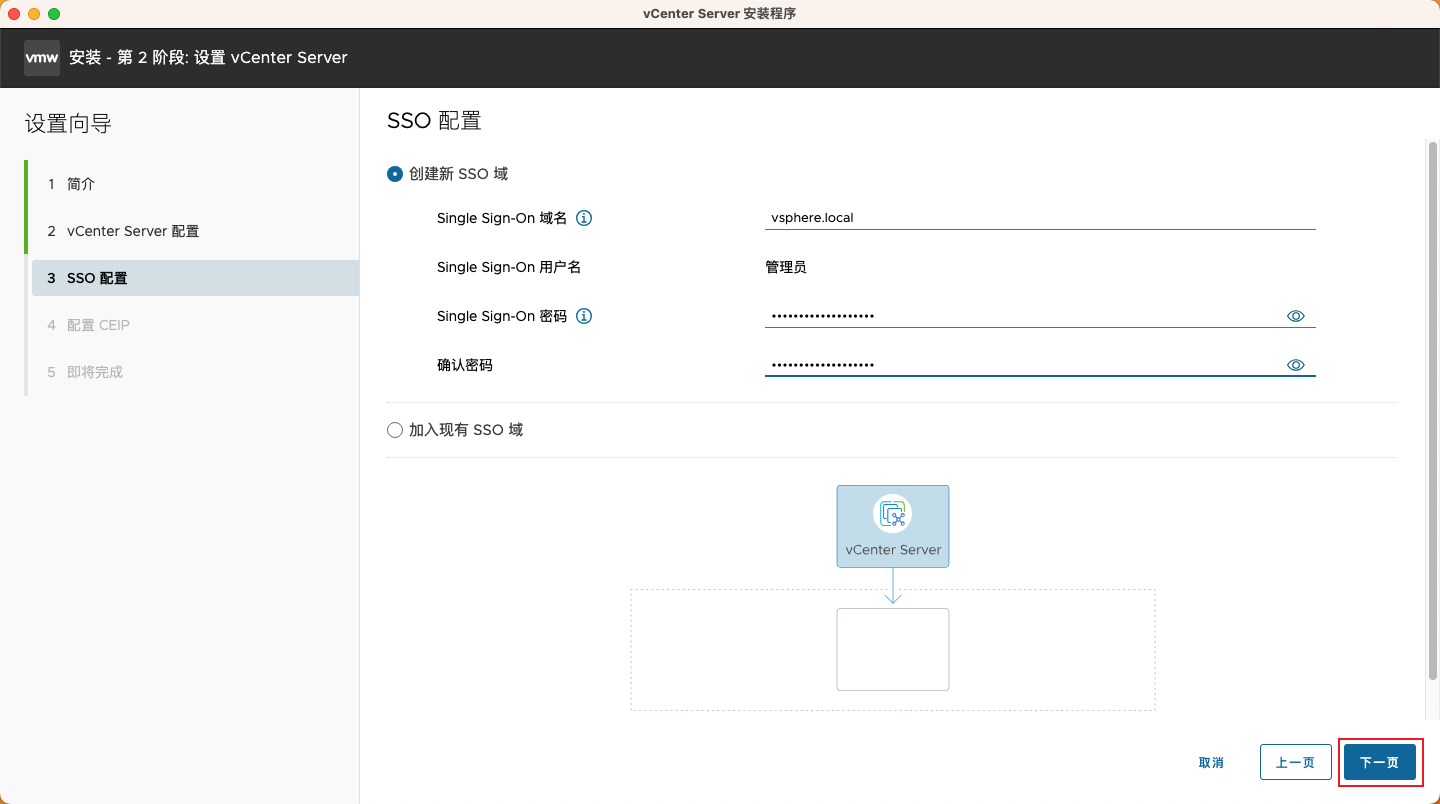
| Configuration item | Fill in the content |
|---|---|
| Operation type | Select Create New SSO Domain |
| Single Sign-On domain | vsphere.local(Recommended by default) |
| Single Sign-On username | 管理员(Default administrator account name) |
| Single Sign-On password | Set a complex password (at least 8 characters, including uppercase and lowercase letters, numbers, and special characters) |
| Confirm password | Re-enter to confirm |
⚠️The SSO administrator account is [email protected], This is the primary credential for logging in to vSphere Client. Please be sure to remember the password!
Step 14: Configure the Customer Experience Improvement Program (CEIP)
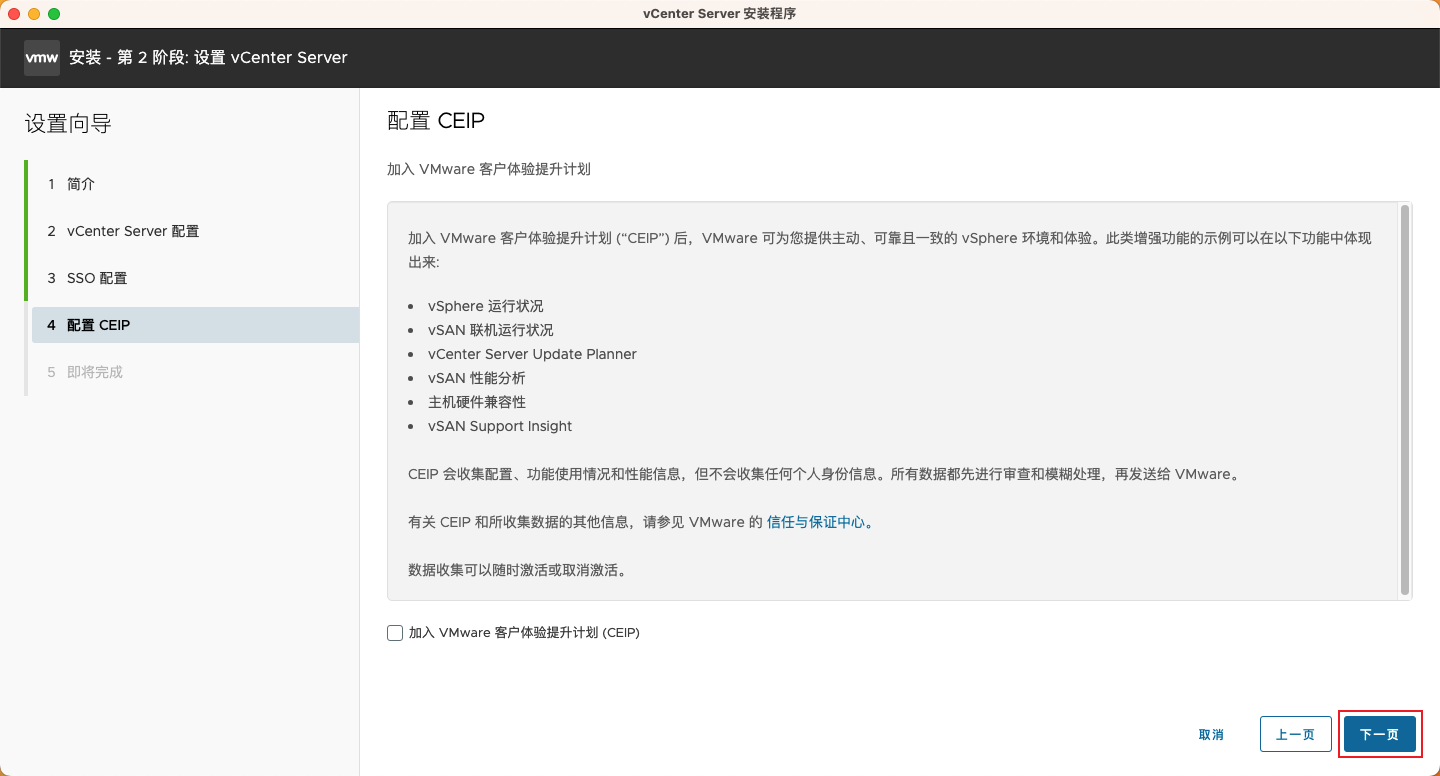
The VMware Customer Experience Improvement Program (CEIP) collects configuration and usage data to help VMware improve its products. Participation is optional.
- This selection Unchecked Join the VMware Customer Experience Improvement Program (CEIP)
Step 15: Confirm configuration information
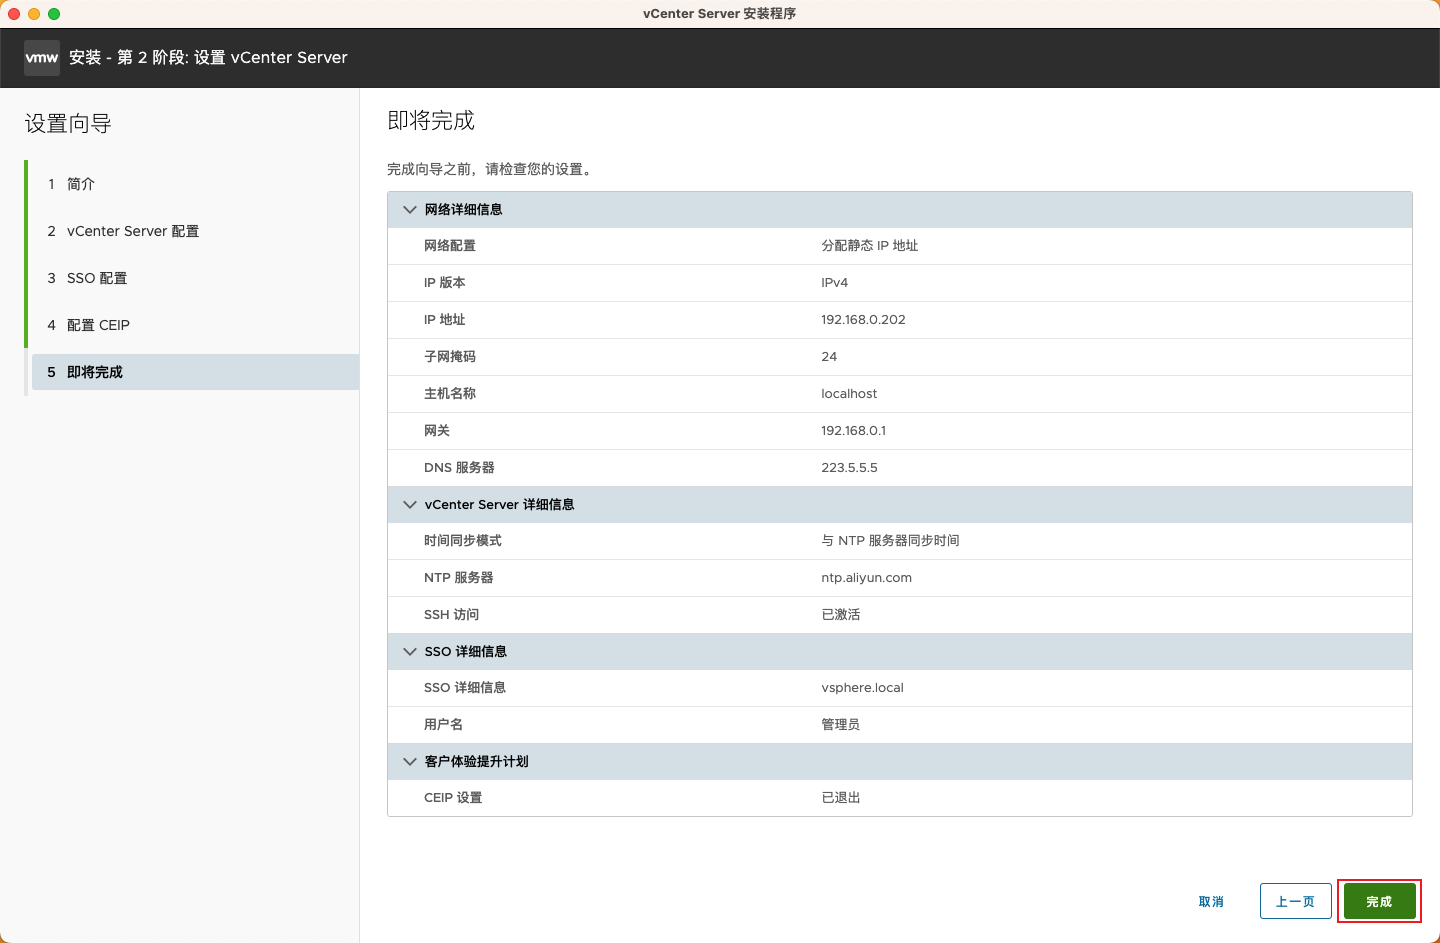
Before the installation is formally executed, the system will summarize and display all configuration information. Please check carefully:
Network configuration: IP address, subnet mask, gateway, DNS
vCenter Server Configuration: Time synchronization mode, NTP server, SSH status
SSO configuration: SSO domain, username
CEIP settings: Whether to join
After confirming it is correct, click Completed.
Step 16: Confirm to start the installation
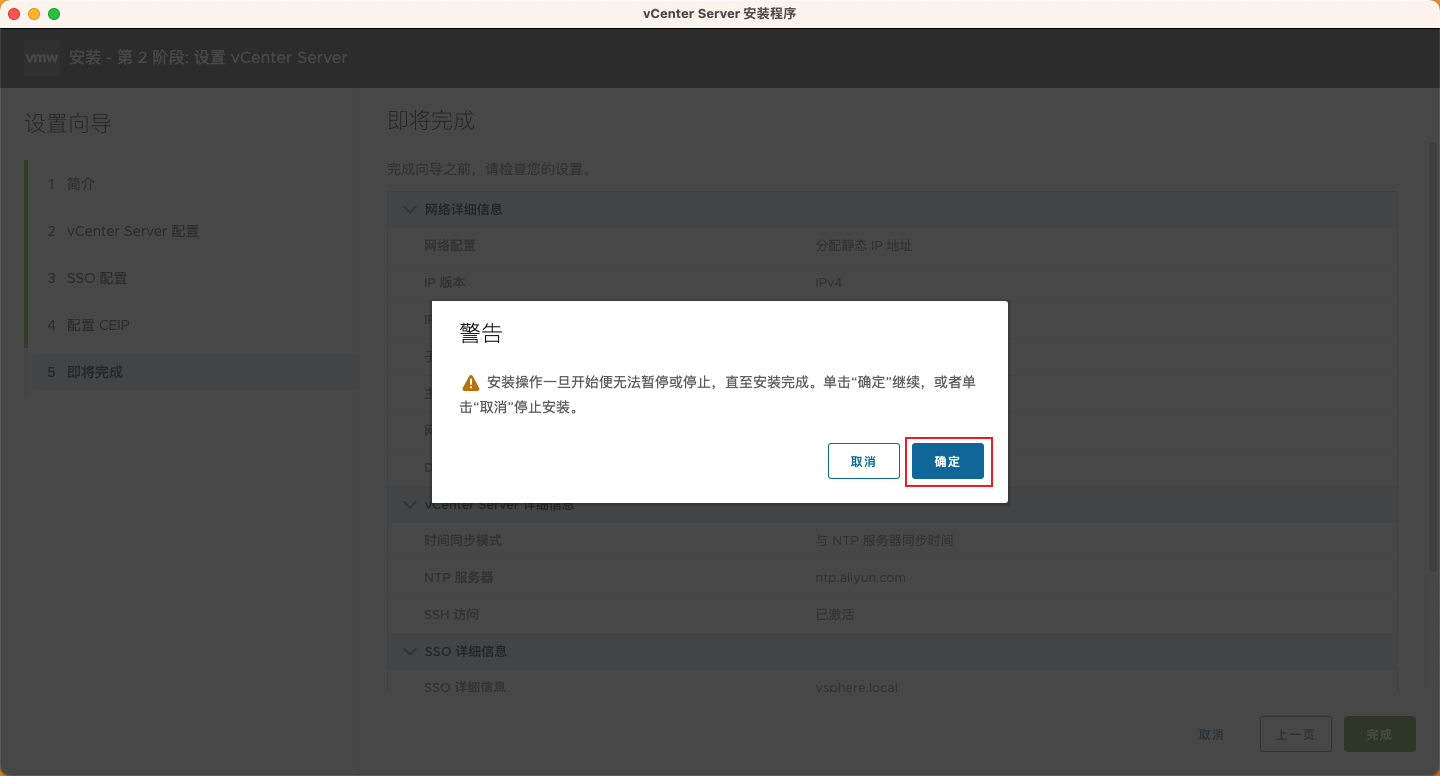
The system will pop up a warning prompt "Once the installation starts, it cannot be paused or stopped", click Confirm Begin the formal installation.
Step 17: Installation in progress
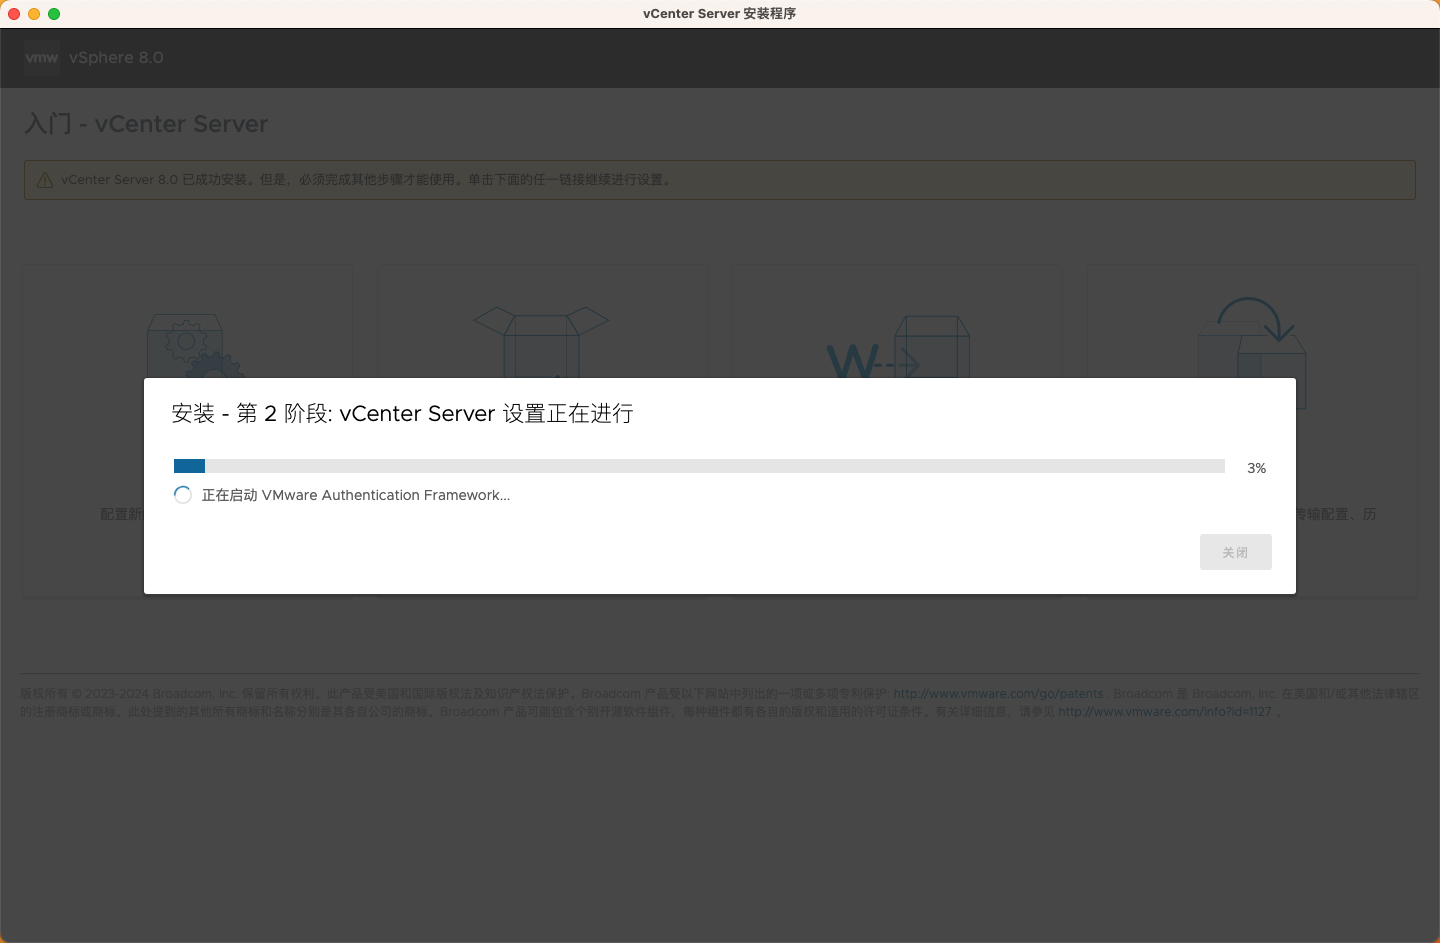
This stage starts and configures various vCenter Server services; the entire process takes about 15~30 minutes.
💡 Note (avoid pitfalls)
If you do not configure the deployment information according to the example in the tutorial, errors may occur. At this step, you may not see a progress bar! Wait about 5 minutes; if there is still no progress, exit the installer and delete the corresponding vCenter Server virtual machine in ESXi, for example VMware vCenter Server After that, just start over from the beginning!
Step 18: Installation complete
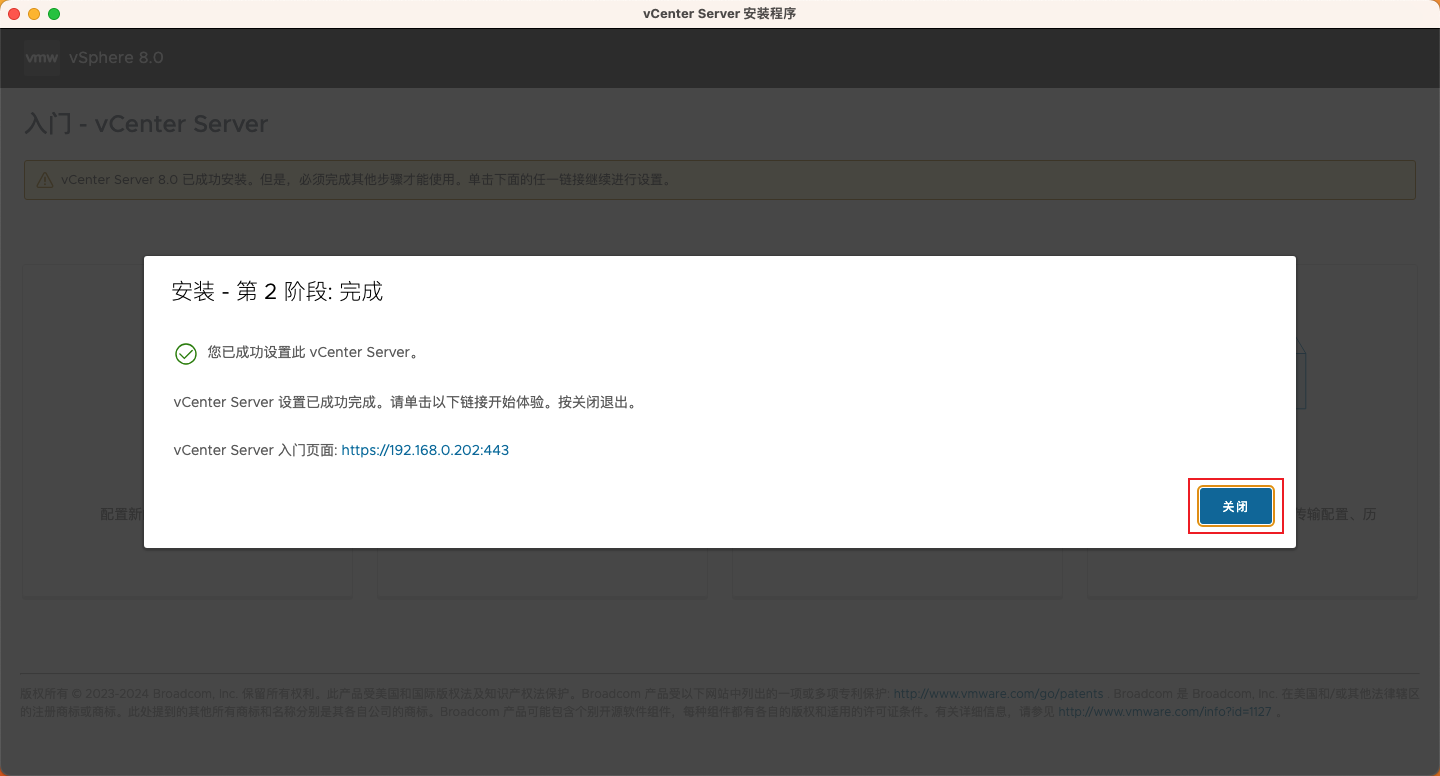
After installation is complete, the system will prompt:
✅You have successfully set up this vCenter Server. vCenter Server Getting Started page:https://192.168.0.202:443
Click Close Exit the installer.
Step 19: Verify the installation result
View the status through the vCenter Server management interface
Visit https://192.168.0.202:5480/, log in with the root account and check the overall running status:
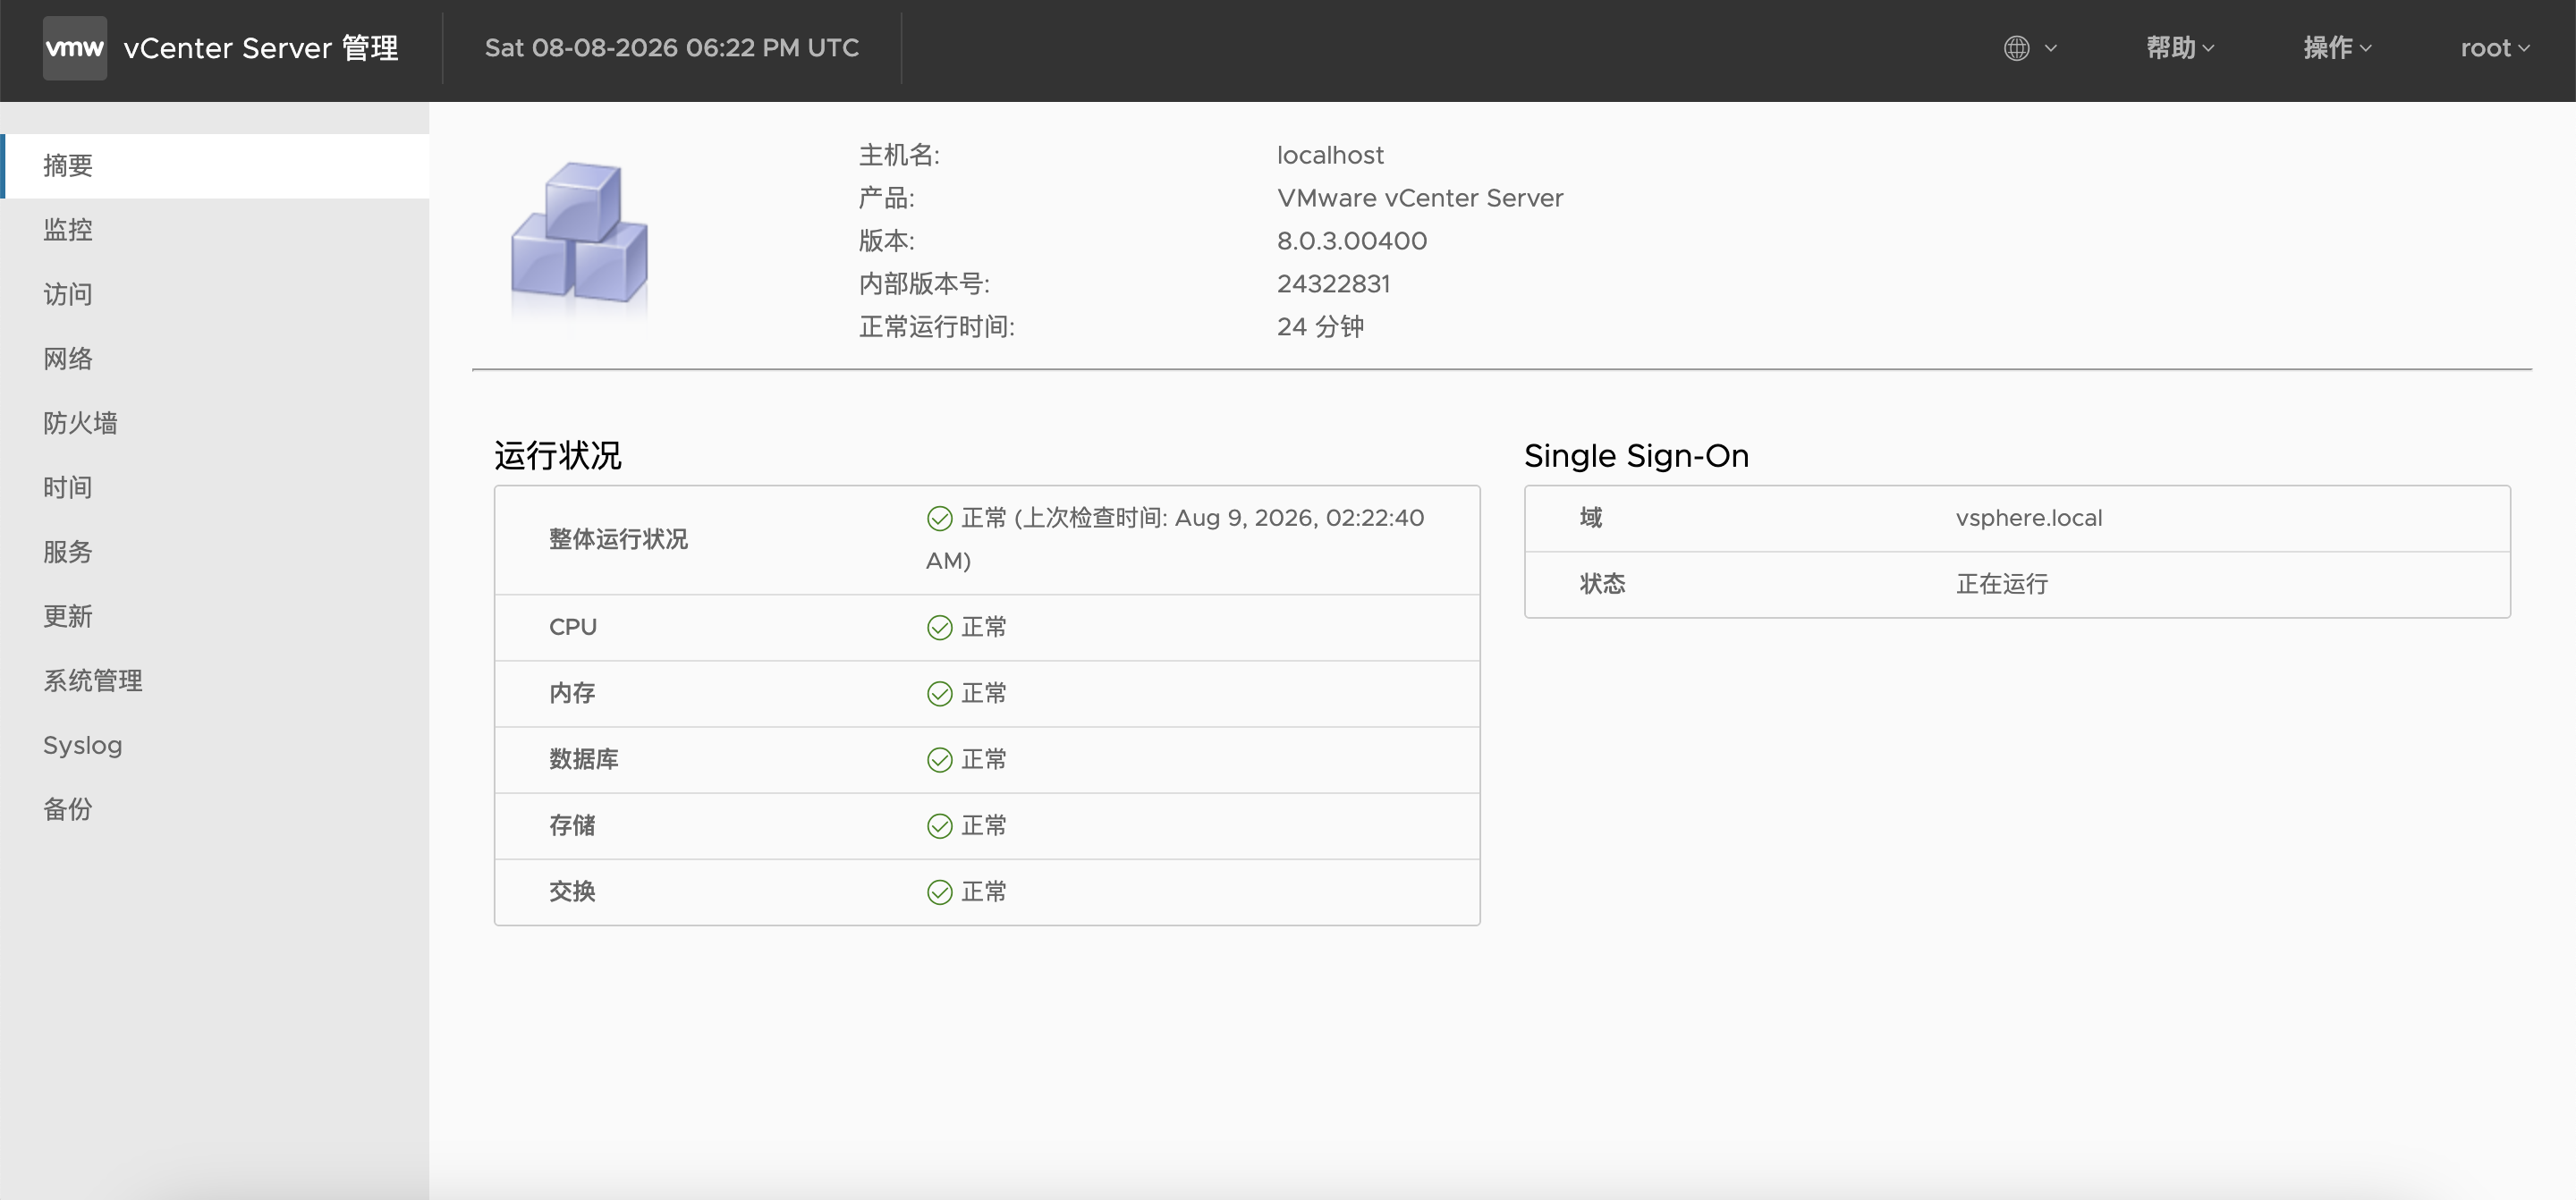
The health status shows that all components are normal (green), indicating that vCenter Server is running normally.
Log in via vSphere Client
Access https://192.168.0.202/, use [email protected] Login:
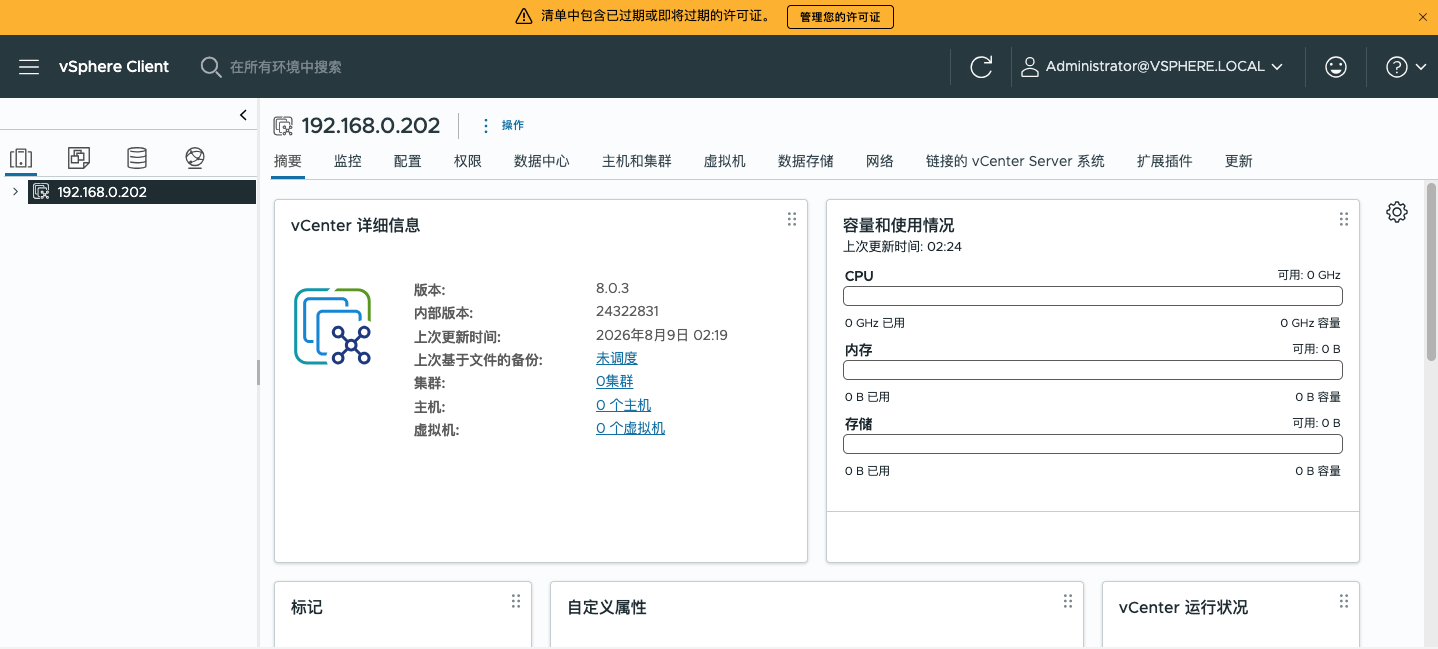
A successful login indicates that vCenter Server is fully deployed and ready!
Recommended actions after installation
After installation is complete, it is recommended to perform the following follow-up configuration:
| Operation | Description |
|---|---|
| Add license | Assign valid license keys to vCenter Server and ESXi hosts |
| Add ESXi host | Add an ESXi host to vCenter management through the vSphere Client |
| Create data center | Create a data center in vCenter and organize hosts and virtual machines. |
| Configuration backup | Configure a file-based backup policy in the vCenter Server management interface. |
| Update CA certificate | Replace the default self-signed certificate with a trusted certificate issued by the enterprise CA. |
| Configure HA/DRS | Configure high availability and distributed resource scheduling as needed. |
Common troubleshooting
1. Unable to access the vCenter Server management interface (port 5480)
Check whether the ESXi host firewall allows TCP port 5480 communication
Check whether the vCenter Server virtual machine is running properly.
2. SSO login failed
Confirm using the full username
[email protected]Check whether the system time is synchronized with NTP (a time offset exceeding 5 minutes will cause SSO authentication failure)
3. Network timeout during deployment
Verify ESXi host network connectivity
Check whether the DNS configuration is correct
Conclusion
At this point, the complete installation and deployment tutorial for vCenter Server 8.0 comes to an end. The entire process is divided into two stages, totaling about 30~50 minutes. With the illustrated instructions in this article, you should be able to successfully complete the installation and basic configuration of vCenter Server.
📌This document is based on vCenter Server 8.0.3.00400 (build 24322831). The interface may vary slightly across minor versions, but the operation procedure is basically the same.
Reference materials
Next article: Complete Guide to Adding an ESXi Host in vCenter Server 8.0 | The First Step to Building a vSphere Cluster