
English
Windows 11 Configure a Static IP Address (Settings App Method)

Applicable scenarios: fixed office workstations, servers, and devices on home intranets that require a stable IP.
Operation steps
Step 1: Go to network settings
Click the bottom-right corner of the taskbar Network icon(Wi-Fi or Ethernet icon)
Click in the pop-up menu.Network & Internet settings
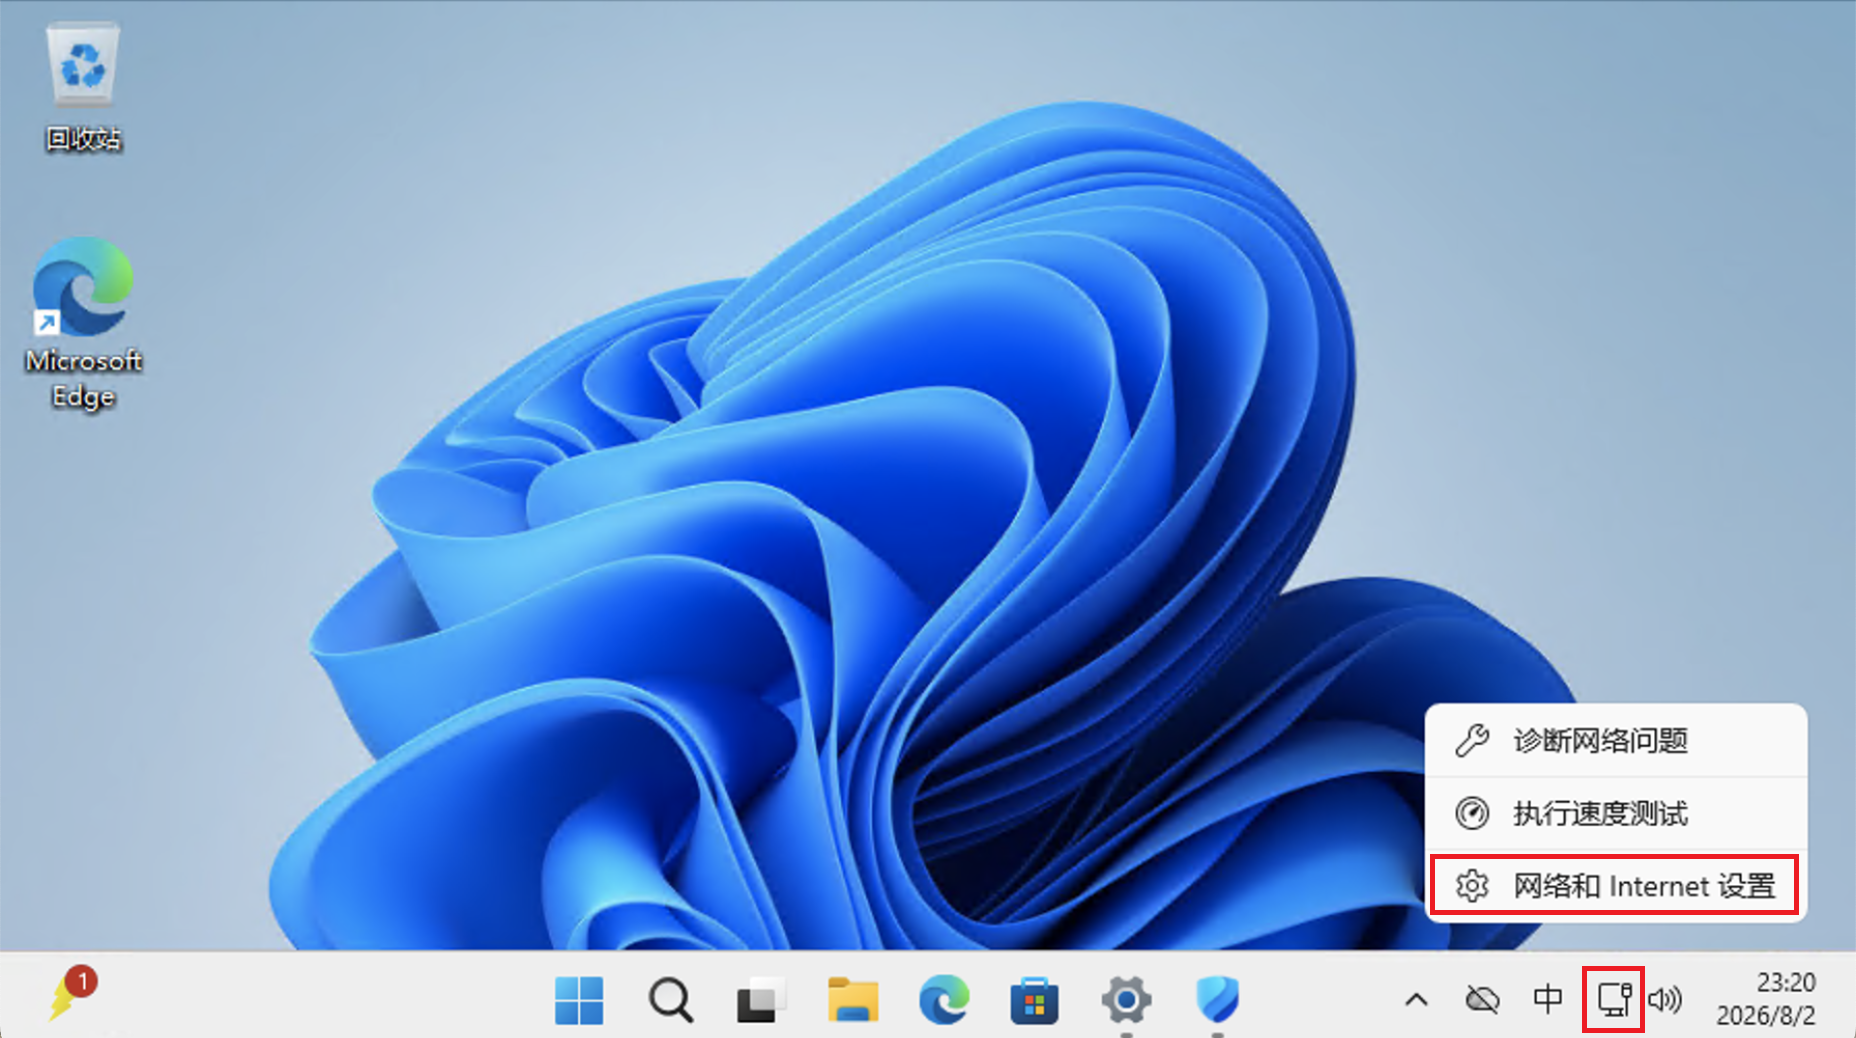
Image above: Click the network icon in the taskbar → Go to Network & Internet settings
Step 2: Go to Advanced Network Settings
Click on the left side of the settings window.Network and Internet(If not on this page)
Scroll down to find Advanced Network Settings and click
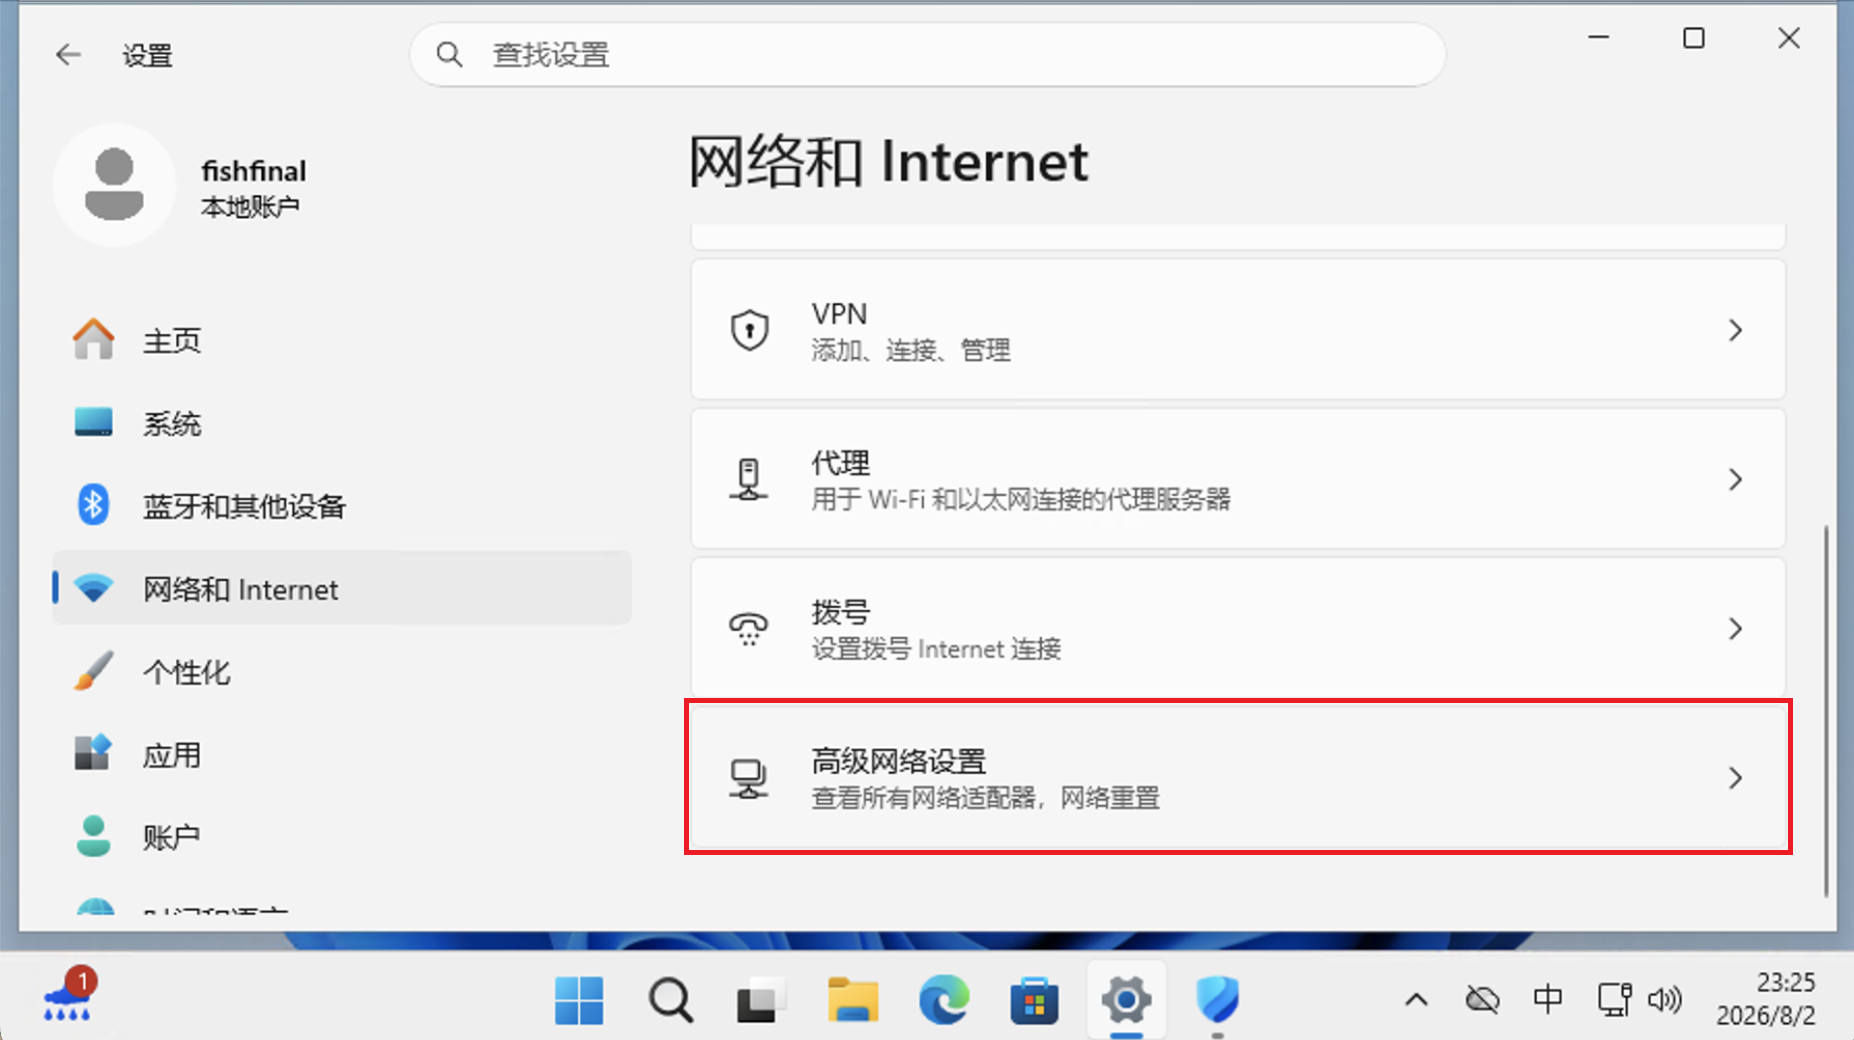
Above image: Network & Internet settings page, click Advanced network settings
Step 3: Open Ethernet properties
- At Advanced Network Settings On the page, click the currently used network connection (here it is Ethernet)
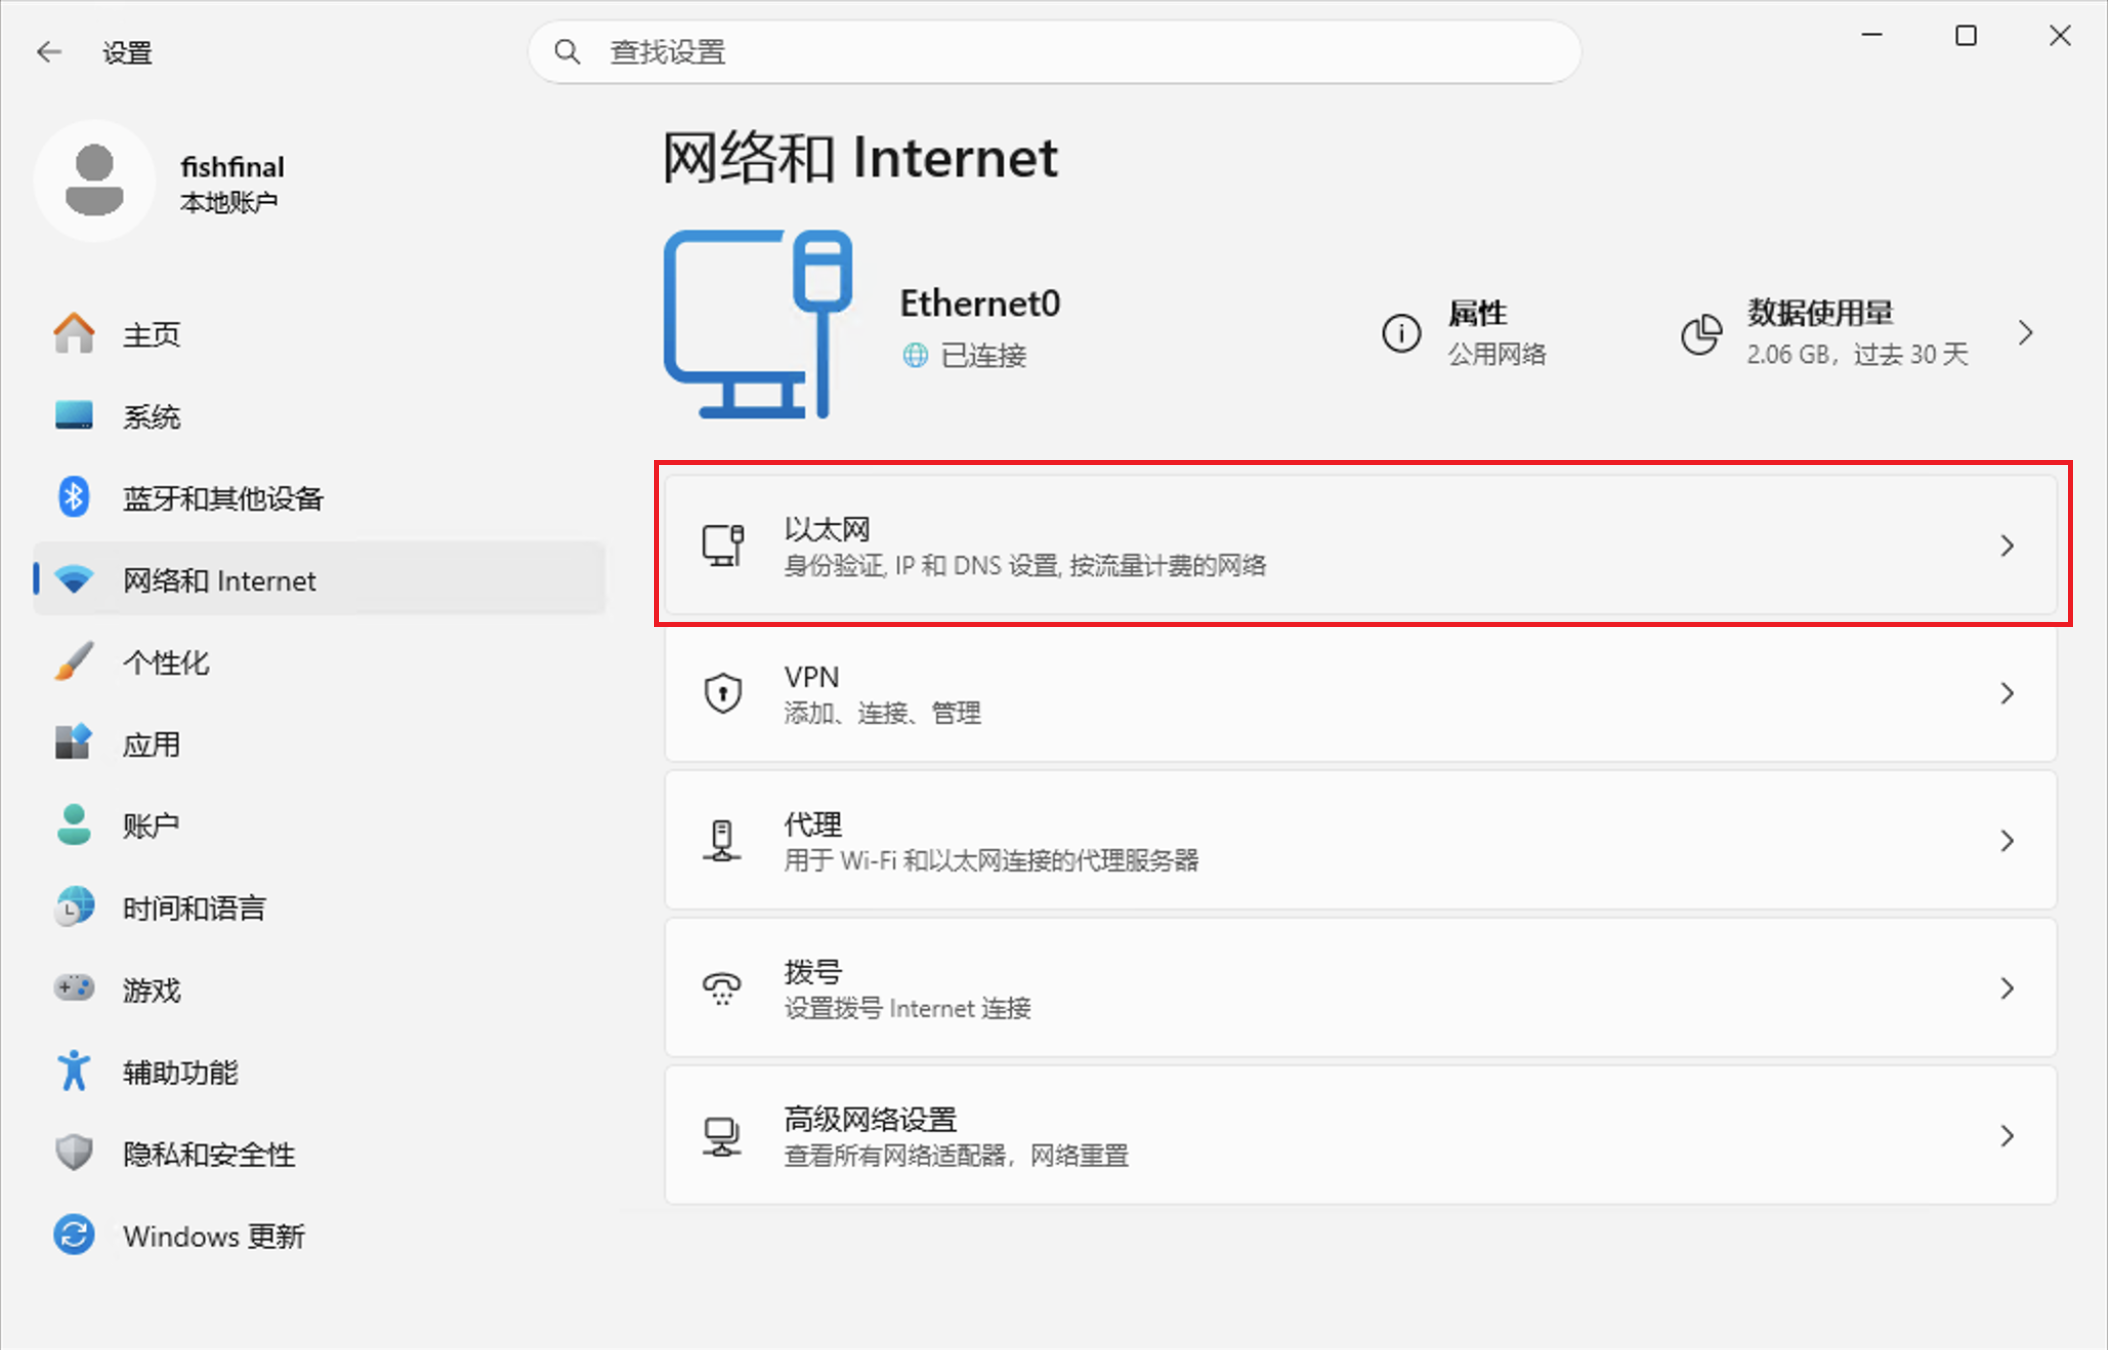
Above image: Click “Ethernet” to enter connection details.
Step 4: View current network information (optional)
Enter the Ethernet details page to see the current IP address,Default Gateway,DNS server and other information
Record the current gateway and DNS addresses; you will need to refer to them during subsequent configuration.
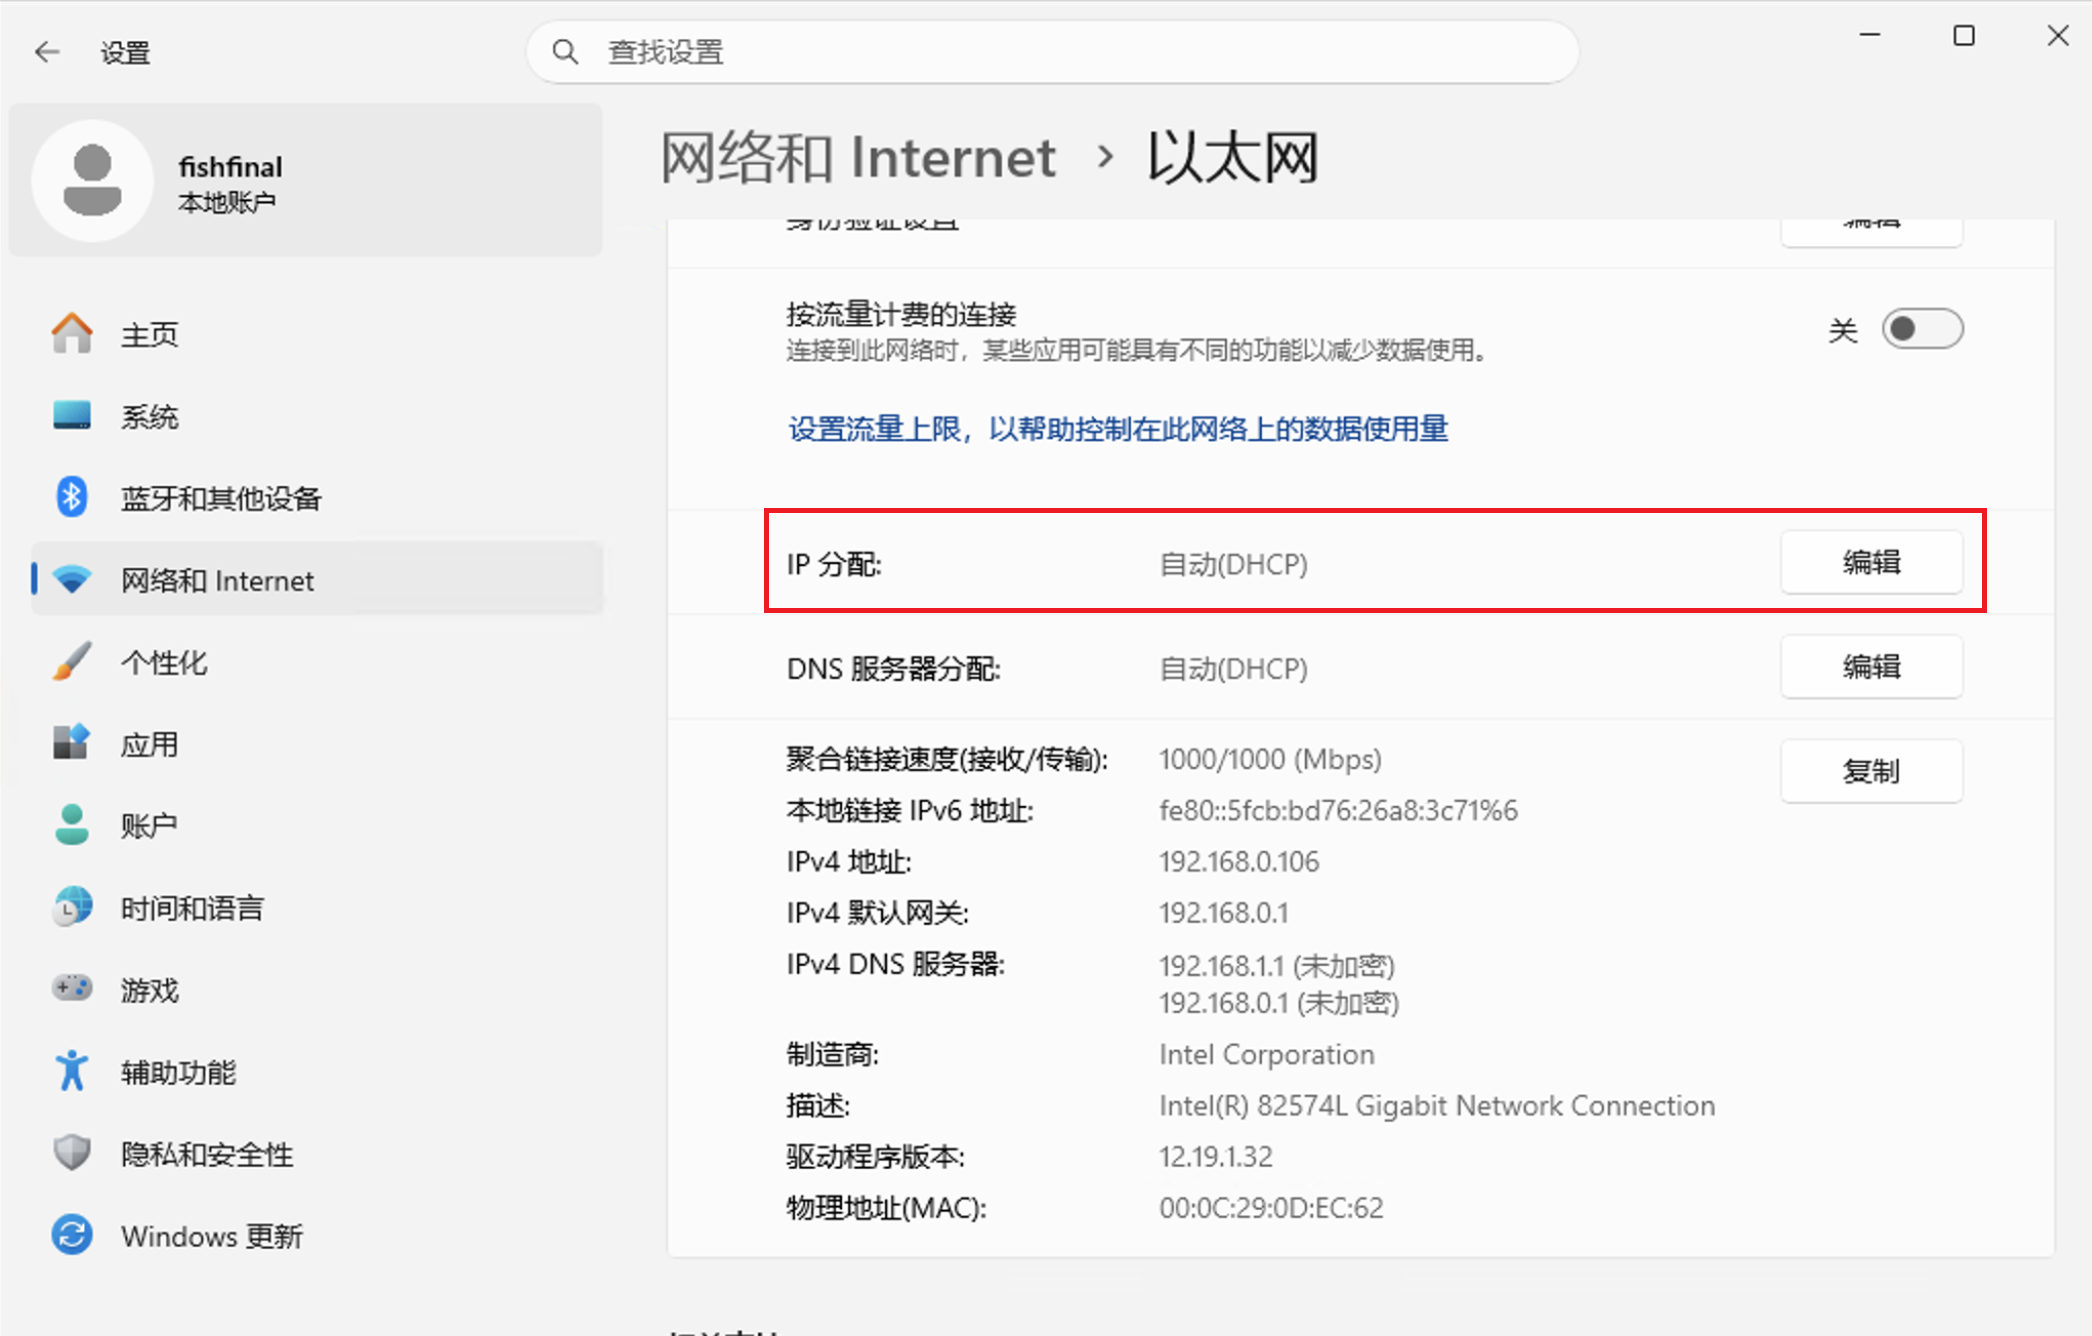
Figure above: Current network information; the red box indicates the key parameters to be configured.
Step 5: Enable manual IP editing
at IP allocation OK, click the one on the right.Edit button
In the pop-up window, change the drop-down option from Automatic (DHCP) Switch to Manual
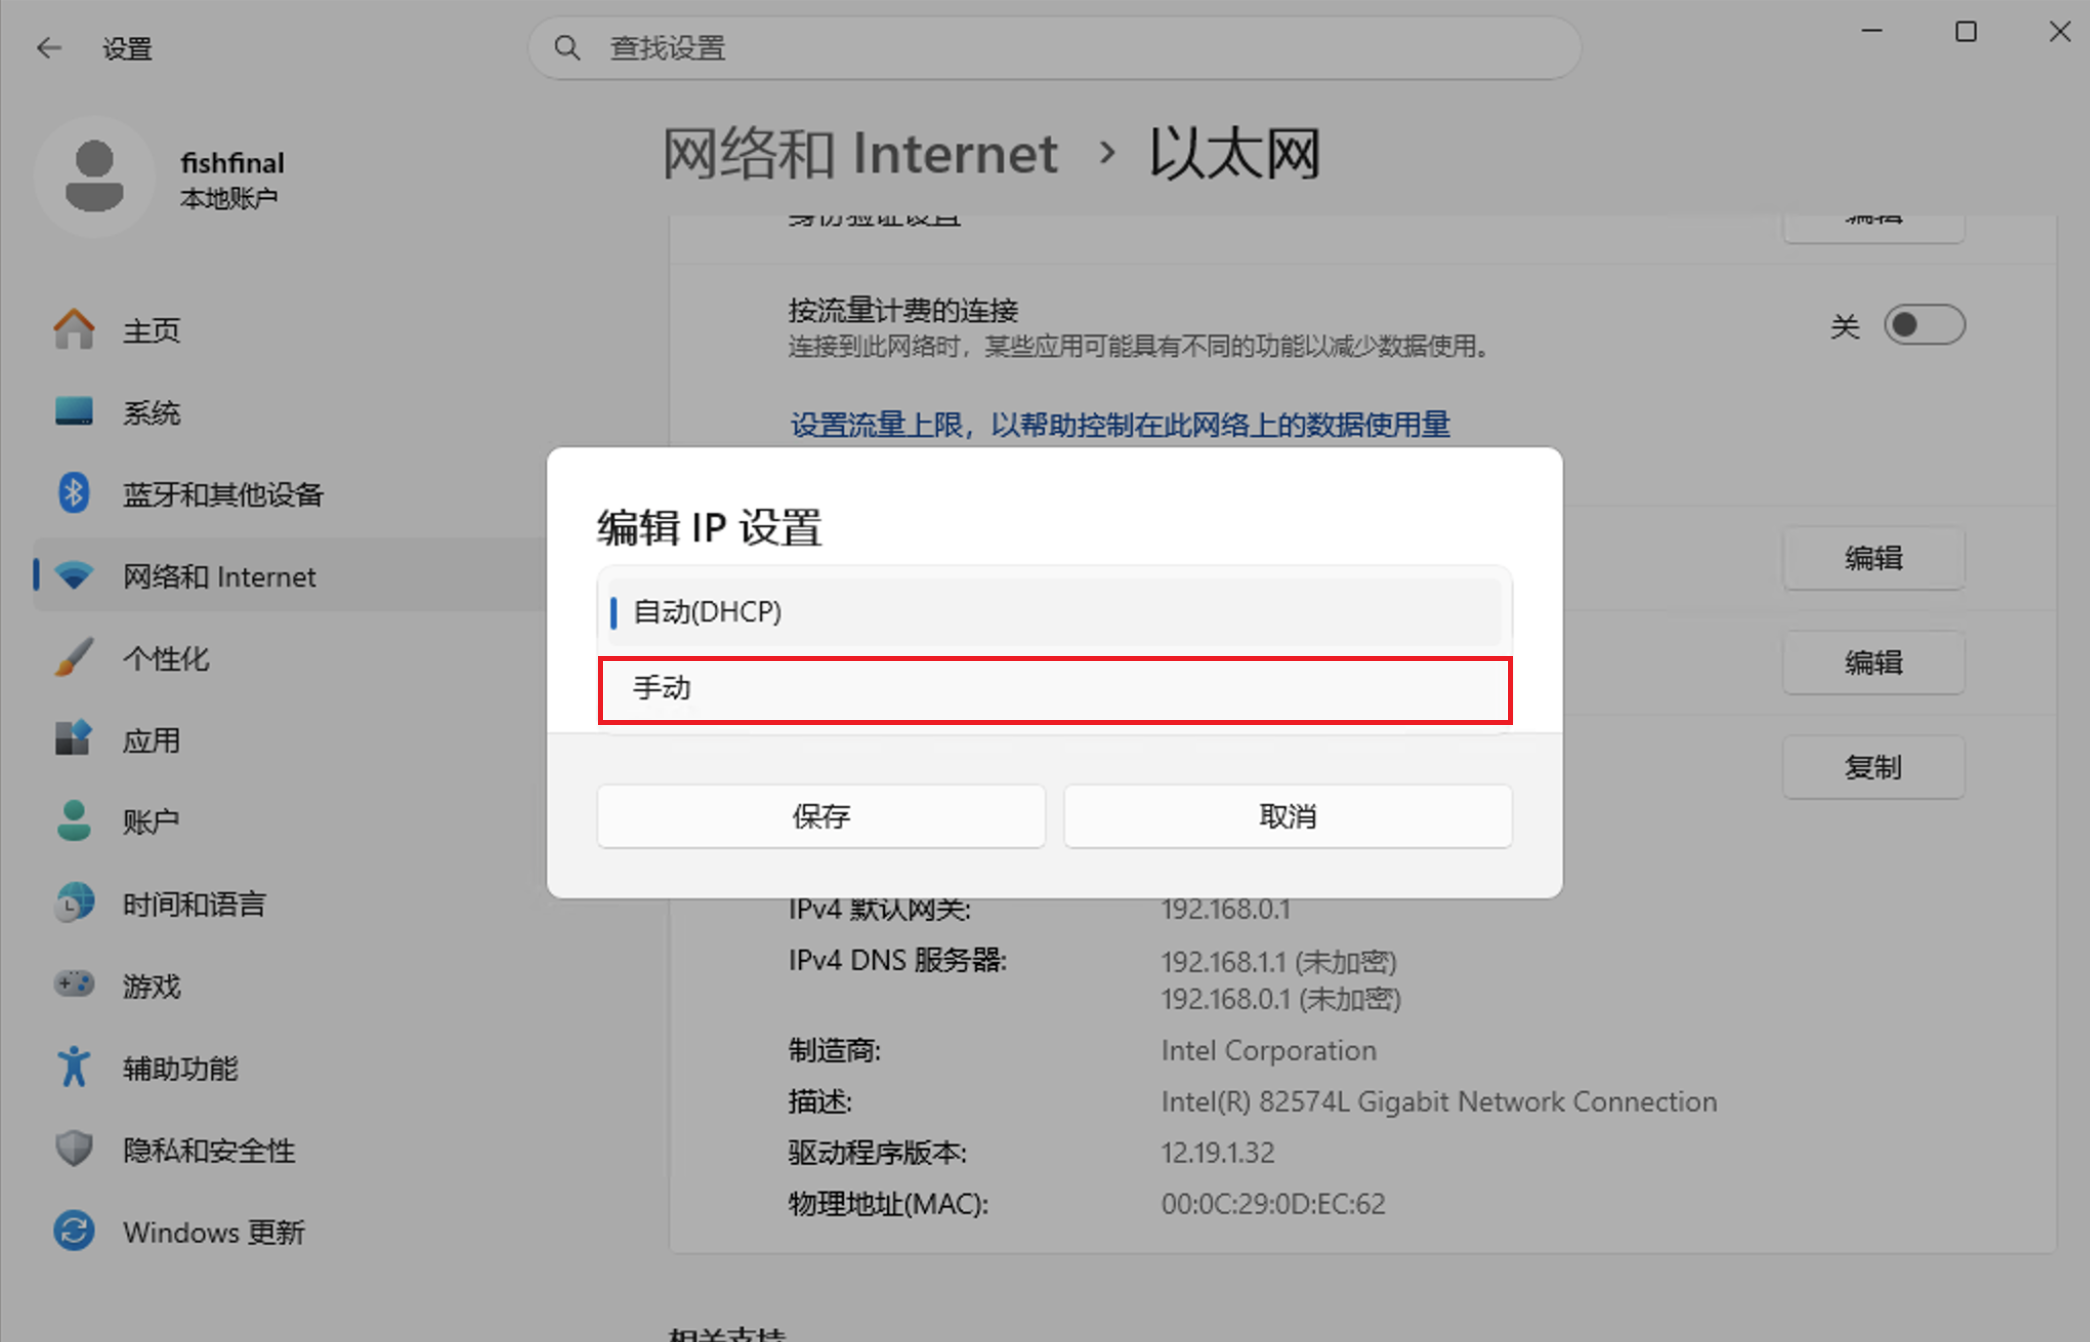
Above: Switch IP assignment from “Automatic (DHCP)” to “Manual”
Step 6: Enable IPv4 and fill in the parameters
In “Manual” mode, set IPv4 Switch to open
Fill in the following fields in order:
| field | Fill in the content | Example value |
|---|---|---|
| IP address | The fixed IP you want | 192.168.0.213 |
| subnet mask | usually is 255.255.255.0 | 255.255.255.0 |
| Gateway | Router address (refer to the value recorded in step 4) | 192.168.0.1 |
| Preferred DNS | Recommend 114.114.114.114 | 114.114.114.114 |
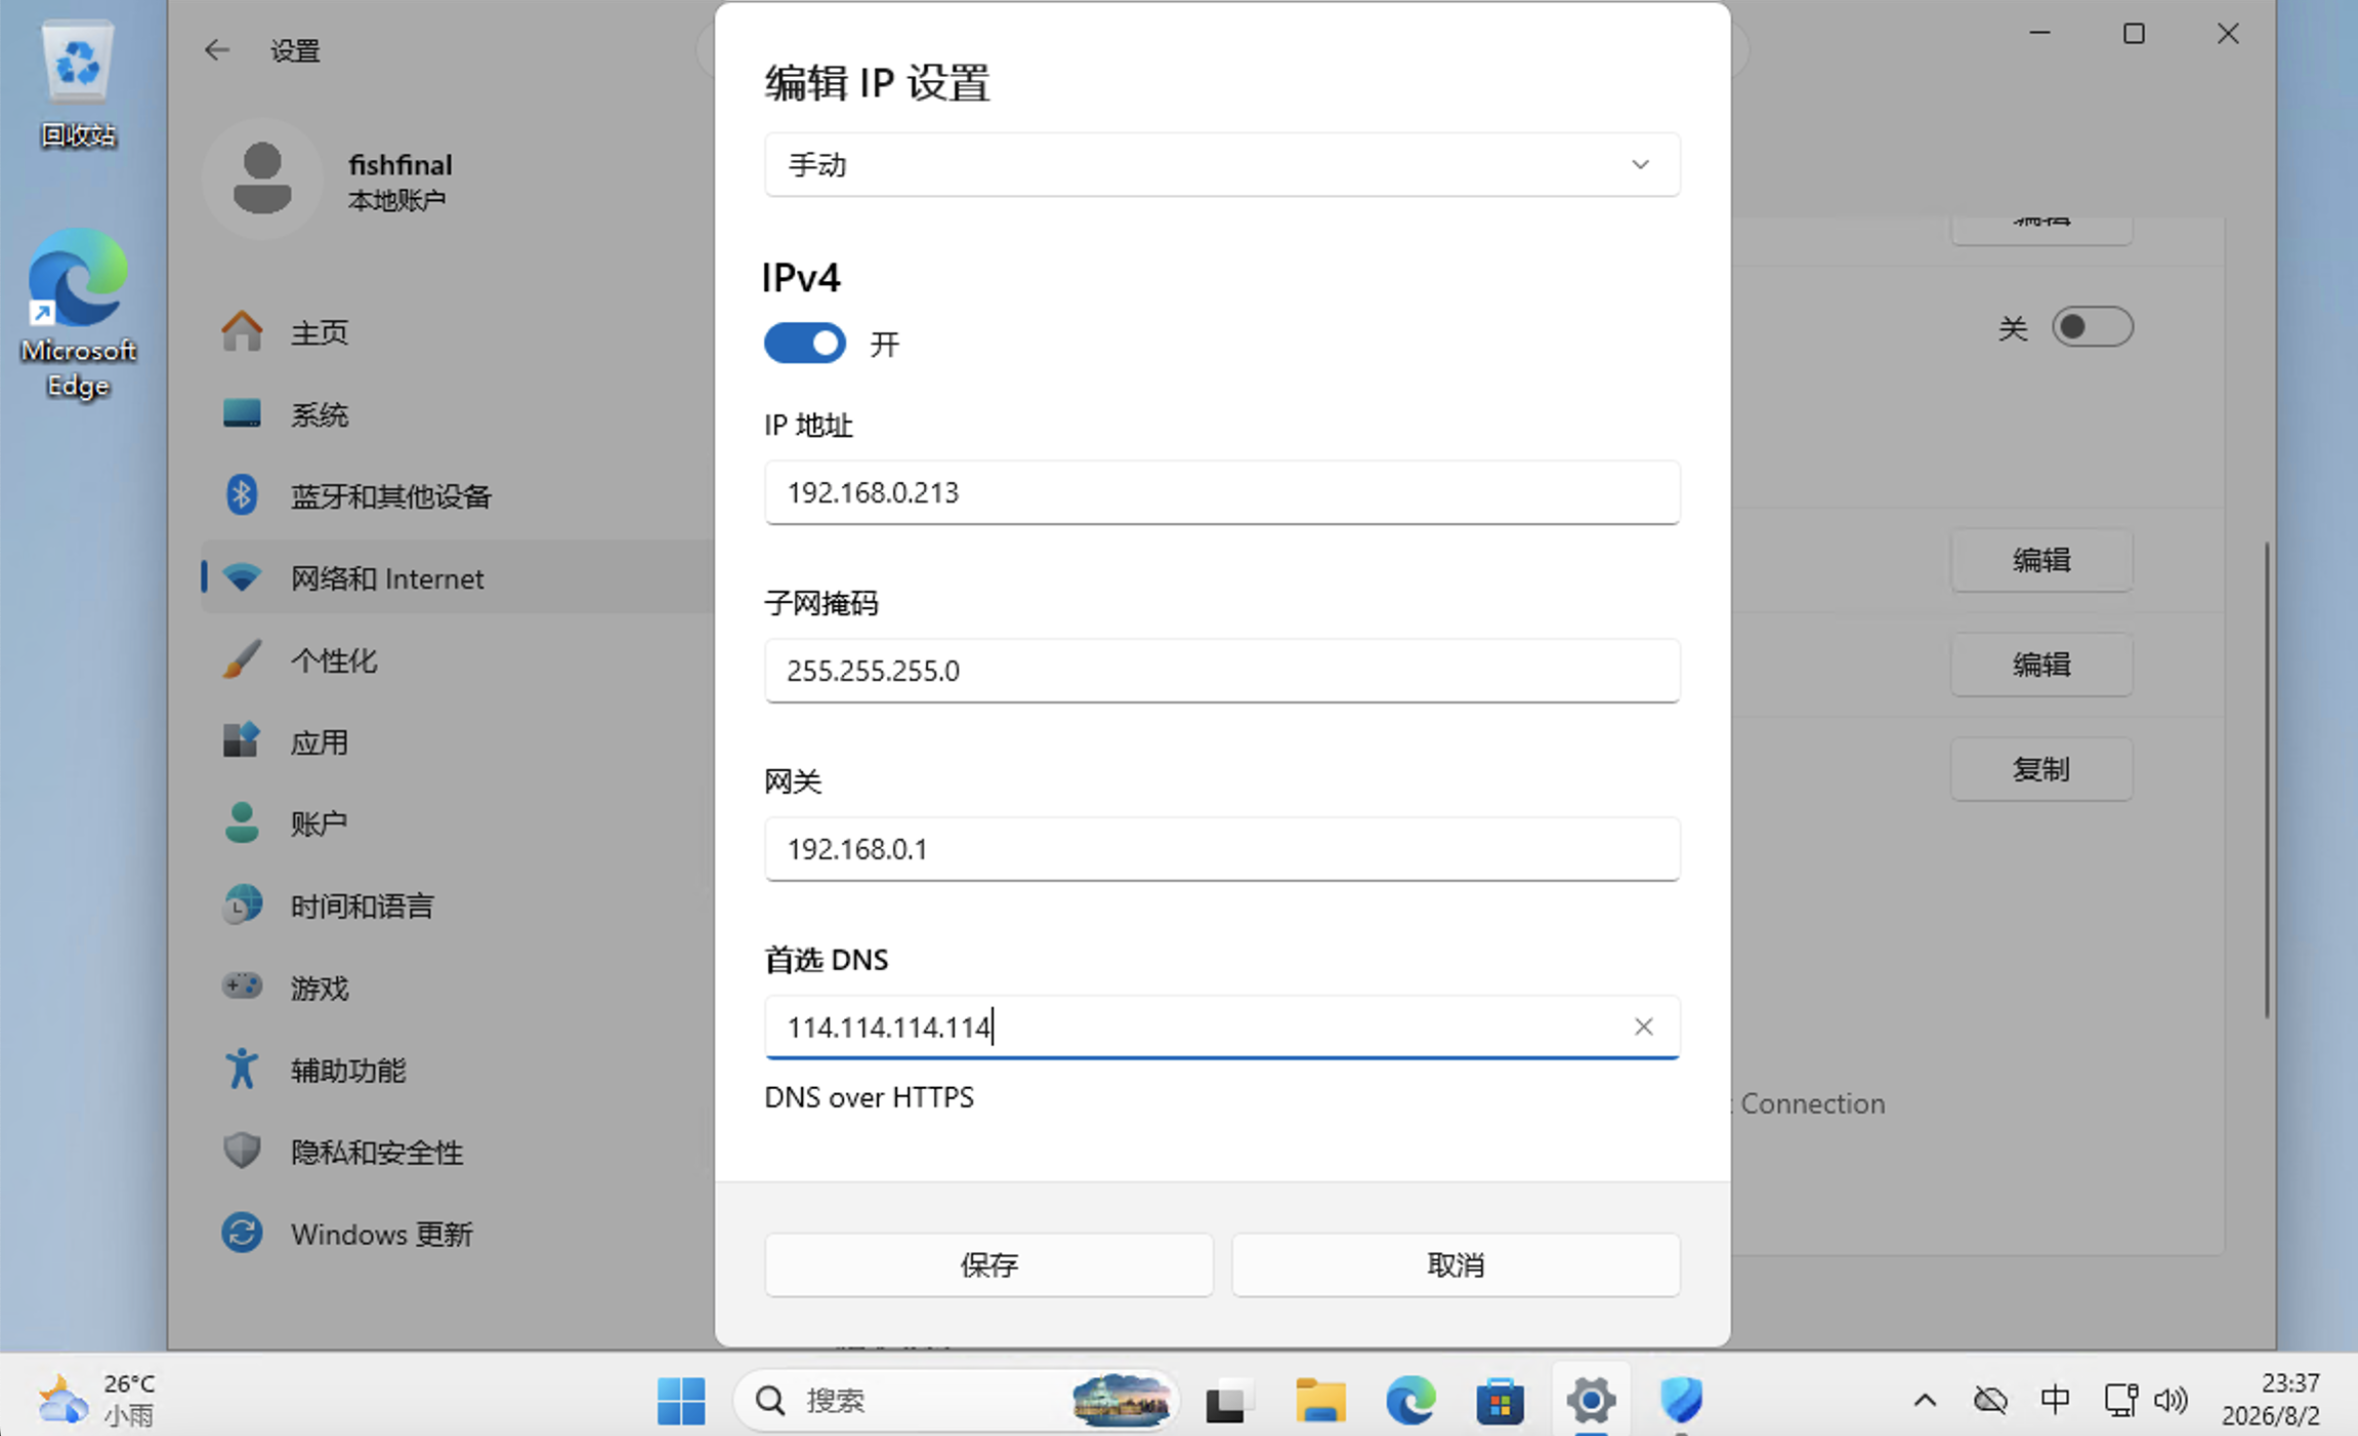
Above figure: Enable IPv4 and enter the IP, subnet mask, gateway, and preferred DNS.
⚠️Attention: in the screenshot 192.168.0.213 This is for example only; please choose an idle IP based on your network environment.
Step 7: Save and apply
Click Save button
Settings take effect immediately; no computer restart required.
Key precautions
How to avoid IP conflicts?
Before filling in the IP address, it is recommended to first confirm that the IP is not in use:
Method 1: Execute in CMD
ping 192.168.0.xxx, if timed out, it is most likely idleMethod 2: Log in to the router admin panel (usually
192.168.0.1), check the DHCP address pool range, and set the static IP outside the address pool.
DNS recommendation
| Scene | Preferred DNS | Backup DNS |
|---|---|---|
| Domestic users | 114.114.114.114 | 223.5.5.5(Ali) |
| International users | 8.8.8.8(Google) | 1.1.1.1(Cloudflare) |
Verify whether the configuration is successful.
Press Win + R→ input cmd→ Press Enter, execute:
cmd
ipconfig /allFind "Ethernet adapter" and confirm:
IPv4 address = 你设置的 IP(如
192.168.0.213)Default gateway= the gateway you entered (e.g.
192.168.0.1)DNS server= The DNS you filled in (e.g.
114.114.114.114)
Test network connectivity:
cmd
ping 8.8.8.8If it can ping through, the configuration is successful ✅
Restore to automatic IP acquisition
To switch back to DHCP:
Repeat Step 5, change “IP allocation” back to Automatic (DHCP)
Click Save.