
English
Complete Guide to Installing Windows 11 on ESXi 8.0 and Bypassing Hardware Detection

Background Description
When installing Windows 11 in a VMware ESXi 8.0.3 virtual machine, you will usually encounter the following error:
This PC does not currently meet the Windows 11 system requirements.
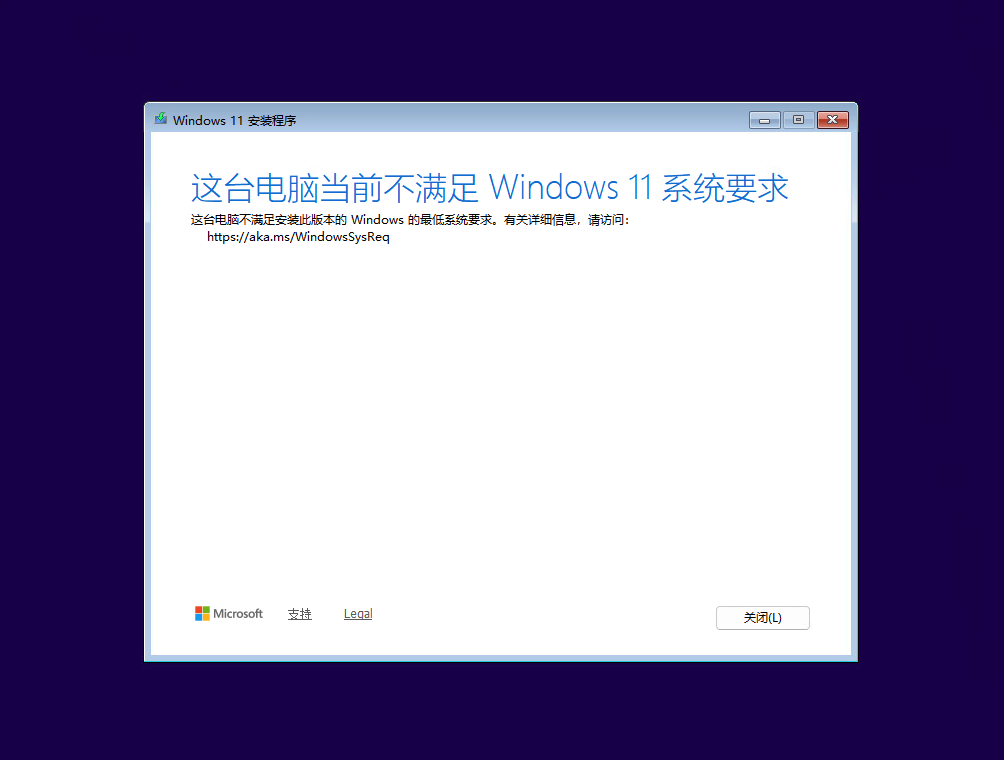
This is because Windows 11 mandates the following hardware requirements:
TPM 2.0(Trusted Platform Module)
Secure Boot(Secure Boot)
sufficient physical memory(4GB+)
Although these requirements can be met in ESXi by configuring virtual machine encryption and TPM emulation, the process is rather cumbersome. This article introduces a Simpler and more reliable Method: Bypass hardware checks via the registry during Windows 11 installation.
Applicable environment
| Project | Version / Information |
|---|---|
| Virtualization platform | VMware ESXi 8.0.3 |
| Client version | VMware Host Client 2.18.0 |
| Target operating system | Windows 11 (64-bit) |
| Virtual machine firmware | EFI / UEFI |
Operating steps
Phase 1: Virtual Machine Preparation
1. Create a virtual machine
When creating a new virtual machine in the ESXi Host Client, pay attention to the following key settings:
Guest operating system family: Select
WindowsGuest operating system version: Choose
Microsoft Windows 11 (64-bit)
2. Mount the Windows 11 ISO image
Edit virtual machine settings → CD/DVD drive:
Check Connected and Connect at startup
Select Data storage ISO file,浏览并选中 Windows 11 安装镜像
3. 调整引导选项(可选)
To prevent the virtual machine from directly entering PXE network boot, you can go to "Virtual Machine Options" → "Boot Options":
will Boot delay Set to
5000millisecondConfirm the firmware type is EFI
Phase 2: Bypass hardware detection (core step)
Step 1: Boot into the installation interface
Start the virtual machine, see
Press any key to boot from CD or DVD...Press any key immediately Enter the Windows 11 installer boot screen

After the first language selection settings screen appears, stop the language selection operation.
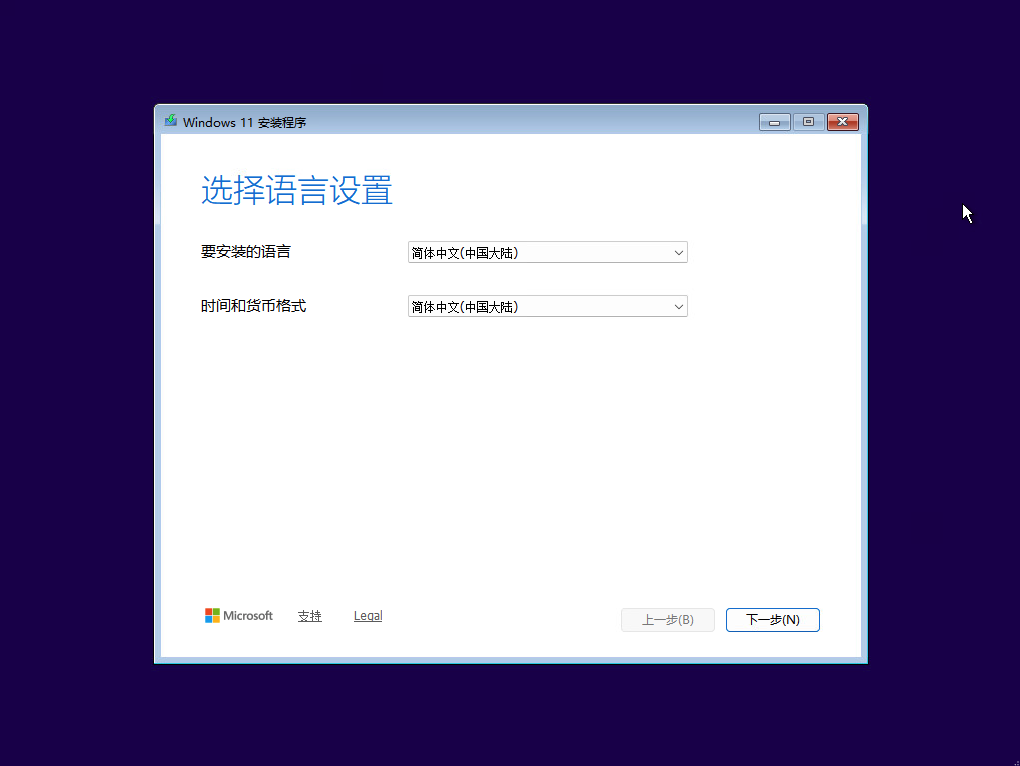
Step 2: Open the command line window
Press the keyboard shortcut:
text
Shift + F10If it doesn't work (some keyboards require the Fn key), try:
text
Shift + Fn + F10At this point, a black one will pop up.Command Prompt Window.
Step 3: Open the Registry Editor
Enter the following command at the command prompt and press Enter:
cmd
regeditStep 4: Create the LabConfig registry key
- In the directory tree on the left side of Registry Editor, expand the following items in order:
text
HKEY_LOCAL_MACHINE → SYSTEM → SetupSelected
SetupFolder (left-click)Right-click in the blank area on the right → New →item, name it:
text
LabConfigStep 5: Add three DWORD values to bypass detection
Select the newly created LabConfig Folder, in the blank area on the right, create the following three in sequence.DWORD (32-bit) value:
| Name | Type | Numerical data |
|---|---|---|
BypassTPMCheck | REG_DWORD | 1 |
BypassRAMCheck | REG_DWORD | 1 |
BypassSecureBootCheck | REG_DWORD | 1 |
Creation method: Right-click → New →DWORD (32-bit) value, then rename and double-click to change the value to 1.
The final effect is as follows:
text
BypassTPMCheck        0x00000001
BypassRAMCheck        0x00000001
BypassSecureBootCheck 0x00000001
Step 6: Return to continue installation
Close Registry Editor
Close the Command Prompt window.
Simply follow the guide interface to start the Windows 11 installation.
Stage 3: Disk Partitioning
Taking a 96GB virtual disk as an example, recommended partitioning scheme:
| partition | size | Purpose |
|---|---|---|
| Partition 1 | 100 MB | ESP (EFI System Partition, automatically created) |
| Partition 2 | 16 MB | MSR (Microsoft Reserved Partition, automatically created) |
| Partition 3 | ~58.6 GB | System drive (C drive) |
| Partition 4 | ~37.3 GB | Data disk (D drive) |
Operation steps:
Select unallocated space, click New
Enter the system disk size (e.g., 60000 MB), and click Application
When the system prompts you to create an additional partition, click Confirm
Select the remaining unallocated space and click again New, use all remaining capacity
Select the 58.6GB primary partition, click Next step Start installation
Phase 4: Complete the installation
After you click "Next", Windows 11 will begin copying files and installing. During this process, the virtual machine will automatically restart 2-3 times:
No need to press any key.
Do not forcibly shut down the virtual machine.
Wait patiently for about 10-20 minutes.
After entering the OOBE (out-of-box experience) interface, simply follow the prompts to complete settings such as country/region selection and account creation.
Common troubleshooting
Q1: The installation interface did not show CD/DVD boot and went directly to PXE network boot
Solution: Edit the virtual machine settings and check the CD/DVD drive's Connected and Connect at startup Whether they are all checked. Or add a boot delay in the boot options, then press after restarting ESC Manually select to boot from the DVD.
Q2: No response when pressing Shift+F10
Solution: Ensure the mouse focus is within the virtual machine console window (click the black area). If the keyboard has an Fn function key, try Shift + Fn + F10.
Q3: The Setup folder cannot be found in the registry path
Solution: Confirm the path is HKEY_LOCAL_MACHINE\SYSTEM\Setup Note the capitalization; SYSTEM is uppercase.
Q4: Do I still need to enable TPM after the system is installed?
No need. After bypassing detection through the registry, Windows 11 will not enforce TPM and Secure Boot requirements, system functions work normally, and daily use is unaffected.
References
VMware ESXi official documentation: https://docs.vmware.com/
Windows 11 system requirements: https://aka.ms/WindowsSysReq
Conclusion
The above method has been verified in VMware ESXi 8.0.3 + Windows 11 23H2/24H2 environments. Compared with configuring virtual machine encryption and TPM emulation, the registry bypass method Simpler operation and higher success rate, especially suitable for personal experimentation and development testing environments.
⚠️Prompt: The method in this article is only applicable to personal learning, development, and testing scenarios. In production environments, it is recommended to follow the official Windows 11 hardware requirements to ensure system security and stability.