
English
Use Deployment in IntelliJ IDEA to automatically synchronize code to a remote server

During development, we often need to sync local code to a remote server for testing or deployment. IntelliJ IDEA provides powerful Deployment (Deployment) This feature enables automatic code upload through protocols such as SFTP and FTP. This article will explain in detail how to configure and use this feature.
What is Deployment
Deployment is a built-in file synchronization tool in IntelliJ IDEA, supporting:
Connect to remote servers through protocols such as SFTP, FTP, and FTPS
Manually or automatically upload/download files
Mapping between local and remote directories
File difference comparison and synchronization
Detailed Configuration Steps
1. Open the Deployment configuration
In the IDEA top menu bar, click in sequence:
- Tools→Deployment→Configuration...
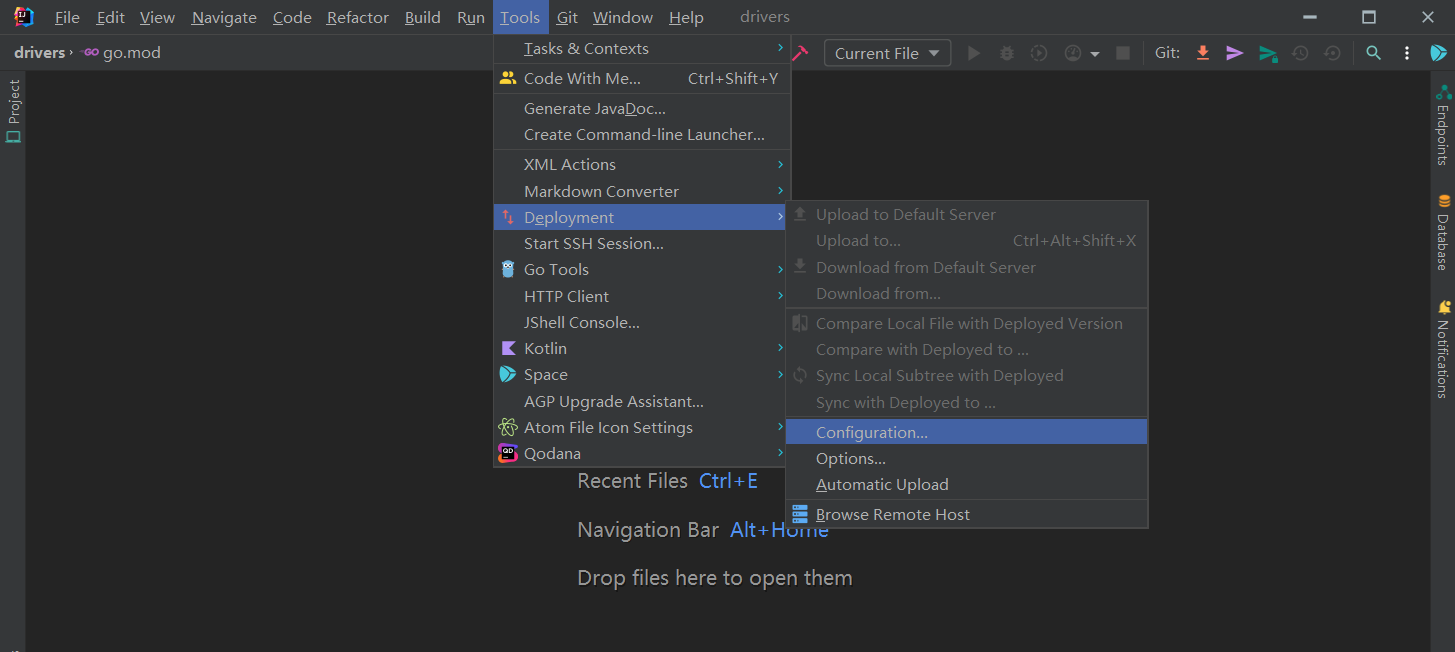
2. Add new server
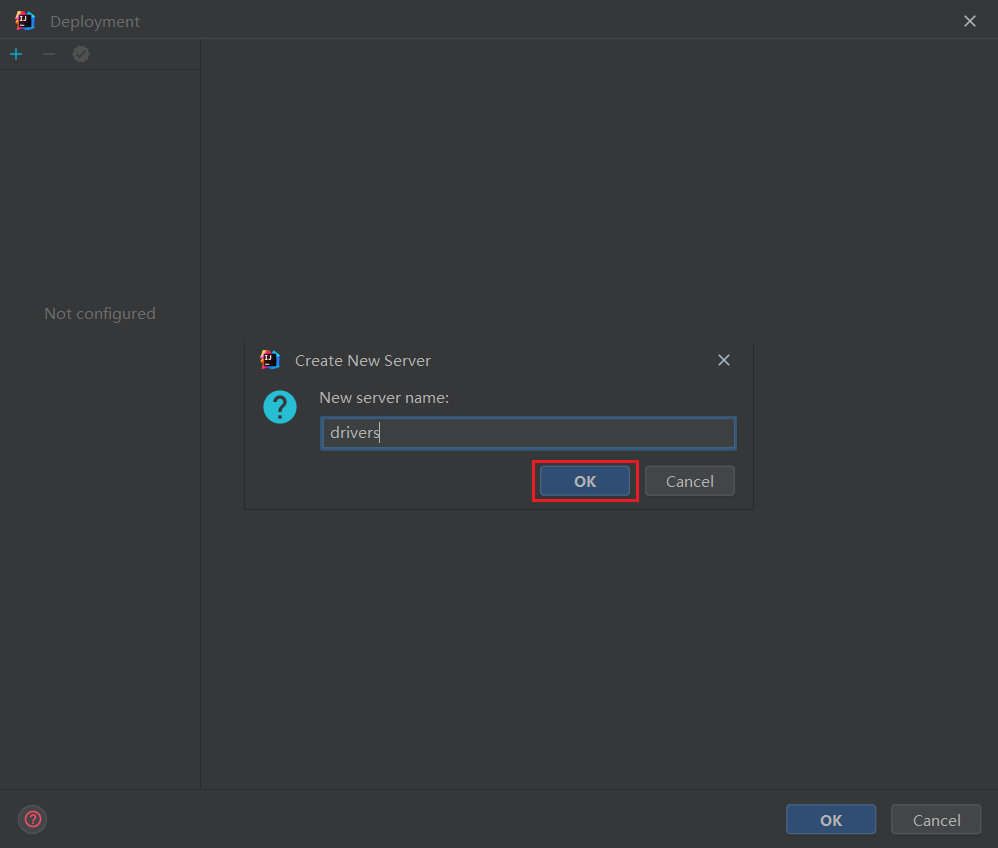
In the pop-up Deployment window:
Click Add Insert(+ sign)
Select connection type:SFTP(This article uses SFTP as an example)
Enter the server name, for example:
drivers
3. Configure SFTP connection
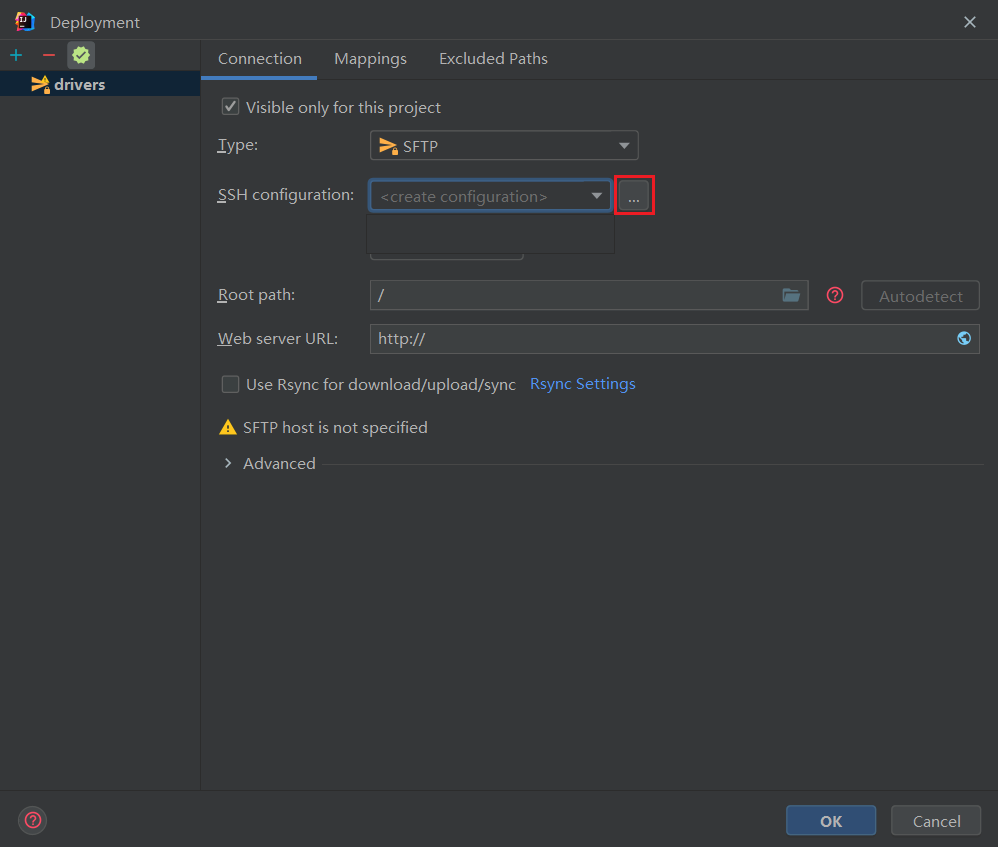
On the connection configuration screen, enter the following information:
| Configuration item | Description | Example value |
|---|---|---|
| Type | Connection Protocol | SFTP |
| SSH configuration | SSH connection configuration | Click to create a new configuration |
| Root path | Remote root path | /(Auto-detect) |
| Web server URL | Web server address | http://(Can be left blank) |
Create SSH configuration
Click SSH configuration on the right side ... Button, create SSH connection:
Click Add Insert(+ sign)
Fill in the SSH connection information:
| Configuration item | Explanation | Example value |
|---|---|---|
| Host | Server IP address | 172.16.3.2 |
| Port | SSH port | 22 |
| Username | Login username | root |
| Authentication type | Authentication method | Password or Key pair |
- Click Test Connection Verify whether the connection is successful
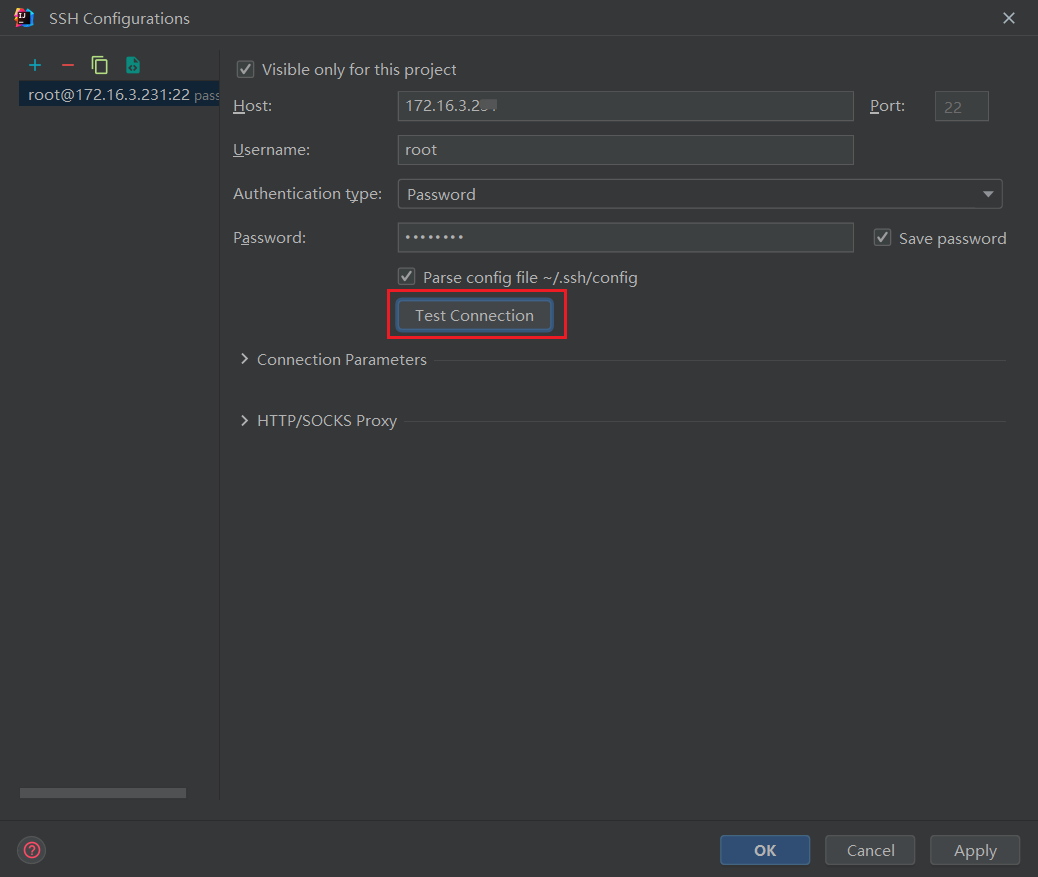
After the connection is successful, it will display Successfully connected! Hint.
4. Configure directory mappings (Mappings)
This is the most critical step: you need to associate the local directory with the remote directory:
| Configuration item | Description | Example value |
|---|---|---|
| Local path | Local project path | C:\Users\go\src\github.com\kubernetes-csi\drivers |
| Deployment path | Remote deployment path | /root/workspace/go/src/github.com/kubernetes-csi/drivers |
| Web path | Web access path (optional) | Leave blank or enter a relative path |
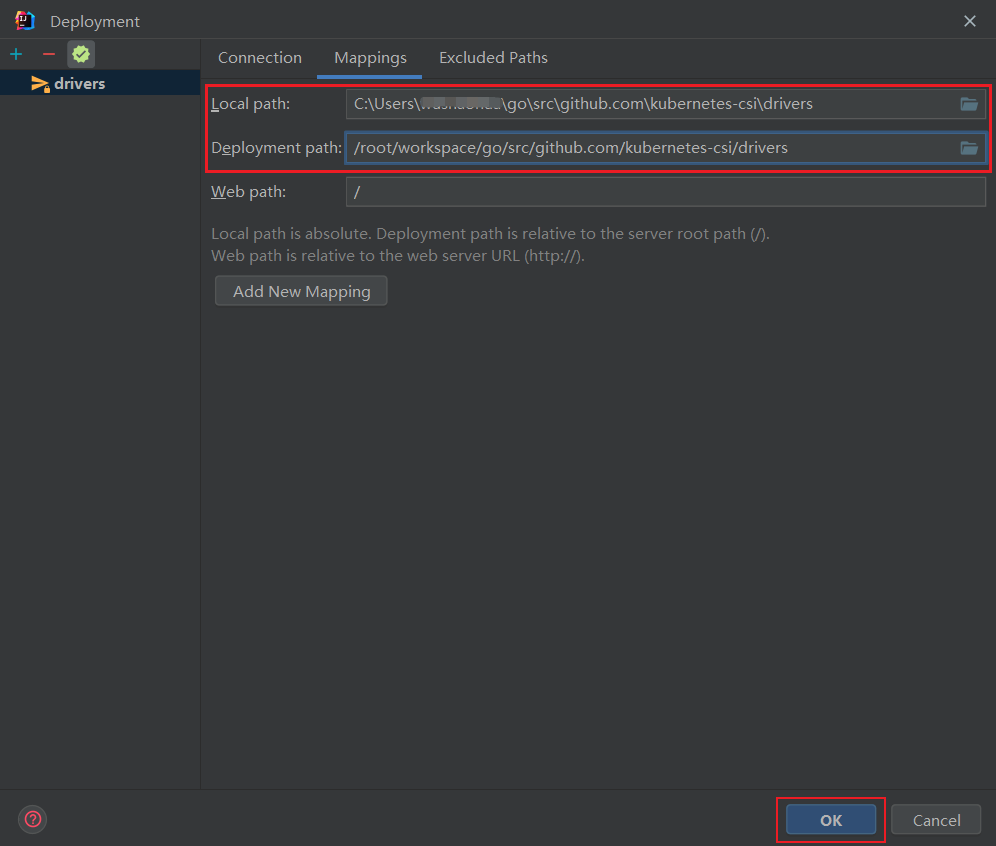
Path description
Deployment path is relative to Root path path
If the Root path is set to
/, then the Deployment path is an absolute pathIt is recommended to first create the target directory on the remote server.
5. Create a remote directory
Before configuring the mapping, it is recommended to first log in to the server via SSH and create the target directory:
bash
mkdir -p /root/workspace/go/src/github.com/kubernetes-csi/drivers6. Perform the first upload
After configuration is complete, you can upload files in the following ways:
Right-click on the project root directory
Select Deployment → Upload to drivers
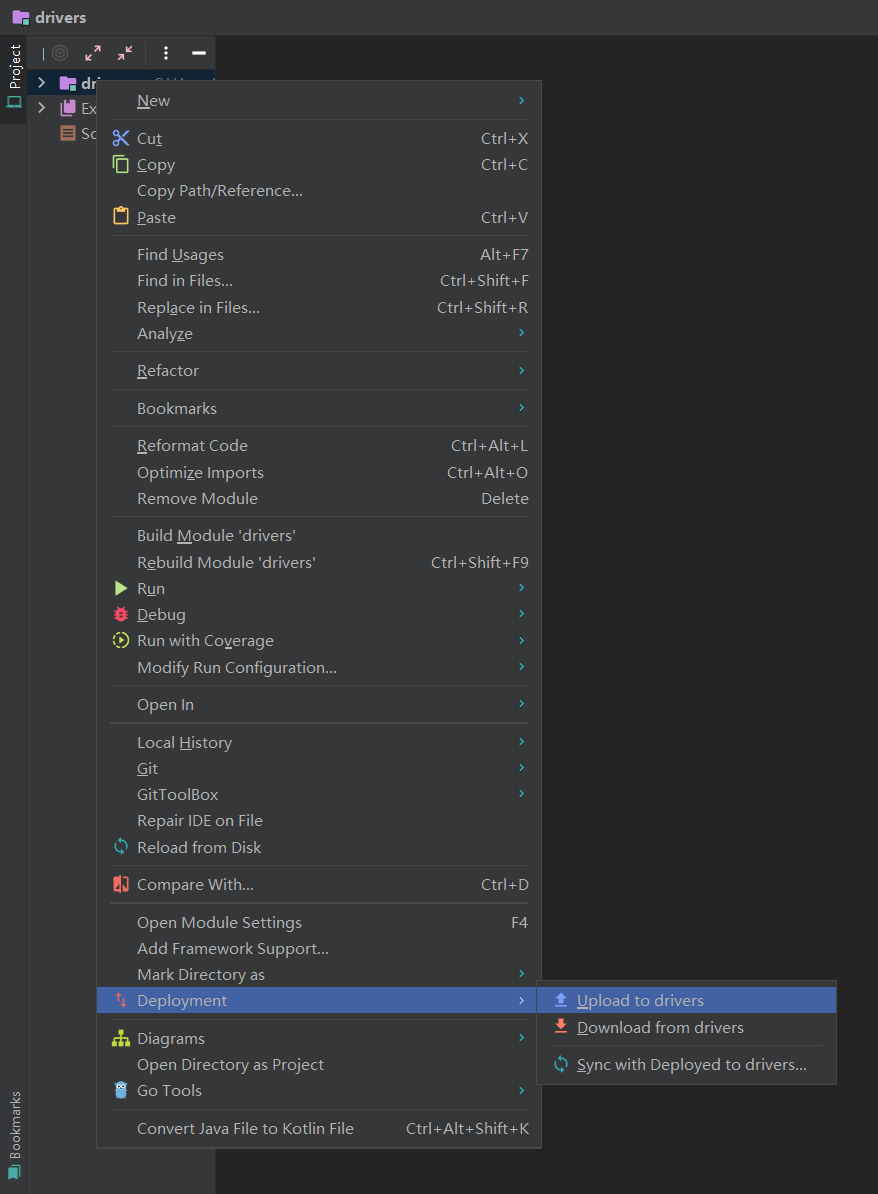
Confirm Upload dialog box:
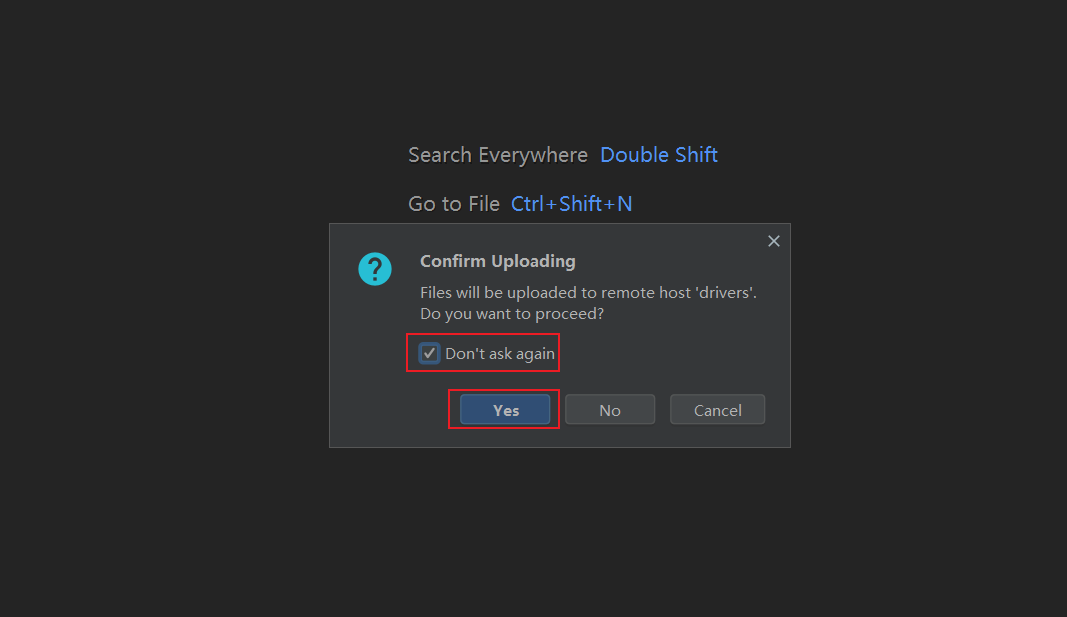
7. View upload progress
Upload progress and results can be found at the bottom.File Transfer Window view:
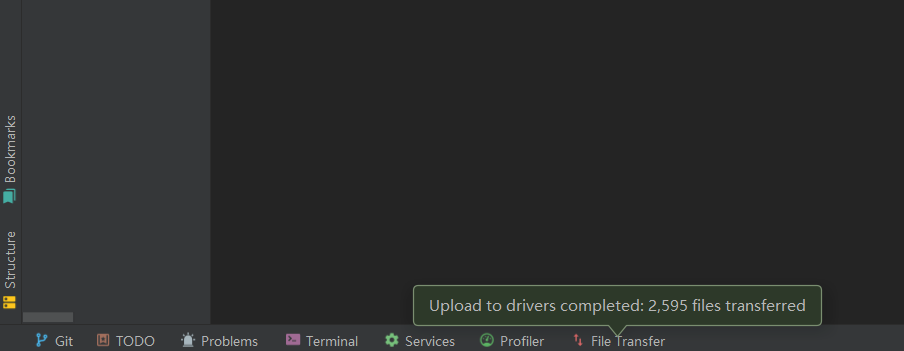
8. Verify the upload result
Log in to the server and check whether the file was uploaded successfully:
bash
ll /root/workspace/go/src/github.com/kubernetes-csi/drivers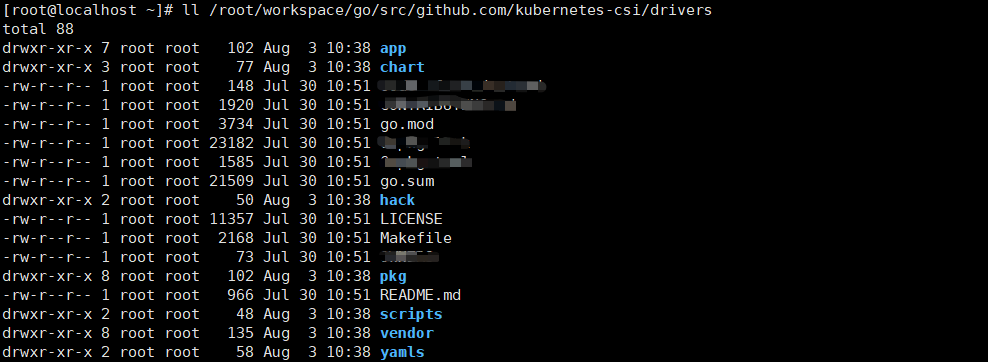
Advanced configuration options
Automatic upload
In the Deployment configuration, you can enable automatic upload:
Enter Tools → Deployment→Options...
Check Upload changed files automatically to the default server
Exclude file
at Excluded Paths In the tab, you can configure files or directories not to upload:
- For example:
.git,node_modules,*.logWait
Use Rsync
For a large number of files, you can enable Rsync to improve transfer efficiency:
Check in the connection configuration.Use Rsync for download/upload/sync
Configure Rsync parameters
Common operation shortcuts
| Operation | Menu path | Explanation |
|---|---|---|
| Upload | Deployment → Upload to... | Upload the current file/directory to the server |
| Download | Deployment → Download from... | Download files from the server |
| Sync | Deployment → Sync with Deployed to... | Synchronize local and remote files |
| Browse Remote Host | Deployment → Browse Remote Host | Browse remote server files |
Notes
Before first upload, ensure the remote directory has been created
File permissions: After uploading, be sure to check whether the file permissions are correct.
Large file transfer: Suggest using Rsync or uploading in batches.
configuration file:
.gitIt is recommended to exclude files that do not need to be uploaded, such as directories, in Excluded Paths.Network stability: Keep the network connection stable during upload
Summary
With IDEA's Deployment feature, we can:
✅ One-click upload code to remote server
✅ Implement mapping between local and remote directories
✅ Automatically sync modified files
✅ Supports multiple transport protocols
This feature greatly simplifies the development process and is especially suitable for development scenarios that require frequent testing on remote servers. After configuration is complete, you only need to focus on writing local code; file synchronization is handled automatically by IDEA.
Related links: