English
vSphere Content Library Creation Tutorial: Local Library Setup and Virtual Machine Template Management (Illustrated Detailed Guide)

Say goodbye to scattered templates: 7 diagrams guide you from scratch to build a vSphere Content Library
Do you often fail to find virtual machine templates you previously cloned? Or do you repeatedly upload OVF files when deploying across clusters? vSphere Content Library is a centralized storage repository created precisely to solve these pain points.
This article will use 7 screenshots of hands-on operation, Step by step, we will guide you from scratch through creating and configuring a local content library, so you can completely say goodbye to template management chaos.
1. Why do you need a content library?
In daily operations and maintenance, VM templates, ISO images, and OVF files are often scattered across different datastores, making search and reuse extremely inefficient. The core value of the vSphere Content Library lies in:
| Core competencies | the problem solved |
|---|---|
| Centralized storage | All templates are stored in a unified location, eliminating the need to search through each data store one by one. |
| Cross-vCenter sharing | Supports publish and subscribe, enabling multi-data center collaboration. |
| Version control | Updatable template versions ensure deployment consistency. |
| Access control | Set access permissions at the library level, which is more secure. |
II. Creating a Local Content Library: Step-by-Step Illustrated Guide
Step 1: Enter the content library management interface
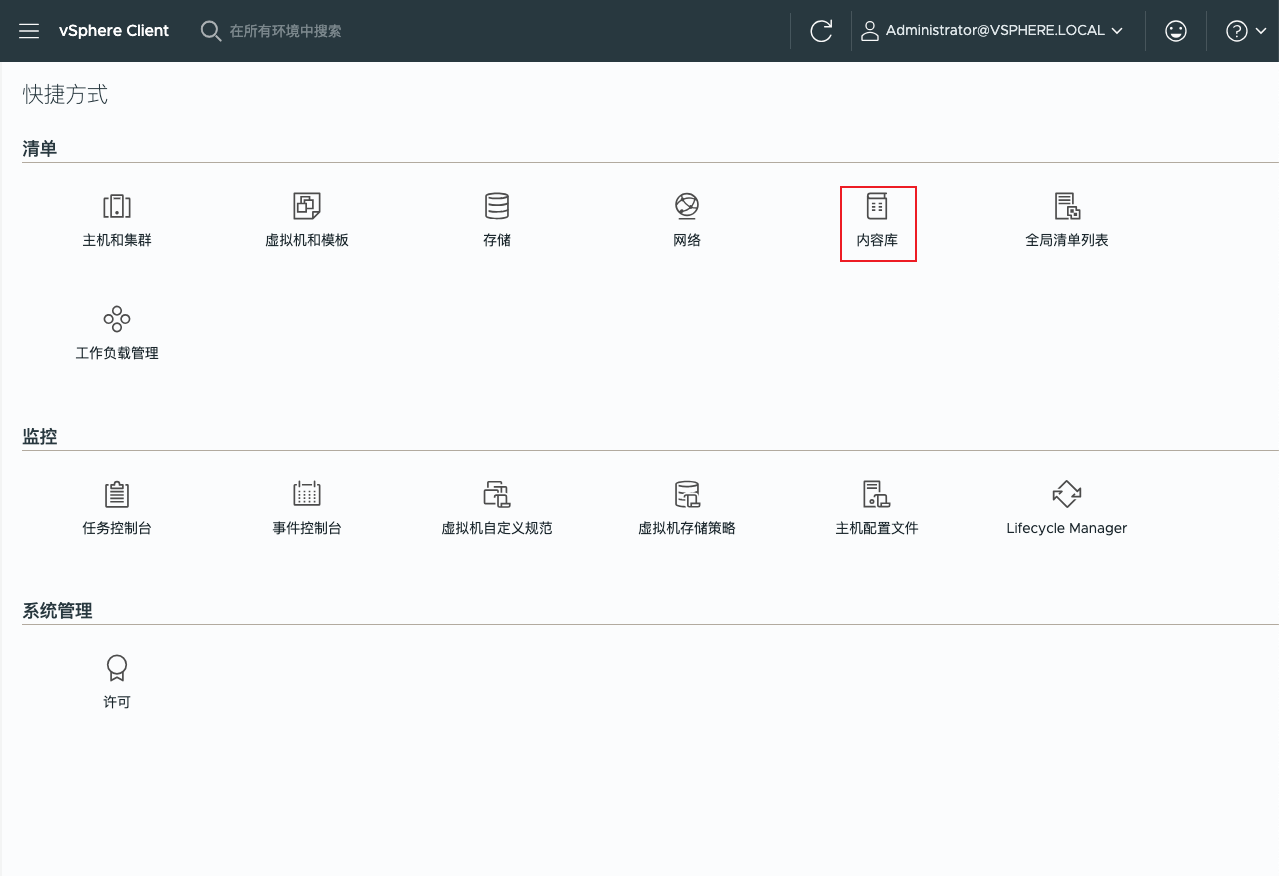
After logging in to vSphere Client, click in the left navigation pane Content Library(Content Libraries), as shown below:
When entering for the first time, the list is usually empty and needs to be created manually:
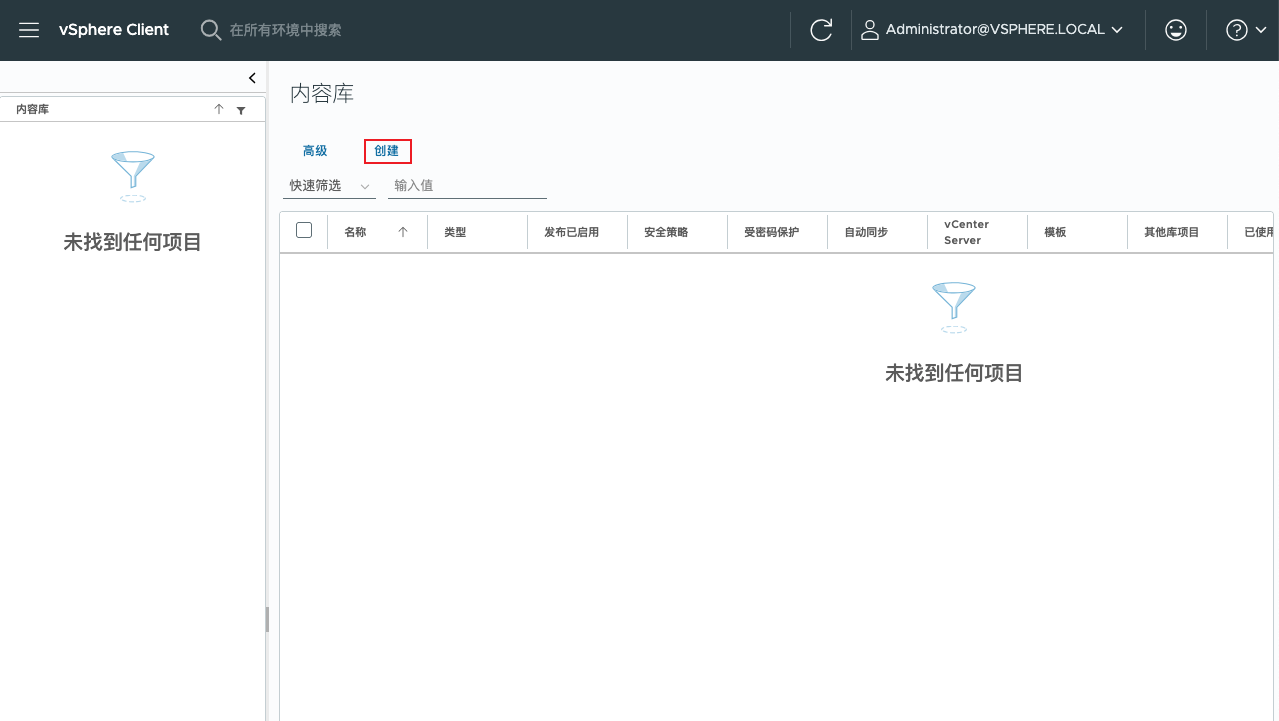
Click the top left corner's create button, start configuration.
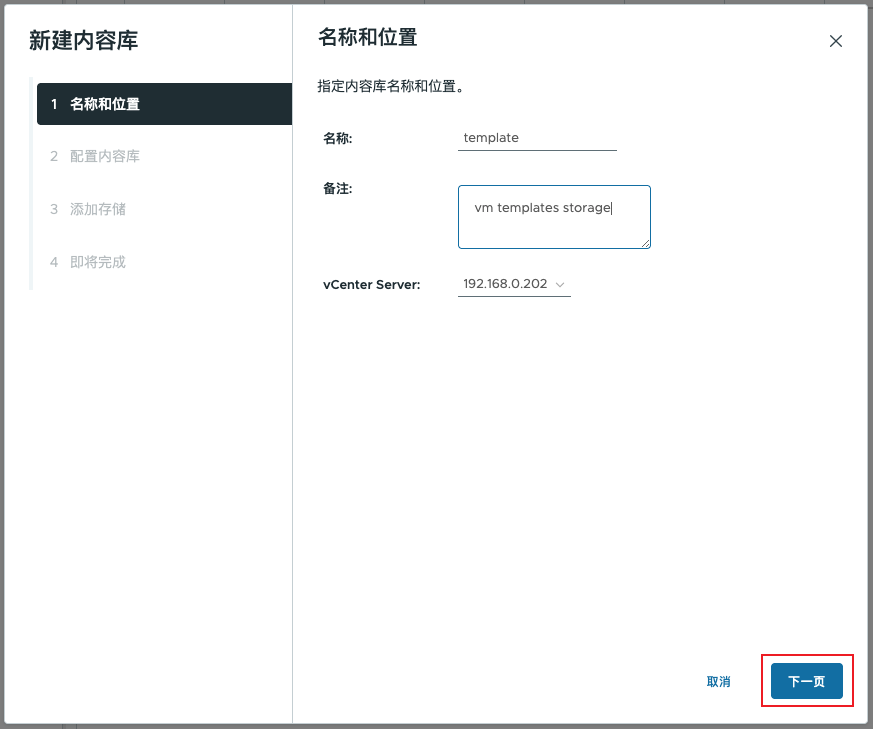
Step 2: Fill in the library name and location
这是最基础的一步,建议名称使用英文便于后续脚本调用,备注用中文方便团队识别:
Name:
template(Example)Remarks:
vm templates storagevCenter Server: Select the currently managed vCenter instance
Step 3: Configure the content library type (Key)
At this step, you need to decide whether the content library is for "local personal use" or "external publishing":
Local content library: Stored in the datastore of the current vCenter, suitable for internal team use.
If checked Enable publishing+Enable authentication, then other vCenter instances can subscribe to this library using a password.
Subscribed content library: Used to mount externally published libraries (such as pulling templates from another data center).
For initial setup, it is recommended to choose Local content library and enable publishing, leaving room for future expansion:
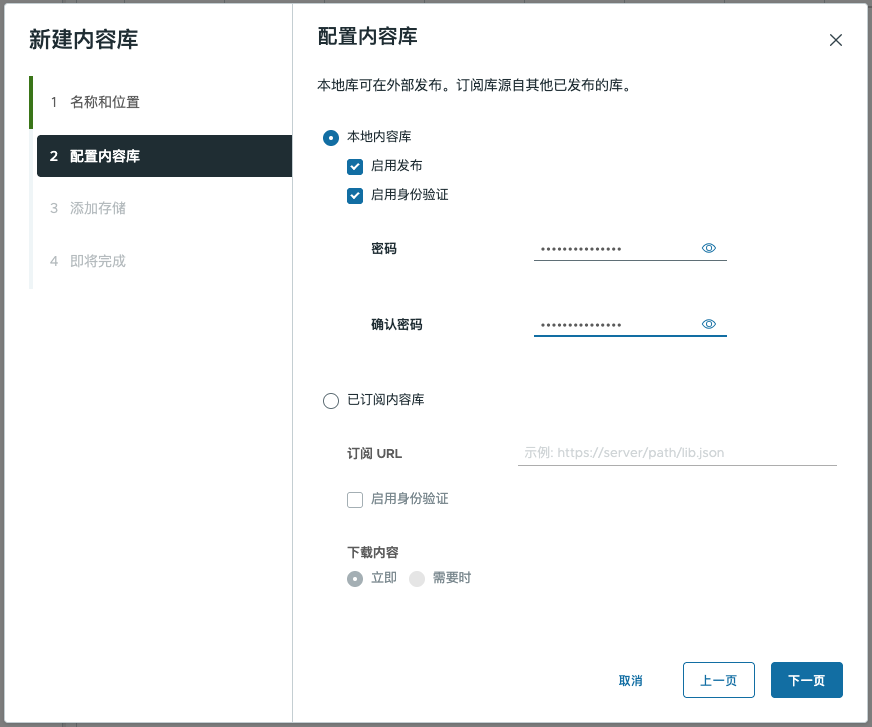
Tips If a publishing password has been set, be sure to record it properly; you will need it when subscribing.
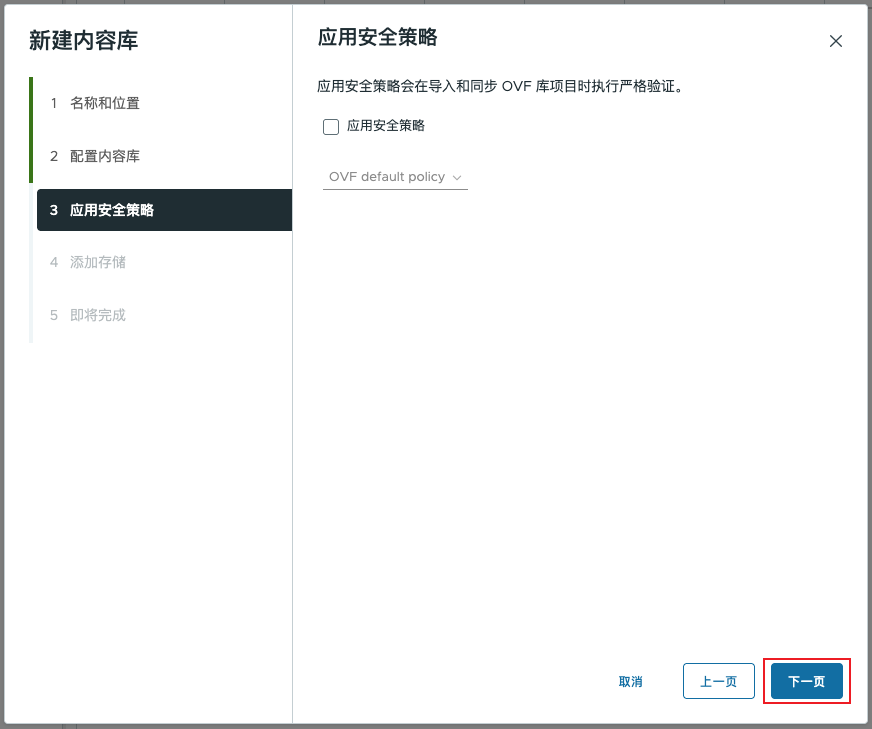
Step 4: Security Policy (Recommended not to enable in the vast majority of scenarios)
This step can easily cause confusion. Applying security policy here means performing strict signature and certificate verification on the imported OVF file:
After enabling: Only OVF signed by VMware or a trusted authority can be imported; unsigned third-party images will be rejected.
Disabled: Allows importing any OVF, including templates from open-source communities or custom-built ones.
For templates generated by internal cloning of virtual machines (such as the "Clone as Template" operation you are about to perform), this item Completely ineffective. It is recommended to uncheck this option to avoid being blocked when importing open-source images later:
Step 5: Add storage space
Select the physical data storage used to store template files. It is recommended to choose storage with sufficient capacity and stable performance:
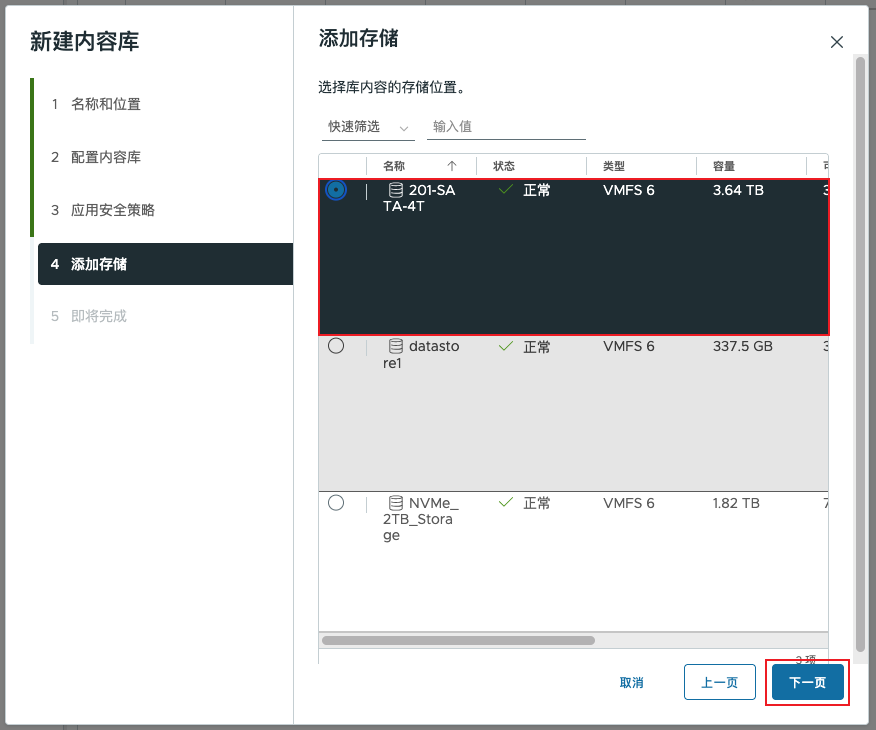
This example selected 201-SATA-4T, In practice, please choose the storage with the largest available space according to your environment.
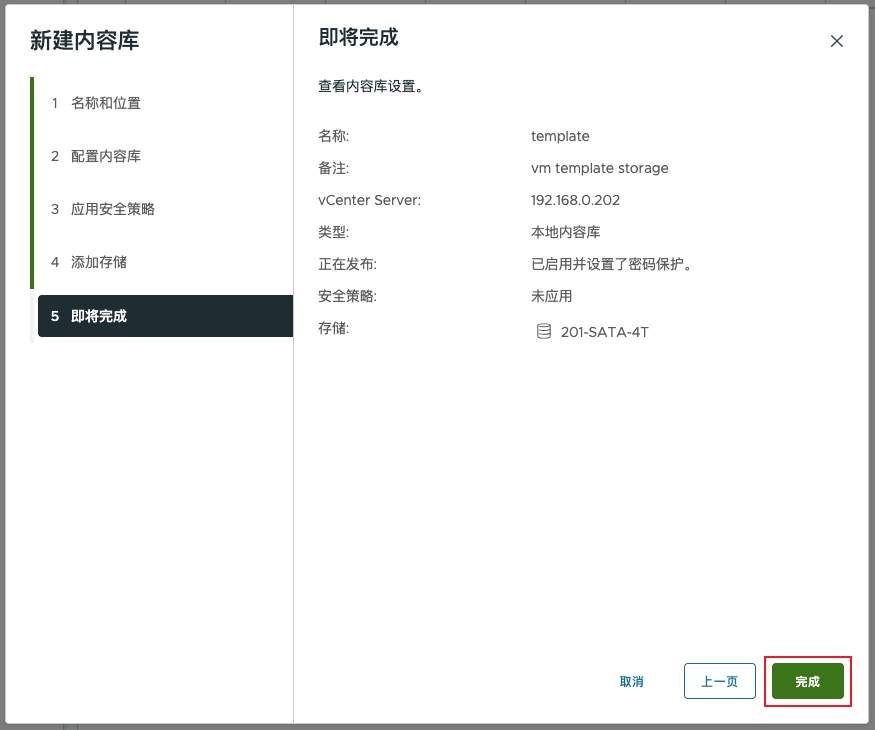
Step 6: Confirm the configuration and complete creation
The final step is an overall overview; please carefully verify the following key information:
| Configuration item | This setting |
|---|---|
| Name | template |
| type | Local content library |
| Publishing status | Enabled (password protected) |
| Security policy | Not enabled |
| Storage location | 201-SATA-4T |
After confirming it is correct, click Complete:
III. Verify the creation result
After creation is complete, return to the content library list, and you will see that the new library has successfully appeared:
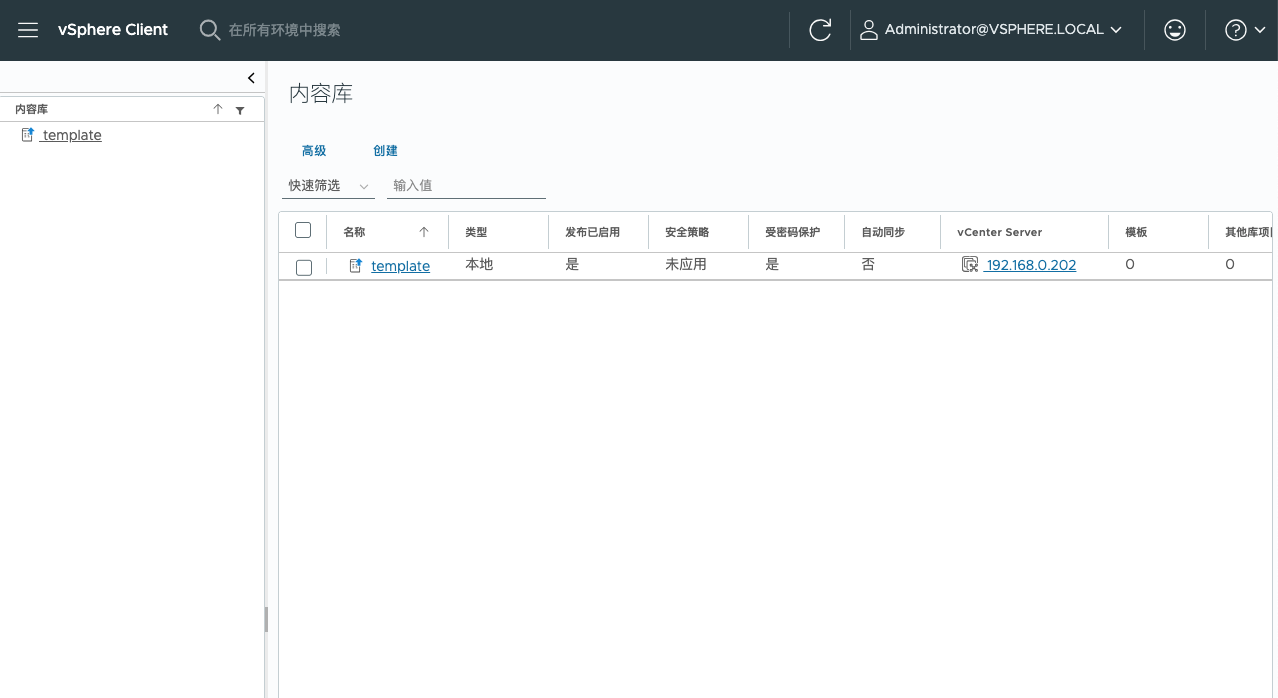
Click to enter the library summary page to view detailed information and storage usage status. The current size is 0 B, waiting for subsequent template import:
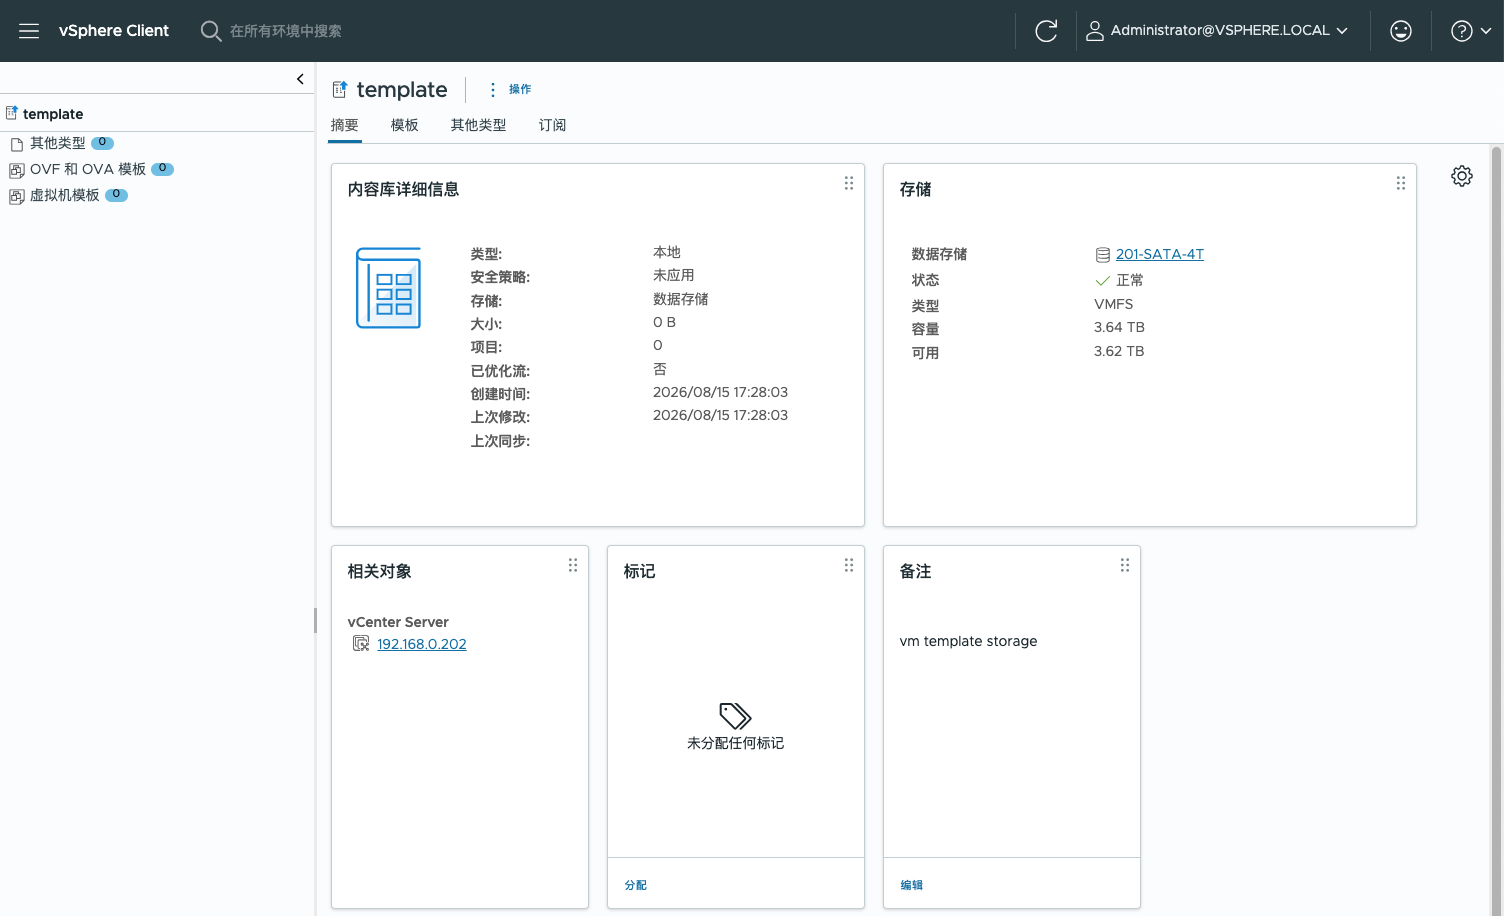
At this point, your first local content library has already Setup complete Done!
IV. How to use it next?
After the content library is created, it can be used in a wide range of scenarios. The following two are the most common:
| Scene | Operation method |
|---|---|
| Clone virtual machine as template | In the "Location" step of the Clone Wizard, refresh and then select template the library can then store the template |
| Deploy OVF/OVA | In the content library, directly "Import Project", or right-click "Deploy Virtual Machine" from the library. |
V. Tips for Avoiding Pitfalls
Do not lose the release password.: If authentication is enabled, the password is the subscriber's only credential, and it is recommended to store it in a password manager.
Storage space needs to be monitored.: Templates and images will take up a large amount of space; regularly check the capacity usage of the repository.
Enable security policies on demand: It is recommended to enable it only in production environments and when using the official commercial OVF; keeping it disabled in daily development environments is more flexible.
Conclusion
Through the above 7 steps, you have mastered the complete process of creating a vSphere local content library. Whether in a personal lab environment or an enterprise-level operations scenario, the content library can make your template management more standardized and efficient.