
English
How to Configure Slack Incoming Webhook? From Zero to Sending Messages, the Pitfalls I've Encountered

I. Introduction: Why am I writing this article?
As a developer who deals with APIs every day, I originally thought configuring a Slack Webhook was an extremely simple matter—just create an app, get a URL, and send a POST request, right? How hard could it be?
As a result, I was dumbfounded for the entire afternoon.
The "Add New Webhook" button is grayed out and cannot be clicked.
When installing the app, an error is reported: “No bot users to install.”
After authorization is complete and I return to the Incoming Webhooks page, the URL still does not appear.
Every step lands you in a pitfall, and every step drives you crazy.
Later, I combed through the official documentation and community posts before I finally got this whole process completely straight. This article explains my pitfalls and the correct process I eventually figured out, all in one go. If you’re also configuring Slack Incoming Webhook, I hope this saves you that afternoon.
II. Preliminary Preparations
Before we begin, let's confirm two things:
There is a Slack workspace (Workspace)— that's the Slack your team is using.
Has permission to create applications— If you are not an Admin of the workspace, you may not be able to create an app and will need to contact the administrator to help enable it.
If both of these are OK, then we'll officially begin.
III. Step 1: Create a Slack App
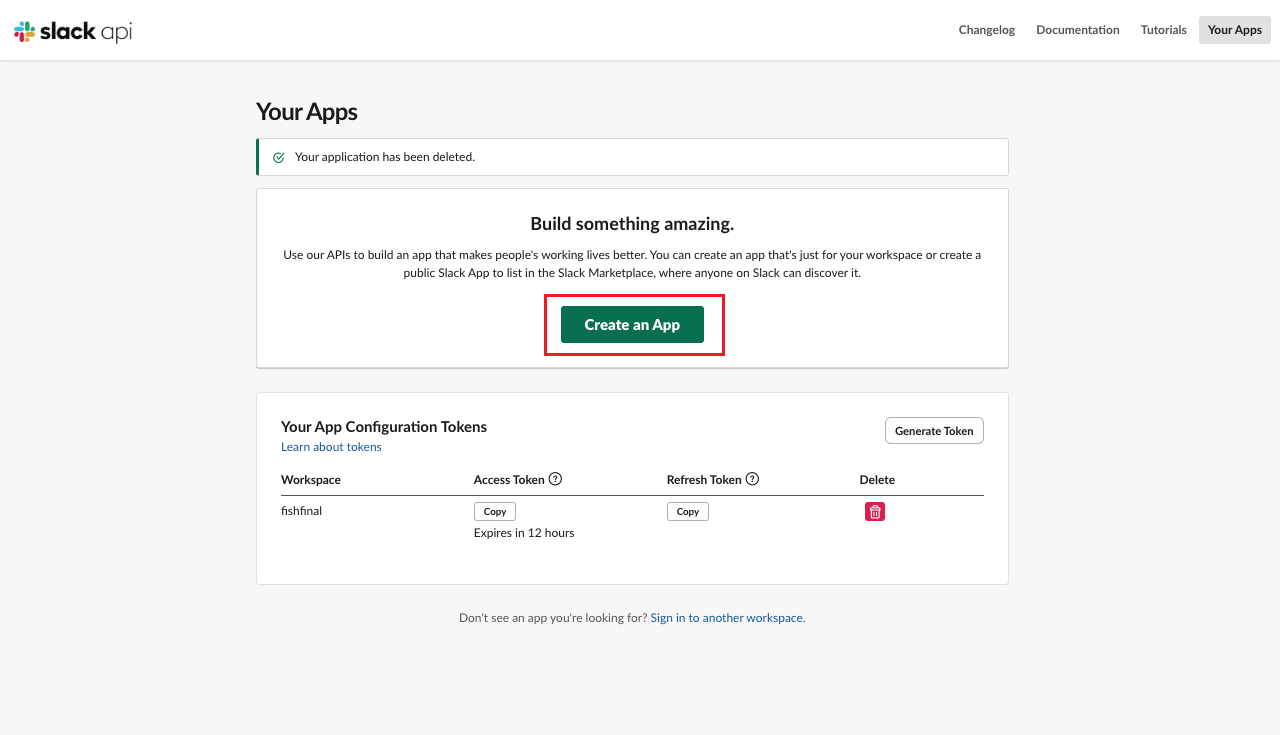
- Visit Slack API website, click the ... on the page “Create New App”.
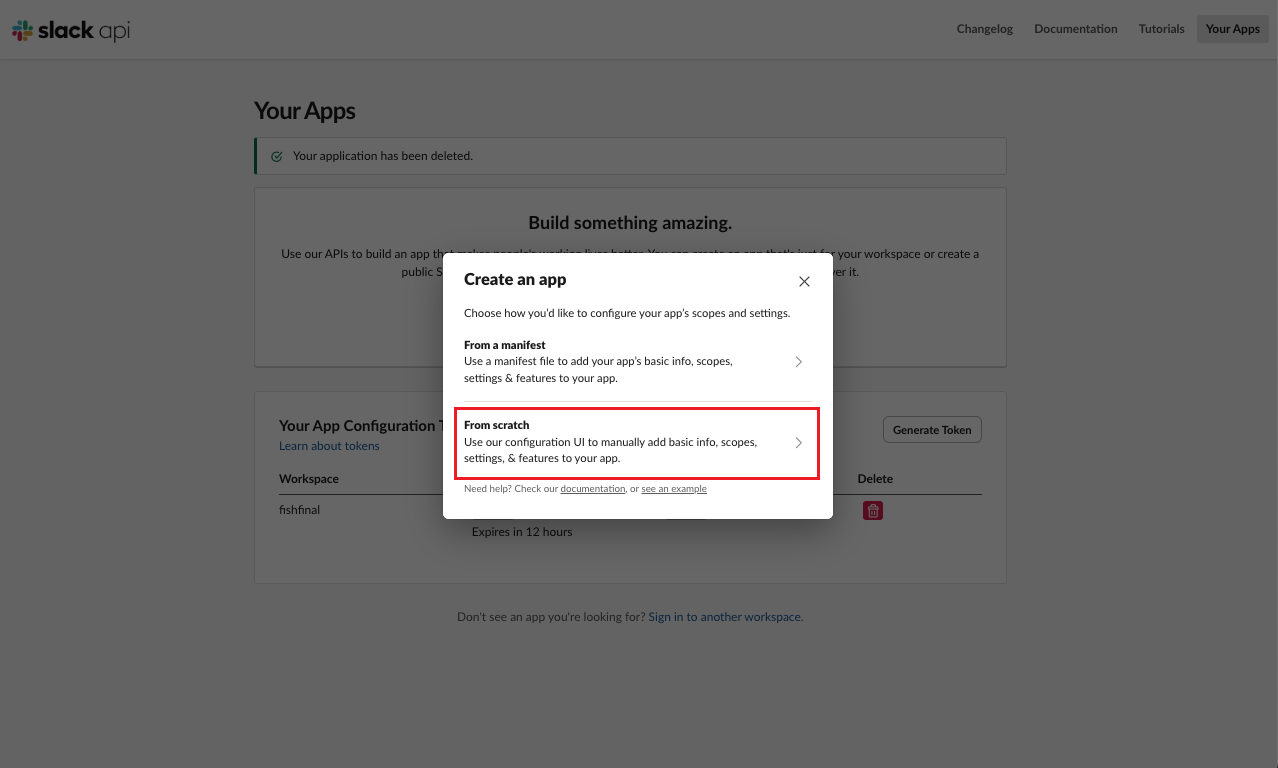
- In the pop-up window, select “From scratch”(From the beginning).
Fill in application information:
App Name: Give your app a name, for example “message-bot”.
Pick a workspace to develop your app in Select which workspace you want to install to.
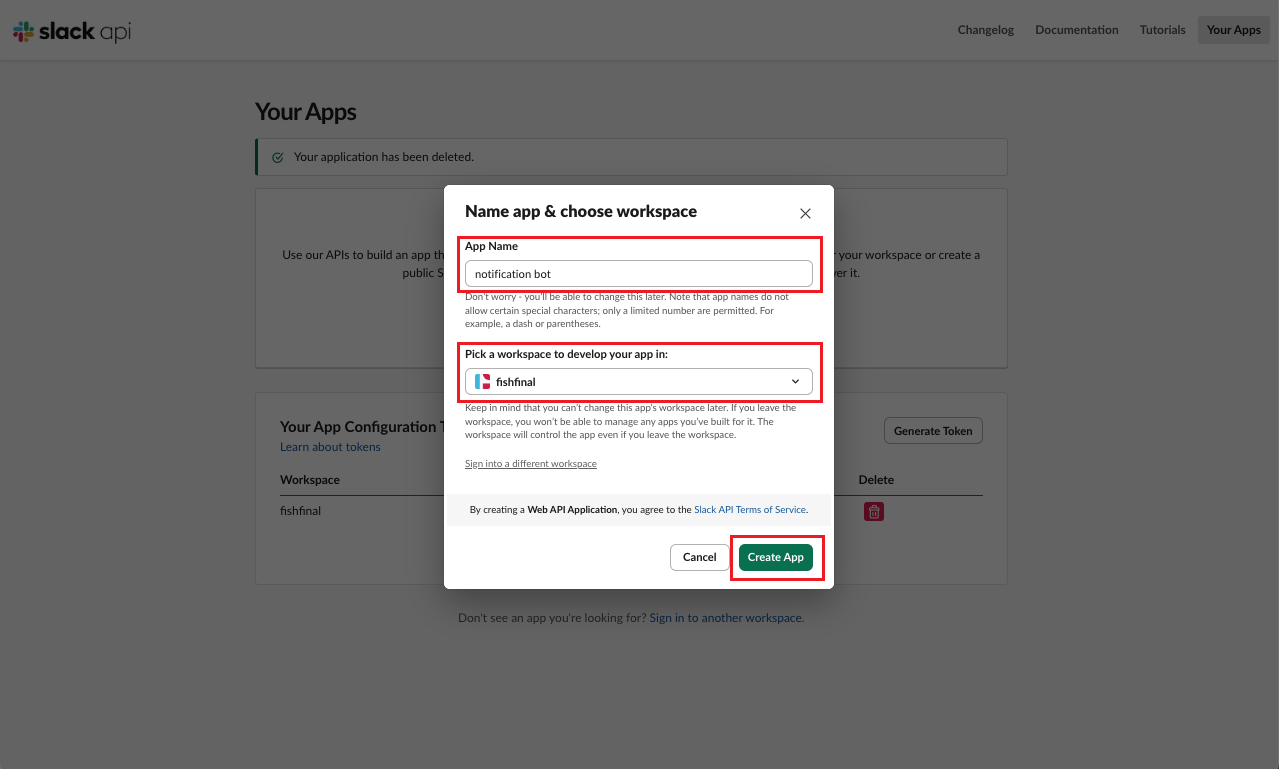
- Click Create App, the application has been created.
💡 This step usually won't cause any problems—just follow along and click.
IV. Step 2: Add Scope (Crucial!)
Slack's permission model is based on Scope (permission scope)..., what your app can and cannot do is all configured here.
4.1 Go to the OAuth & Permissions page
In the left menu's “Features” Under the category, find and click “OAuth & Permissions”.
4.2 Add OAuth Permissions
Scroll to the middle of the page.“Scopes” Area, click Add an OAuth permission(Add an OAuth Scope).
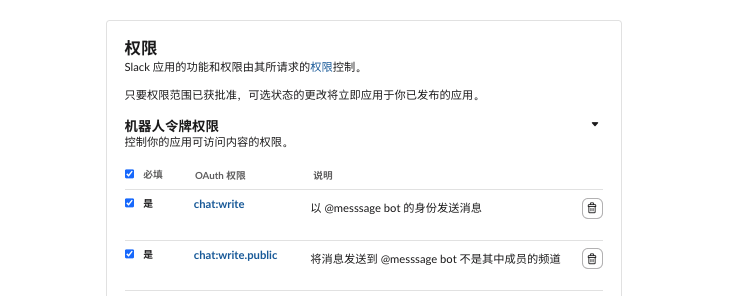
Need to add two permissions:
| Scope | effect |
|---|---|
chat:write | Send a message as a bot |
chat:write.public | Send messages in public channels (even if the bot is not @-mentioned) |
⚠️Neither of these two is dispensable.. Less chat:write, the app doesn't have permission to send messages at all; missing chat:write:public, messages can only be sent to private chats or channels where the bot is @ mentioned.
V. Step 3: Install OAuth Tokens
After adding the scopes, you need to install the app into the workspace to generate a real OAuth token.
On the OAuth & Permissions page, scroll up to find “OAuth Tokens” Area, click Install to fishfinal.
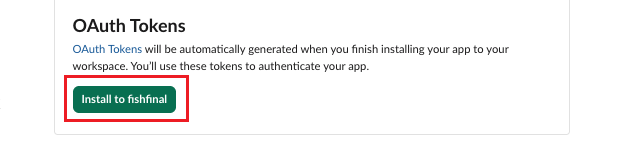
💡 Note:fishfinal is the name of my workspace, the button text here will be “Install to[Your workspace name]”.
After clicking, you will be redirected to Slack's authorization page. This page lists the permissions requested by the app. After confirming, click Allow.
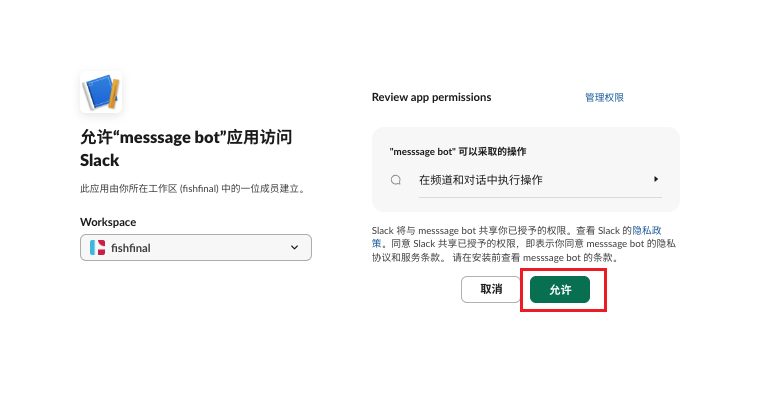
After authorization is complete, you will be automatically redirected back to the OAuth & Permissions page. At this point,OAuth Tokens The area will generate a Bot User OAuth Token.
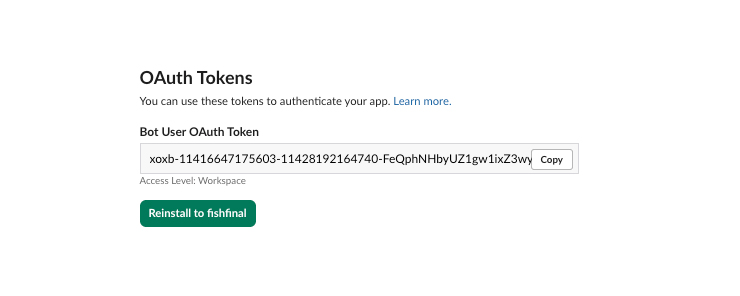
✅ This Token is your application identity credential and will be needed when sending messages later.Please keep it safe and do not disclose it..
VI. Step 4: Activate Incoming Webhook
This is the most easily overlooked step—Even if the app is installed, the Incoming Webhook feature is disabled by default., must be manually enabled.
6.1 Go to the Incoming Webhooks page
Click the left menu Incoming Webhook, by default,Activate Incoming Webhooks's switch is off.
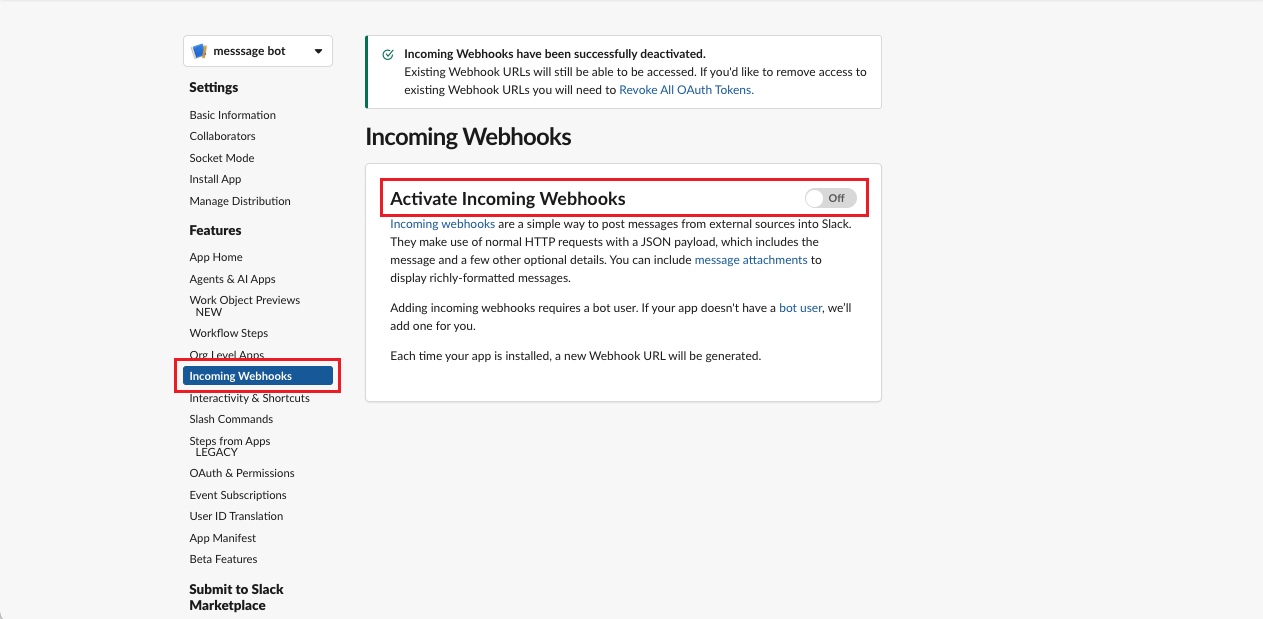
6.2 Turn on the switch
Click the switch to adjust it to on.
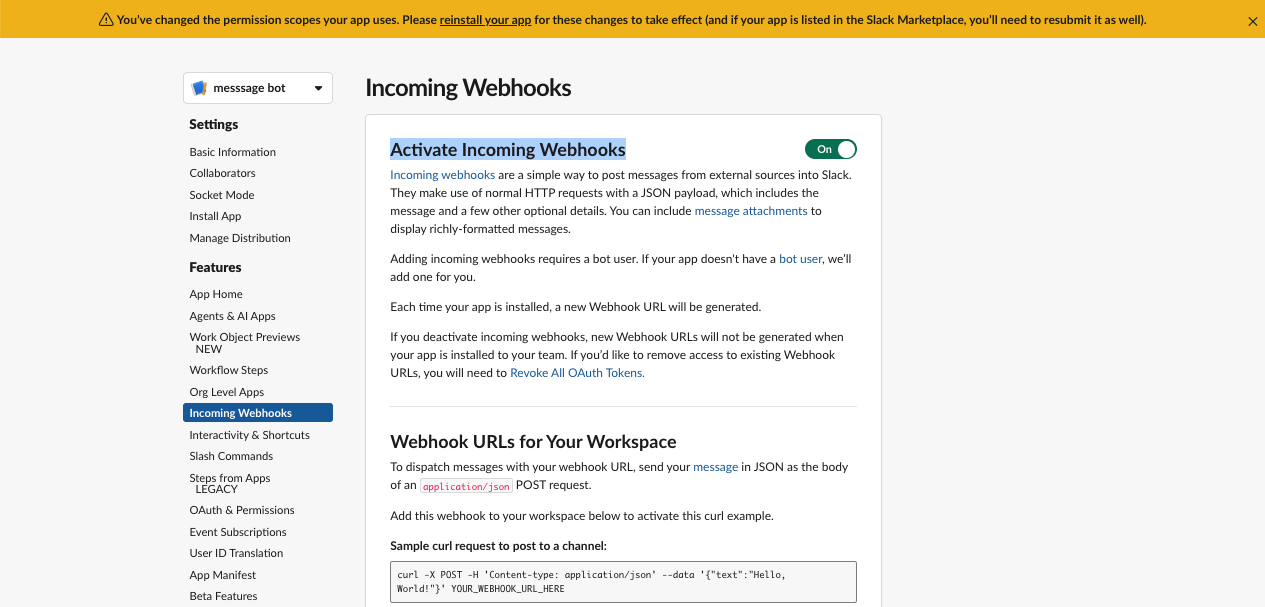
At this point, a warning message will appear at the top of the page:
⚠️You’ve changed the permission scopes your app uses. Please reinstall your app for these changes to take effect.
You have changed the permission scope used by the app. Please reinstall the app for these changes to take effect.
6.3 Reinstall the Application
Click the one in the warning message reinstall your app link, Slack will redirect to the authorization page again.
This time, there is one more key option—Choose the default channel to which webhook messages are sent.
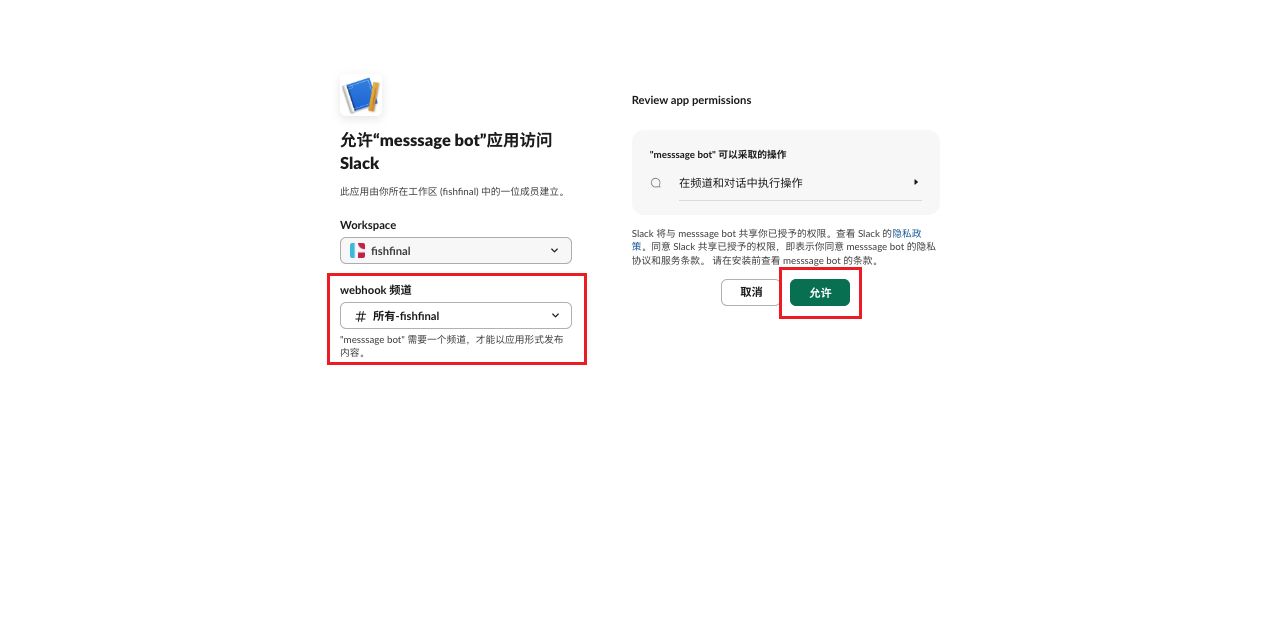
Select a channel (e.g.#general or #random), click Allow.
6.4 Obtain Webhook URL
After reinstallation is complete, the page will automatically redirect back to the Incoming Webhooks page. At this point, in “Webhook URLs for Your Workspace” In the area, you will see:
one curl example command, can be directly used for testing
one Webhook URL, format similar to:
https://hooks.slack.com/services/T00000000/B00000000/XXXXXXXXXXXXXXXXXXXXXXXX
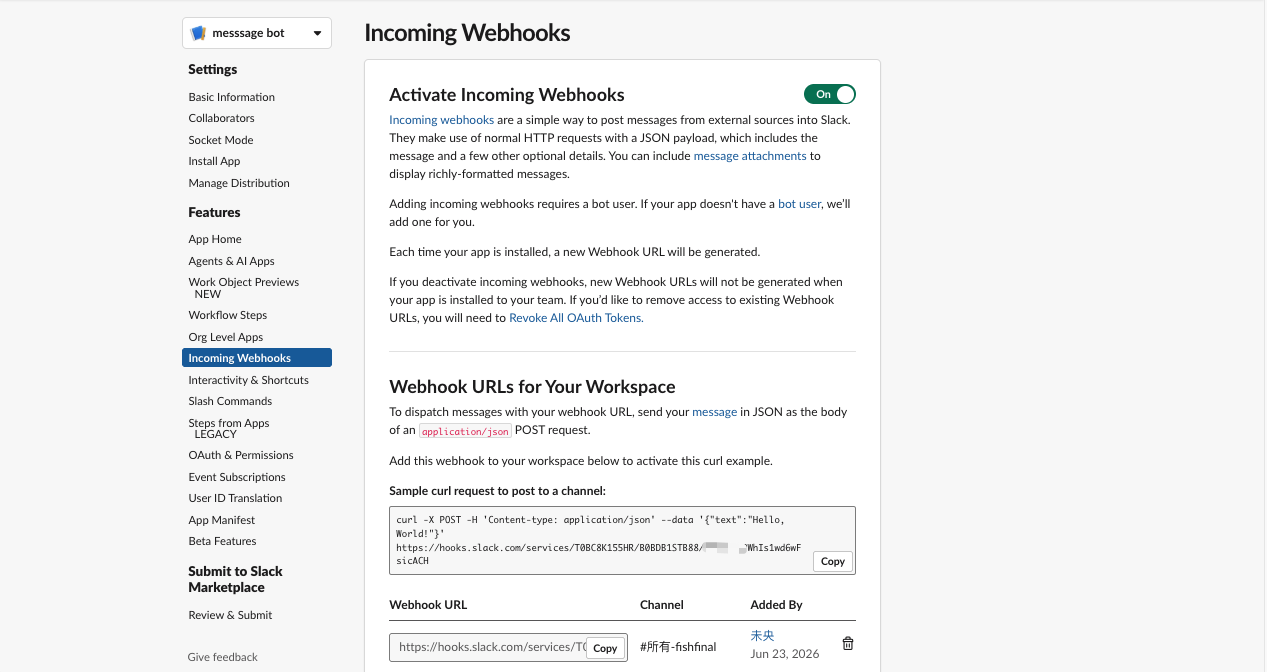
6.5 Test it out
Copy the curl command from the page and execute it in the terminal:
bash
curl -X POST -H 'Content-type: application/json' --data '{"text":"Hello, world!"}' https://hooks.slack.com/services/xxxxxxxxx/xxxxxxxxx/xxxxxxxxxxxxxxxxxxxxxxxxIf everything is working normally, you will see this message pop up in the Slack channel:
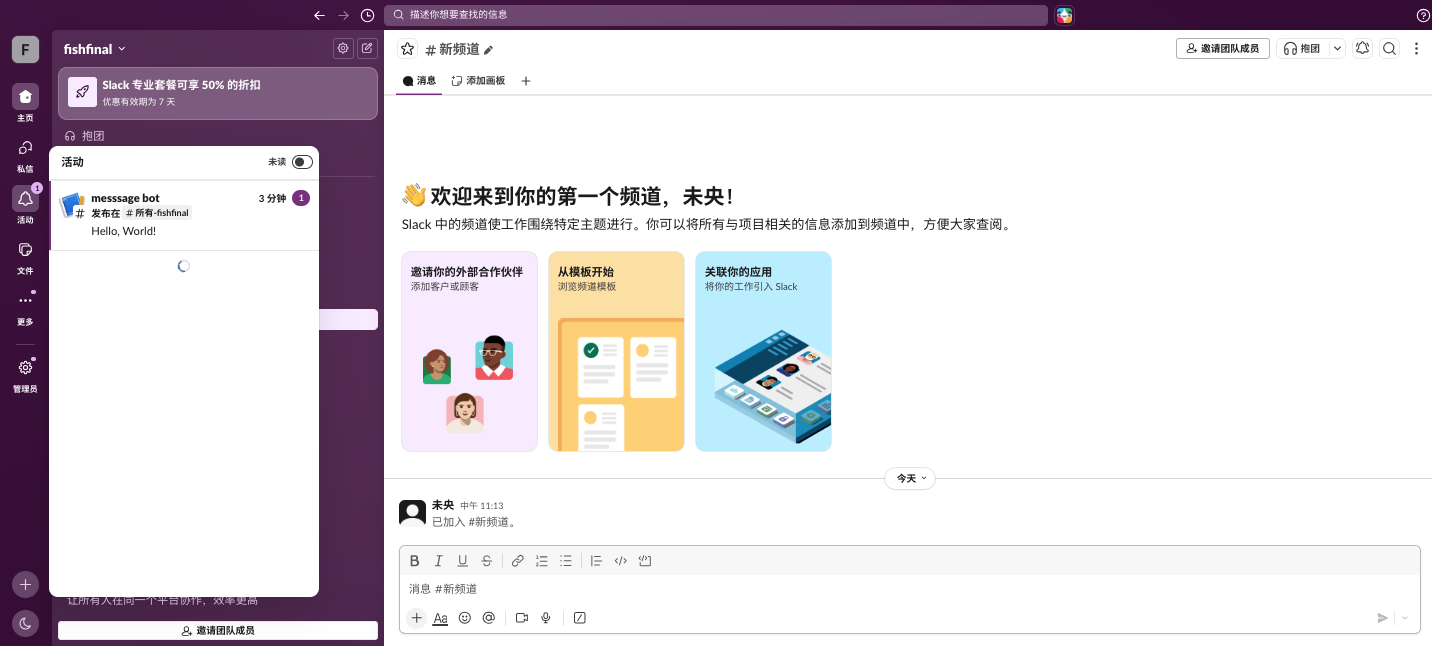
🎉 Congratulations, the configuration was successful!
Finally, click the one next to the Webhook URL Copy button, save it to your code.
VII. Frequently Asked Questions (FAQ)
| Question | Reason | Solution |
|---|---|---|
| The “Add New Webhook” button is grayed out. | Application is not installed or the Scope configuration is incomplete. | First, go to OAuth & Permissions to add chat:write and chat:write:public, then click Install |
| During installation, it reports "No bot users to install." | The application has no Bot users | Create a Bot user in App Home, then reinstall. |
| Still no URL after enabling Incoming Webhook | Not reinstalled after modifying Scope | Click "reinstall your app" in the warning and select the default channel. |
Error sending message invalid_token or not_allowed | The token does not have the corresponding permission. | Confirm Scopes contains chat:write and chat:write:public, and reinstall |
| The message was sent to the wrong channel | The default channel selected during installation is incorrect. | Go through the reinstall process again and select the correct channel. |
VIII. Summary
The complete process of configuring a Slack Incoming Webhook can be summarized in four steps:
1. Create App (Create App)
       ↓
2. Add Scope (chat:write + chat:write:public)
       ↓
3. Install App (Install to Workspace)
       ↓
4. Activate Incoming Webhook + Reinstall (Reinstall)
       ↓
5. Get the Webhook URL
The three most common pitfalls:
Scope omitted—— must add
chat:writeandchat:write:public, not a single one less.Forgot to activate the switch—— Incoming Webhook is disabled by default and must be manually enabled.
Changed the configuration but didn't reinstall.— After the Scope changes, you must reinstall; otherwise, it will not take effect.
I hope this article helps you cut the time it takes to configure a Slack webhook from an afternoon down to 5 minutes.